TBS Discovery Gimbal Project
| |
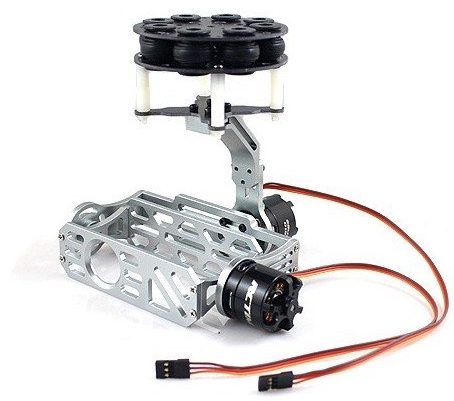
| The RCTimer Gimbal |
Assembly & Mounting
This project started with my wanting to be able to tilt the GoPro forward hopefully at least 45 degrees. I bought the TBS plywood GoPro holder and started working on a way to mount it on a pivot with a servo. After a bit of playing around with this idea I found a thread on RCGroups.com which had just opened up on a new RCTimer.com $100 brushless gimbal. I started to do a little research and found a supplier who sold the gimbal with a Martinez controller for $165 so I bought it!
Update
You can buy this from a US supplier now for $101 (Gimbal only): UAVObjects.com
You can buy the Martinez control board for $35(!) from Witespy Quads
I read everything I could find on this Gimbal and when it arrived there were no surprises. I chased all the threads with a new tap, filed all the mating surfaces smooth and bolted it all together. It went together easily although I ended up using my own screws because the ones in the kit were very poor quality. One thing that first came to mind one completing the assembly was that it was very large (tall) and I would need a very tall set of landing gear to mount it underneath the Discovery frame.
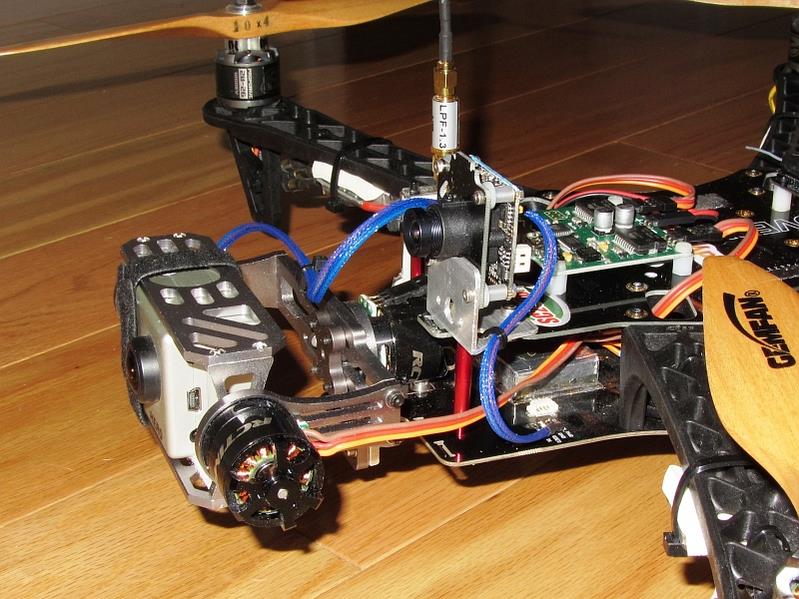
After some consideration, I decided to hard mount it to the original GoPro mount plate. I did this using a piece of 3/4" (19mm) aluminum angle. I had had good luck with smooth video on the original hard mount so I hoped the gimbal wouldn't amplify any vibrations and cause the dreaded jello effect. In my first flight I found it did amplify the vibrations so back to the drawing board.
|
| The RCTimer gimbal hard mounted to the Disco GoPro mount |
|
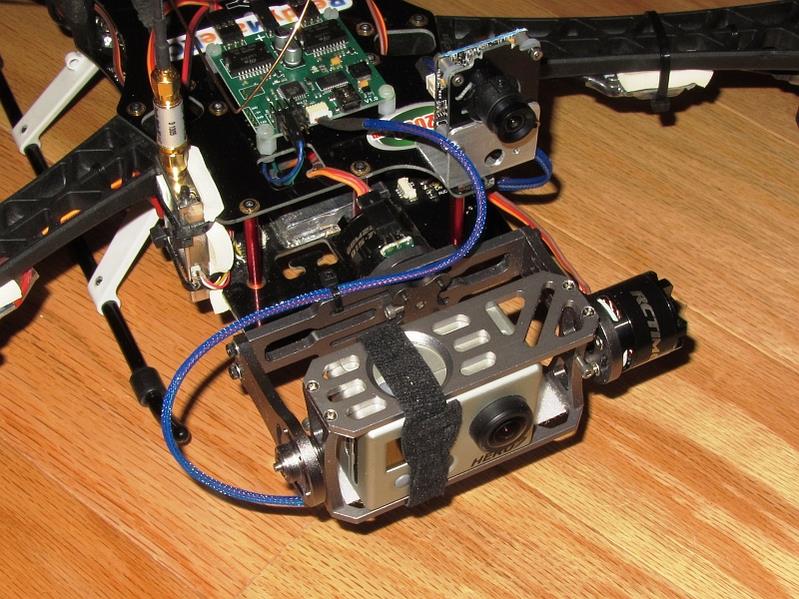
| View showing the Martinez V1 control board |
Modifications - Version 1 and Version 2
For the next mount version I decided to build out from as close to the CG as possible so I played around with different ways to hang the gimbal on a boom. I also worked out ways to significantly reduce the weight of the gimbal so it wouldn't be stressing out the boom I built. Additionally, I also looked at different ways to use grommets to give a small amount of vibration isolation.
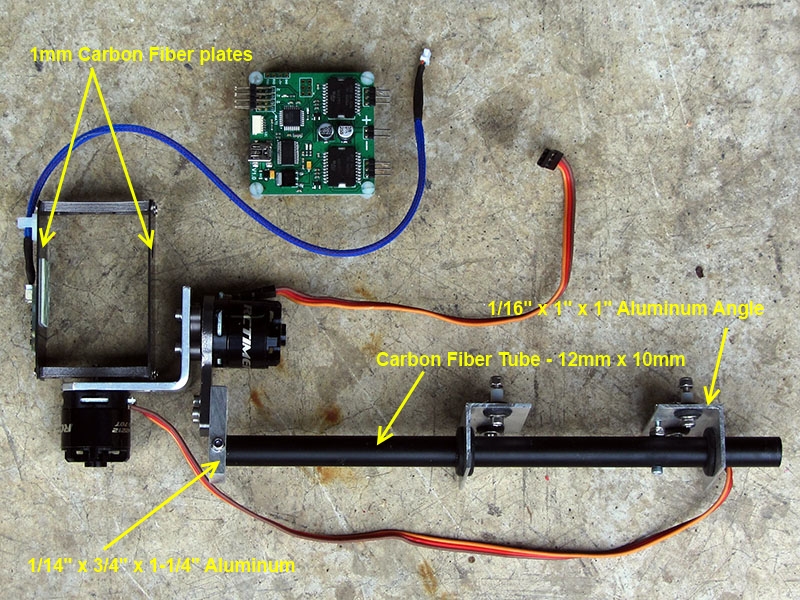
The end result has been really great. I removed 8 ounces from the original weight of the Gimbal pieces and in fact am only using 4 of the original 13 components. In retrospect, I could have built the gimbal pieces myself and saved about $50 on this part.
|
| 4 of the original 13 frame pieces are left after much modification |
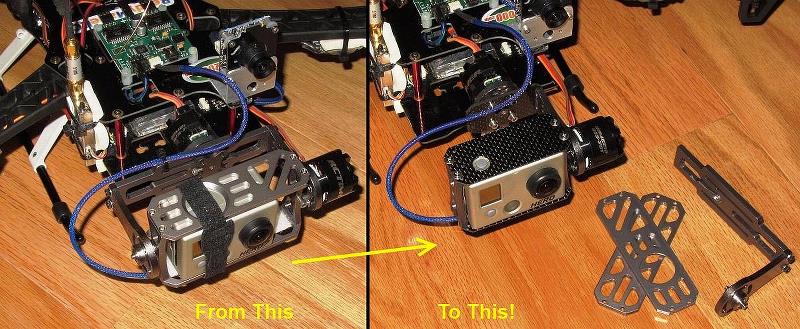
|
| Version 1 and Version 2 showing the parts and pieces I took out |
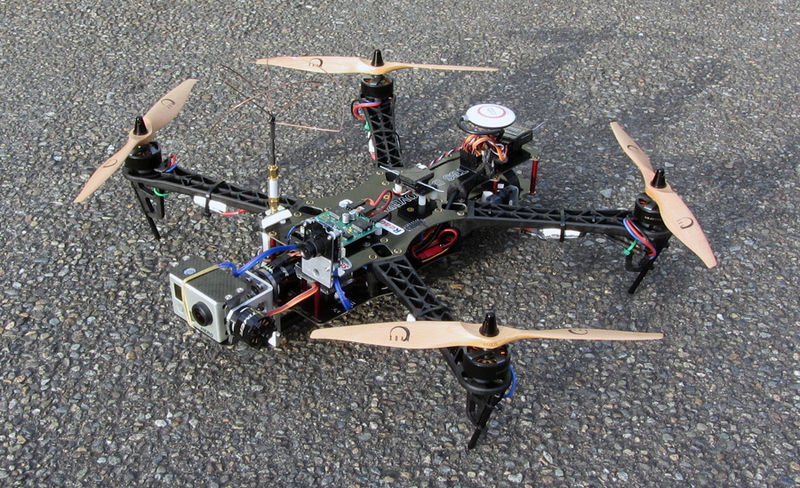
|
| The whole Disco Package ready to fly! |
Version 3!
After running the above gimbal set-up for some time, I have decided to go super light. To do this I have also decided to try a single axis setup with only pitch being stabilized. As much as I love the great video the 2 axis gimbal made, I didn't particularly care for the loss of the feeling of flying. That is, the videos all look like the camera is mounted on a boom like they use in TV/Movie production. So, with that, the below pictures are what I came up with (video to follow). This new arrangement brought the all up weight from 1805gr to 1646gr! Stay tuned...
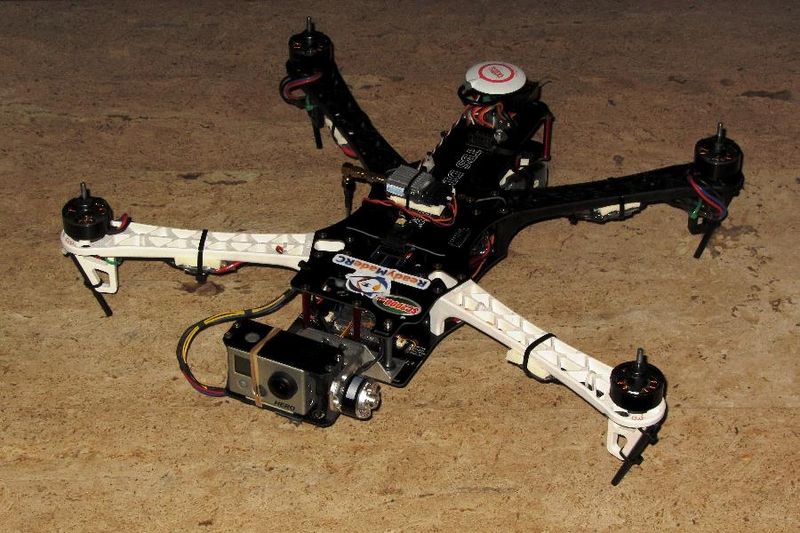
|
| Version 3, my new 1 axis gimbal with iPower 2208 motor |
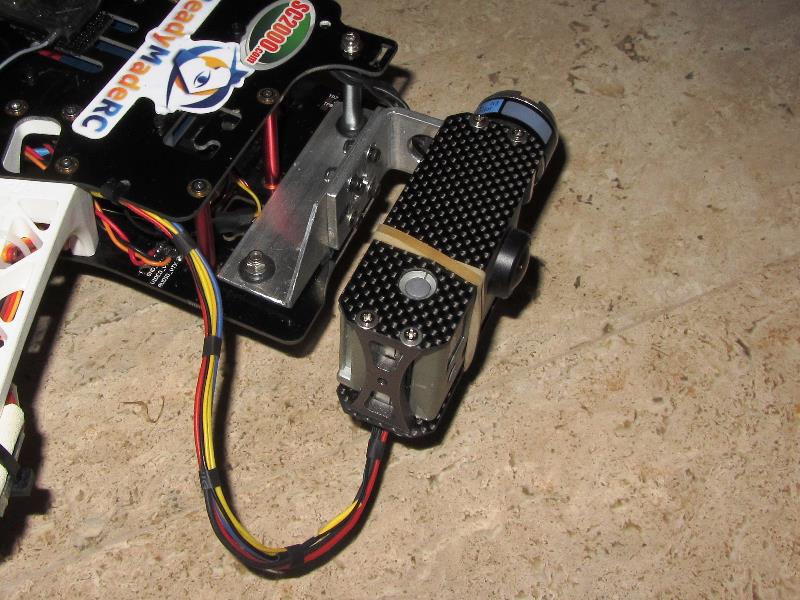
|
| New 29gr mount with grommet vibration damping |
|
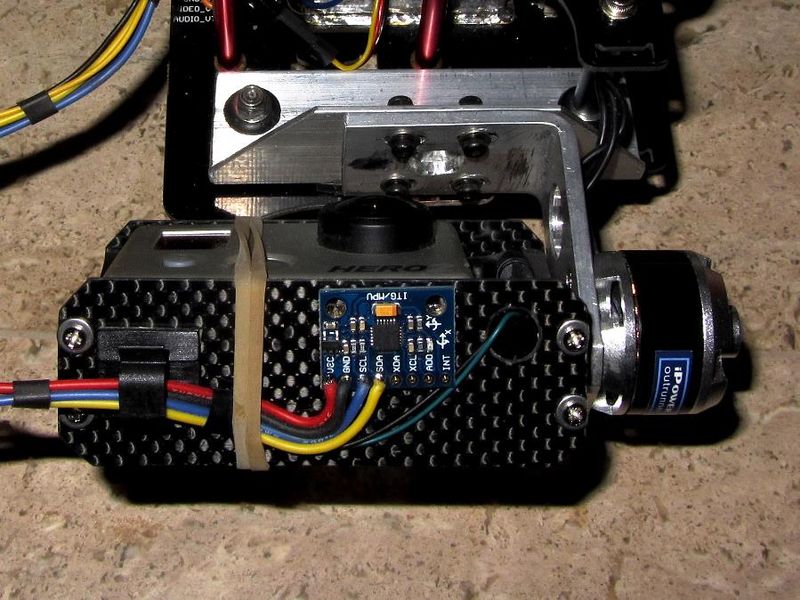
| IMU wiring and wires from the GoPro for FPV |
Version 4 - Back to 2 Axis
After running the single axis I have decided to go back to two axis. It's just too smooth! One axis worked just fine but it was a little bumpy and just didn't have the quality and clarity you get with a two axis unit.
So, for this I created a new mount out of 1" square x 1/16" aluminum and screwed the motor directly to this piece. I used four 5/16" x 3/16" x 1/16" hard rubber grommets to mount this bracket to the two front posts on the Disco frame. Initial videos indicate zero jello with this set-up.
Here is a component list for version 4:
The component list includes all the major components needed. There is no battery listed as I use the 4S flight battery directly.
| Item (Updated June 23, 2013) | Price | Qty | Sub-Tot |
| Martinez v3 Brushless Gimbal Controller | $35.00 | x1 | $35.00 |
| iPower 2208/80 Brushless Gimbal Motor | $20.95 | x2 | $41.90 |
| Aluminum Tube - 1" x 1/16" x 36" | $7.29 | x1 | $7.29 |
| Aluminum Sheet - 1/16" x 4" x 12" | $6.95 | x1 | $6.95 |
| Miscellaneous Parts | $5.00 | x1 | $5.00 |
| Total- | $96.14 |
Miscellaneous Parts includes wires, standoffs, etc. CF camera plates could be made using plywood scraps or the whole cage could be done easily on a 3D printer.
|
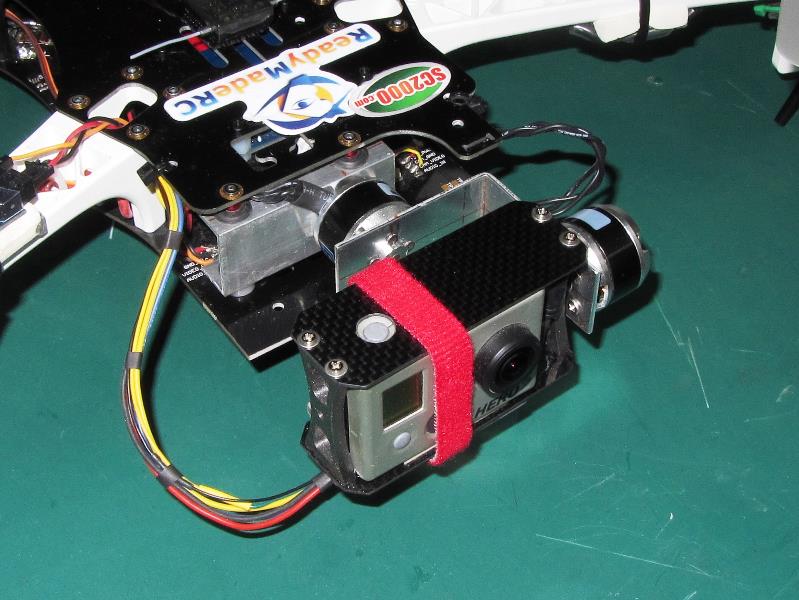
| Version 4, my lightest gimble yet, 138gr with control board (not shown) |
|
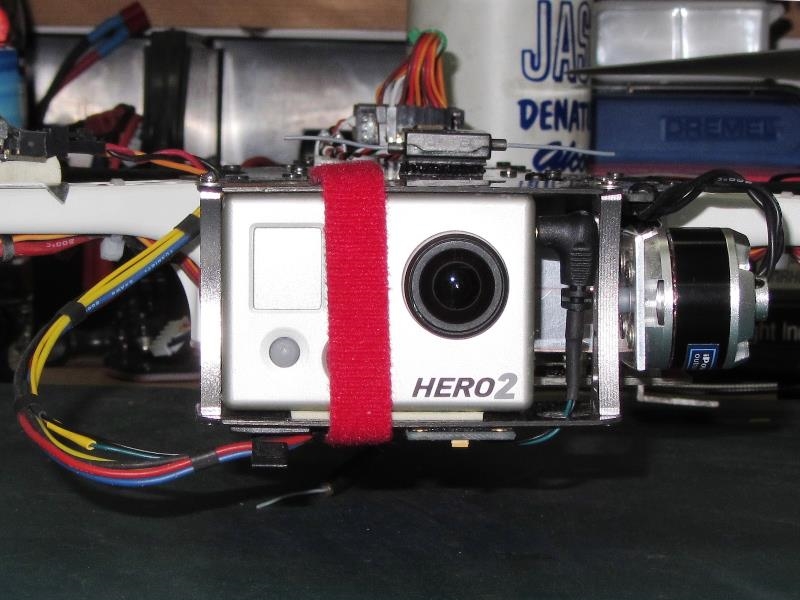
| Front view |
The Martinez BruGi Controller
File downloads for the Martinez/BruGi boards: BruGi Firmware Files
I elected to try this controller because it was inexpensive (<$35) and was based on the Basecam/Alexmos system. This was an adventure all by itself. Getting in on this in it's very beginning was a bit of a learning curve because there were no standards or published tuning recommendations yet. Once I got through some of the pain of the Arduino environment and some stable Firmware files were made available things started to work and work very well. After having built (now) several of these, I find the Martinez board is nearly on par with the original Alexmos BGC1.0 board.
Tuning and Set-up
I put a Tuning and Set-up guide together which has grown as I learn and research other alternatives and methods for working with this controller. This article can be found here:
How To - Martinez Brushless Gimbal Controller Set-Up
Video Sample
Here is one of my first videos:
|
Enjoy! |
See Also
- Team Black Sheep - TBS Discovery
- Easy Brushless Gimbal
- Brushless Gimbal Controller Project Pages
- How To - Martinez Brushless Gimbal Controller Set-Up
- RC Groups
Vendors used for this project
Comments? Questions?