How To - Build a Mobile Launcher
| |
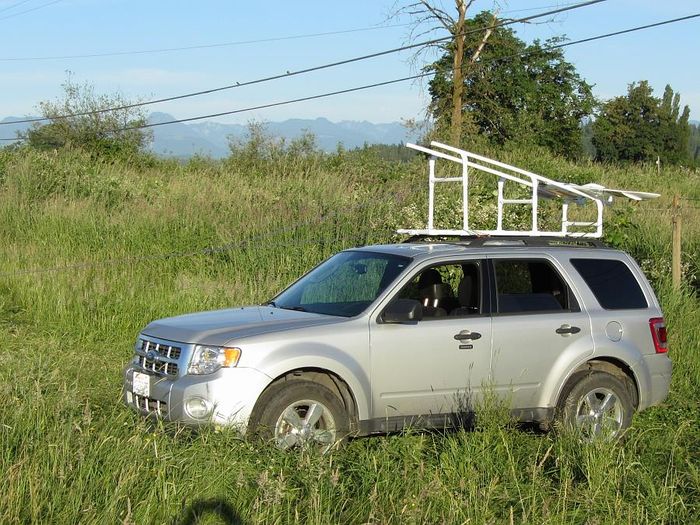
| Park it, put a stake in the ground and you are immediately ready! |
Introduction
So I have always wanted a better way to launch my planes that are without wheels or floats. I recently found an RCG thread dedicated to designs of launch ramps, guides, mechanisms, etc. and decided to go about building my own. Further to this I decided I needed it to work on top of my small SUV(Ford Escape), be sturdy enough to take freeway speeds and long enough to possibly launch without a bungee. Oh, and to be under $100 USD! Here then is my very simple and inexpensive solution that works beautifully on the planes I own.
Supplies and Other Bits
Here are the supplies needed to build my version of a mobile launcher. All told it cost me around $65 USD and took approximately 2 hours to build.
Supplies List:
- 1" PVC SCH40 Tubing - 40ft
- 1" PVC 'T' - 17x
- 1" PVC 45° - 6x
- 1" PVC 90° 'L' - 4x
- 1" x 1/2" PVC 90° 'L' - 2x
- 1/2" PVC SCH40 Tube - 6"
- S8 x 1/2" Self drill/tap sheet metal screws - ~80pcs (Box of 100)
- 3/16" x 3" Cotter Pin
Optional:
- Rope type
- Eyelets
- Rings, keepers, etc
- Ground stakes
- Surgical tubing/bungee chord
- PVC Glue
- PVC Hand Cutter (Scissor)
Some Build Details
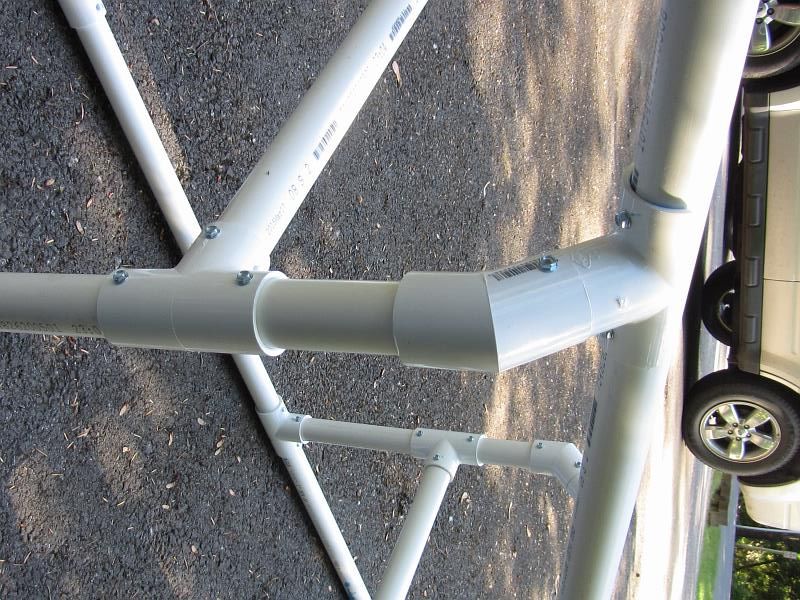
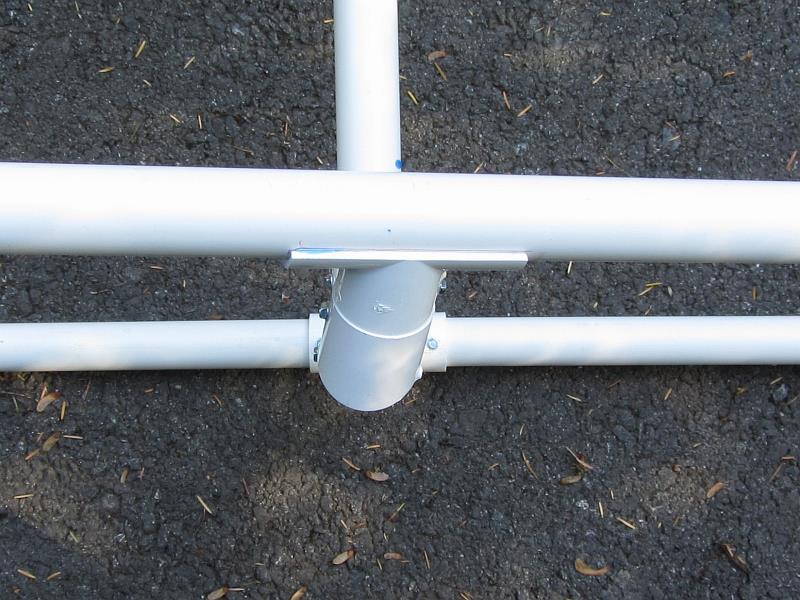
The following pictures show some of how I put this together. All joints are slip fit with a single screw holding them together. The exception to this are the half cut 'T's' used on the rails which are screwed and glued with PVC cement. I did it this way so that I could easily re-position or change tubing lengths if needed while assembling and testing. At some point I might go back and glue all the joints if I feel it is needed although without the glue it is still quite sturdy.
With regards to cutting the PVC, I already owned a pair of the PVC Hand Cutters which are like tubing scissors ($11.95 at Home Depot stores). They are very easy to use and do a decent job in terms of end square-ness. A better cut can be had with a proper chop saw but I didn't find this to be needed. The 6 half cut 'T's' supporting the top rails were cut with a hand-held hack saw and a bench vise. The inside of these 'T's' were smoothed out with a Dremmel using a 3/4" course sanding tube.
|
| Outside joint detail - view 1 |
|
| Outside joint detail - view 2 |
|
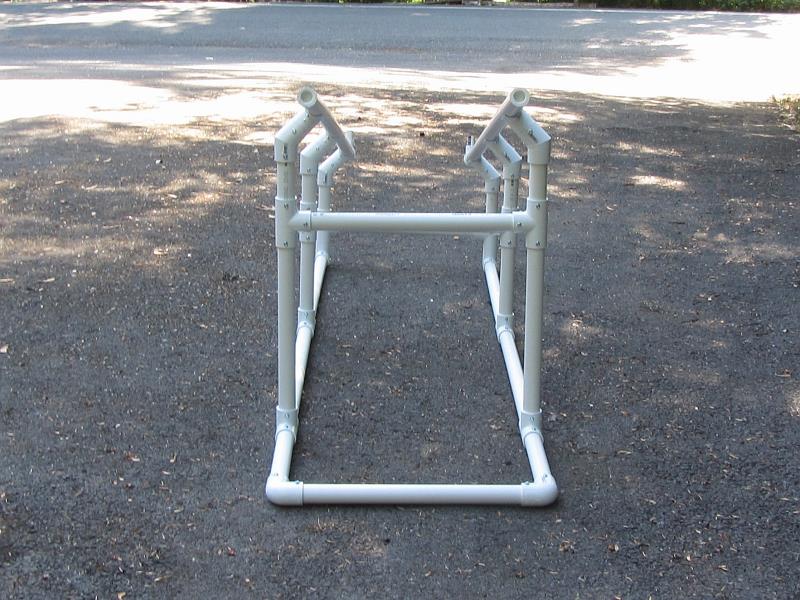
| Launch end view |
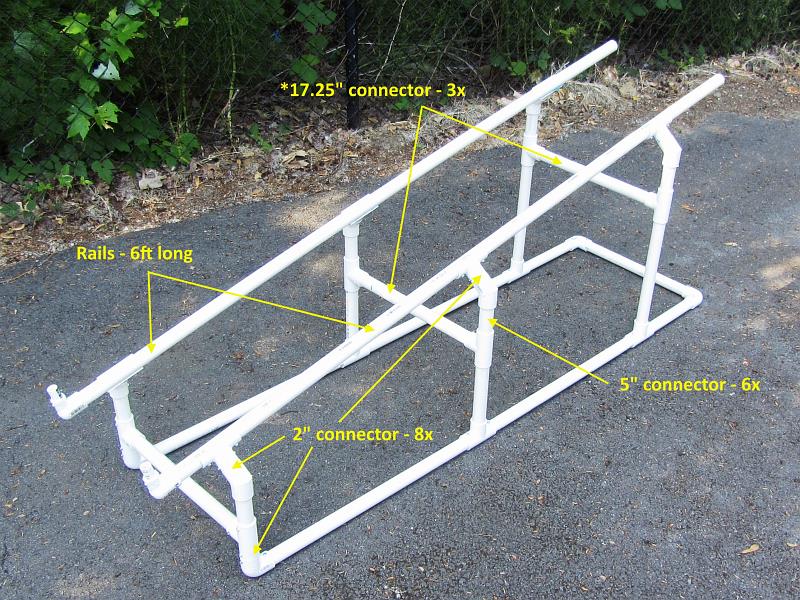
The following picture shows some of the part lengths I used for my build. These are specific to the aircraft you are building and in this case fit both my Phantom FX61 (10" prop) and my Talon X-UAV (13' prop).
|
| Parts layout (dimensional) |
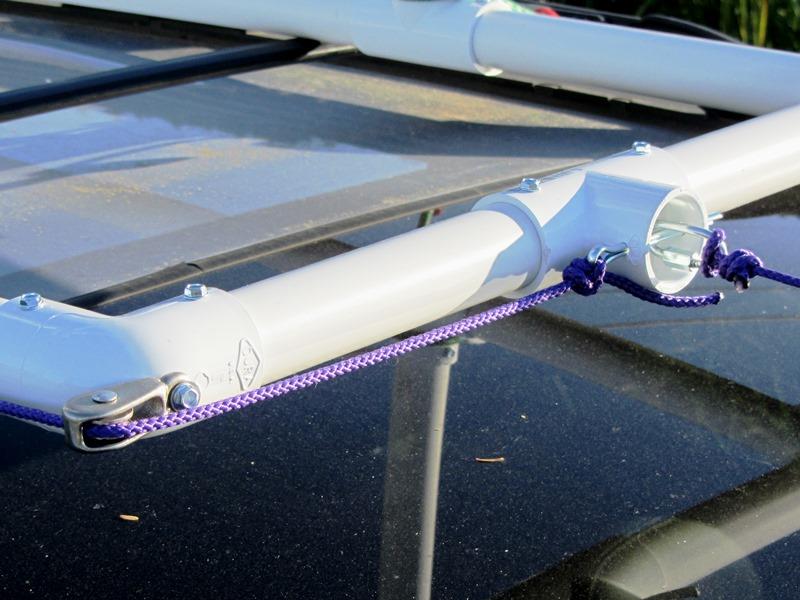
For the release I simply use a 'T' in the front cross tube which is drilled for a 3/16" cotter pin to easily slide in. The pulley just makes it easier to stand behind the launcher and easily pull the trigger chord. You could leave the pulley off and just stand to the side as well.
|
| Launch release set-up |
Some Aircraft Details
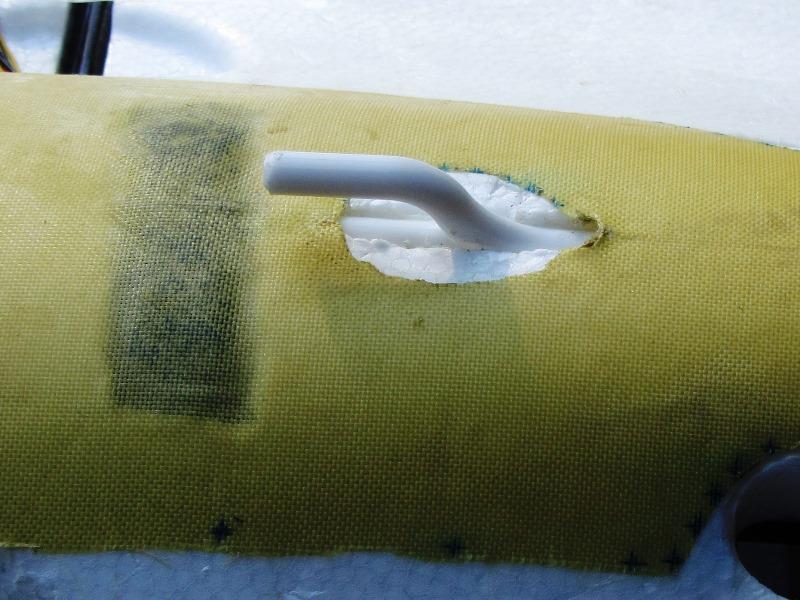
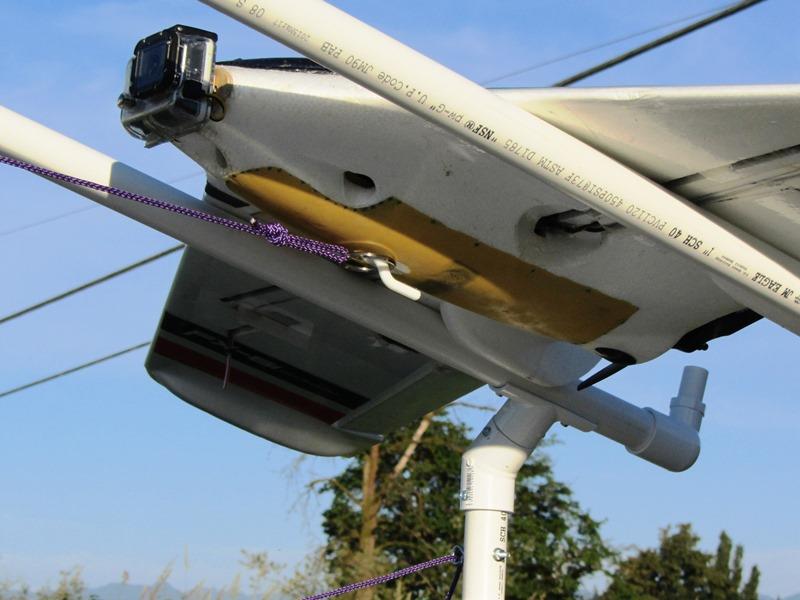
On the aircraft, a Phantom FX61, I embedded a piece cut out of a plastic coat hanger as a tow hook (from an idea posted on RCGroups by RCG member "Ramnes"). These are as cheap as it gets and literally 2 minutes of work to install. I positioned the hook about 2-1/2 to 3" forward of the airframes COG. I roughed it up with course sand paper and glued it into the EPO with welders glue.
|
| Aircraft (Phantom FX61) hook detail which broke on landing! Now it has a collapsible one :) |
|
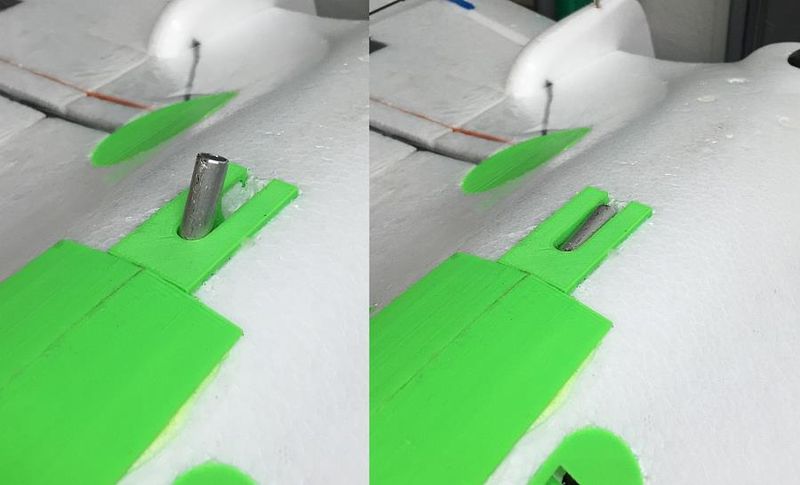
| Newer collapsible hook |
To prepare for launch I stretch the bungee ~15-20ft for the Phantom (4lbs AUW) and 18-24ft for the Talon (6.5lbs). Of course your stretch needs will vary depending on the size and type of bungee chord and the AUW of your aircraft. It is important to note you should never have slack in the aircraft release chord as the resulting shock could be destructive to your plane.
|
| Aircraft launch ready! |
Launch "Pull Parts"
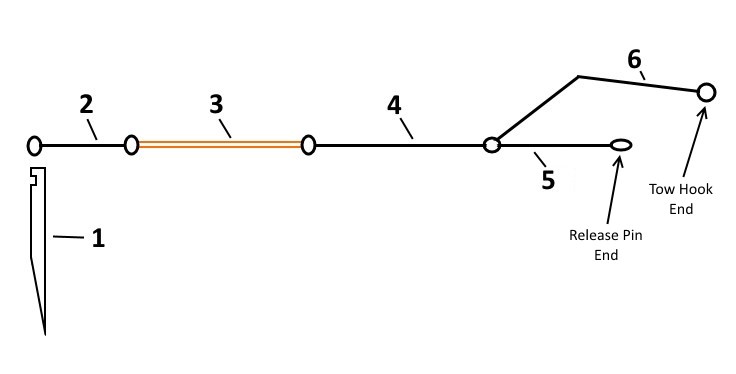
- I use 3/16" 50lb test braided chord and ~70ft (20m) of 5/16"OD x 3/16"ID surgical tubing. The pull chord assembly has 6 basic parts:
- 1. Anchor (stake)
- 2. Anchor chord - ~10" (250mm) of the nylon braid
- 3. Bungee chord - ~35ft (10m) of surgical tube (70ft doubled over)
- 4. Launch chord - ~22ft (7m) of the nylon braid
- 5. Release chord - ~4ft (1.2m) of the nylon braid
- 6. Aircraft release chord - ~8ft (2.4m) of the nylon braid
- Optional:
- Metal connector rings/clips etc.
- Metal connector rings/clips etc.
|
| "Pull Parts" |
Launch Test Video
|
Mobile Launcher Test, June 2015 |
See Also
Vendors used for this project
- The local Home Depot
Comments? Questions?