How To - Simple Bungee Launch Set-up
|
Introduction
Several have asked how I launch my wings and smaller FPV planes and the answer varies depending on the plane, the weather and the location. One method I use and really like is this simple launch set-up which has worked flawlessly. Some years ago I tried this using a ramp with a launch trigger but found that carrying this extra gear around was a pain and completely unnecessary. I then saw a fellow RCG posters video showing this simple method and gave it a try.
The Gear
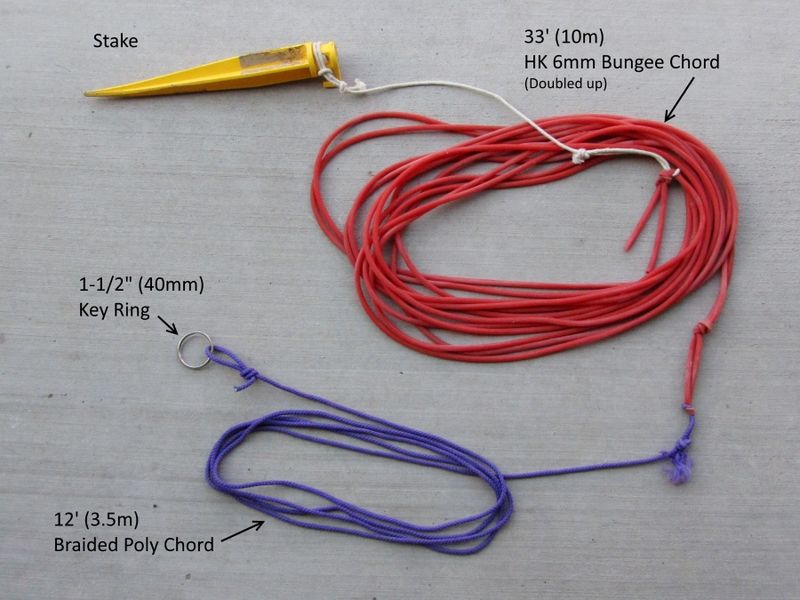
The gear is simple and inexpensive:
- 1x 12' (3.5m) x 3/16" (4.5mm) braided poly chord
- 1x 33' (10m) HobbyKing Red 6mm Bungee Chord
- 1x 1-1/2" (40mm) Metal key ring
- 1x 12" plastic stake to pound into the ground
All together this cost about $10
|
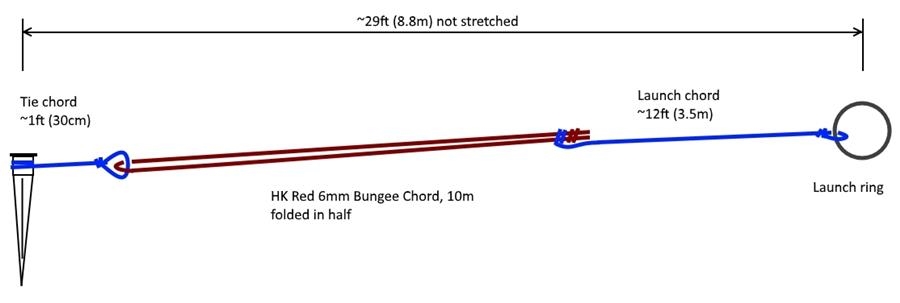
Layout
A few knots and you are ready!
|
The Hook
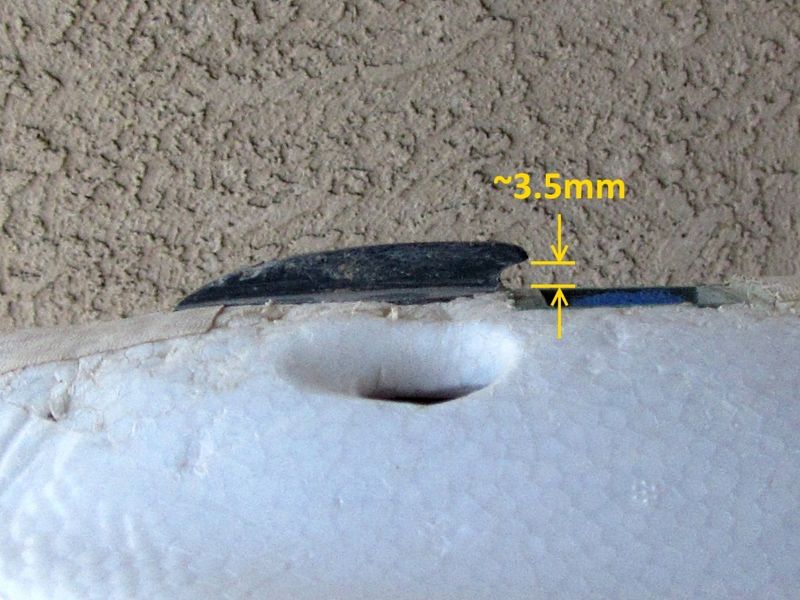
The hook can be simple and it must be pretty small. Below is a picture of the hook on my C1 Chaser wing which is very low profile:
|
This style of hook will work on just about any airframe and for this type of launch it should be well ahead of the CG. In the case of the C1, it is about two thirds the distance to the nose from the spar.
Setup and My Method
The setup is simple, put the stake securely in the ground and make sure you have enough flat, level space to launch into the wind.
My Method:
- Set your FC to a stabilized flight mode with about 20% up elevator (I program a switch for this)
- -Manual mode works well too, just make sure you release the plane level!
- Have your transmitter on a neck strap or in a buddys hands so you can use both hands for the launch
- Pick up the ring and while holding it away from your body walk in the direction of the wind until the pull is 3 to 3-1/2 times the airplanes weight. (20 paces is perfect for my ~880g C1 wing)
- - The amount of pull can be adjusted lower (less paces) after you find the first few go well
- Turn around so you are facing into the wind and connect the ring to the launch hook
- Hold the plane above your head, pointed up just slightly and let it go with a smooth forward motion
- As soon as the plane is clear of the chord, throttle up and fly!
- -You can also use "Auto-Launch" if your flight controller supports this
Updates
I have added a couple pieces to the set-up to help keep the surgical tubing in good shape and get it to last longer.
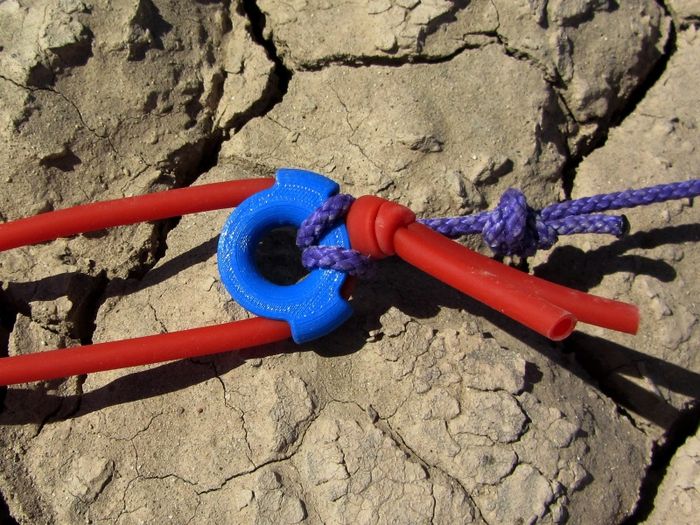
First I added a a pair of printed tubing savers that keep the tubing from stressing to much where it attaches to the chord:
|
You can download the STL for this here: Bungee Saver
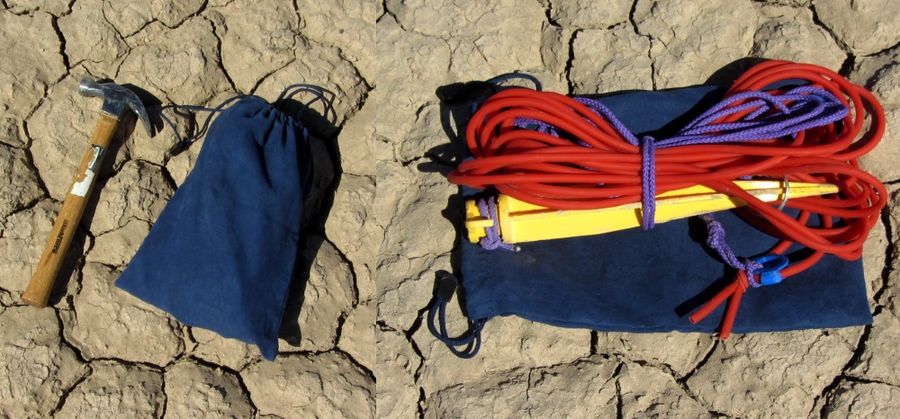
Another addition was finding a cloth bag I could easily wrap it all up in to prevent "shop damage" as even the tiniest nick can become a fail point:
|
Bungee Chord Life
I am now on my second bungee chord after many, many successful launches. The reason is simple, I did not do the greatest job of always protecting the silicone tube when deploying and storing it. It turns out, this tubing does nick fairly easily and a nick can easily turn into a fail which can sting! (remember to hold the ring AWAY from your body when stretching the chord!). I now keep the bungee and stake in a cloth bag (above), am a little more careful when deploying and storing it and I inspect it for nicks often.
Where I live I am very often flying in weather that is hot to extremely hot. It isn't unusual for me to fly when it is above 100 degrees F (38C) so at first I was concerned this would really affect the chord material. So far this hasn't been the case as I have found no ill affects even when leaving the chord laying in the sun for hours.
Video Samples
And now - the C1 Chaser launch!:
|
|
And here is one from my Strix StratoSurfer:
|
|
See Also