Mini Talon X-UAV from FPV Model
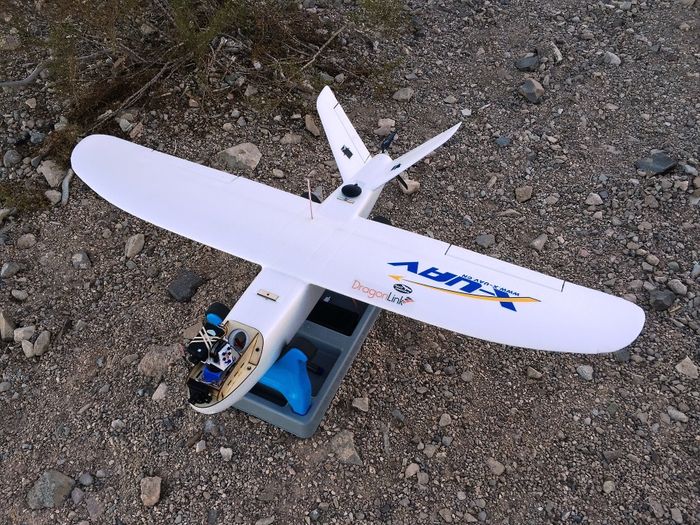
| |
| Ready for fun! |
Introduction
Decided to try the Mini Talon as a way to get a medium range plane I could easily throw in my car. I looked at the Twin Star and the Floater Jet but finally decided on the Mini Talon because my large Talon is such a great flyer and it is relativley inexpensive.
Airframe and Controls
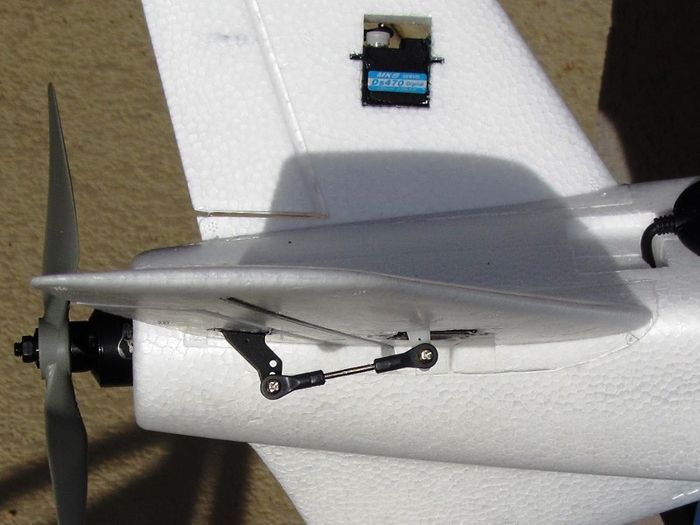
I did decide to try a set of Digital servos mainly because I had them already. The linkage was changed to small Dubro 2-56 ball-ends on the Elevons because of the high miss-allignment btween the controll surface and the sevo arm travel.
|
| Ball-end linkage on the elevons |
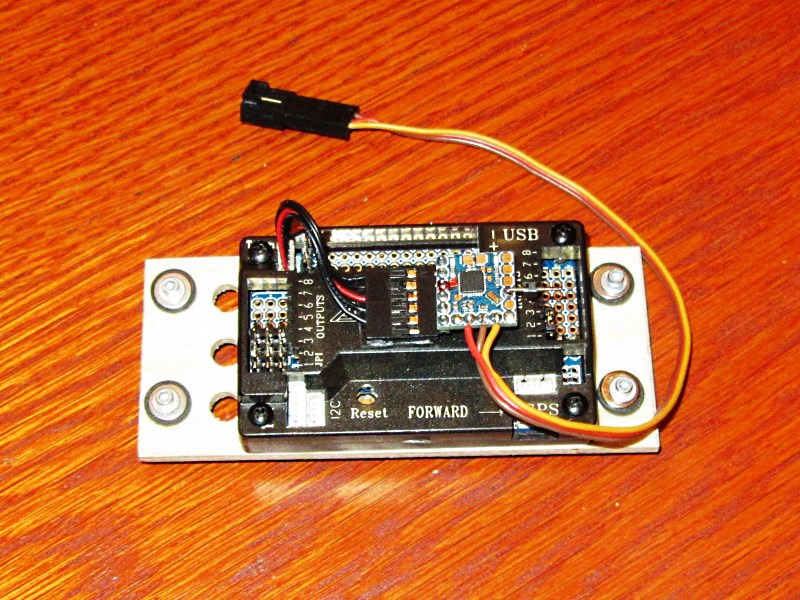
For this build, I decided to try an RTFQ ReadyToFly 2.8 flight controller to save a few bucks and check out if they are reliable and as easy to set-up as my APM. I am using APMPlane 3.3 firmware.
For an OSD, I am running an RTFQ MicroMinium OSD with my own character set.
For radio gear I am using DragonLink V2 with the MicroRX Copter receiver.
Specifications
Build date - January 2016
| Wingspan - 1,300mm (51in) | Wing Area - 30dm^2 (465sqin) |
| Length - 830mm (33in) | Wing Load - 66g/dm^2 (21oz/sqft) |
| Motor - Cobra 2221/16 - 940Kv | ESC - Cobra 33A |
| Battery - 8,000mAh MultiStar | Propeller - APCe 8 x 6 to Aeronaut 9.5 x 6 folder |
| *All Up Weight (no battery) - 1,290g (46oz) | *Weight with 8,000mAh pack - 1,934g (68oz) |
| Flight Controller - RTFQ READYTOFLYER 2.8 w/APM Plane firmware | OSD - Micro MinimOSD w/R800 firmware |
| Radio Gear - DragonLink MicroRX | VTx - RMRC 800mw/1.2G |
| *Weights shown are with a two axis gimbal |
Build/Layout
I won't spend anytime on pictures of assembling/gluing the foam bits together. I'll just show any mods and/or custom setups I did for this build. This starts with a simple layout with the Flight controller mounted on a plywood plate with rubber dampers attached between the wing support plates.
|
| Flight Controller mounted on plywood plate with Micro MinimOSD servo-taped to the top of the case |

|
| Layout showing the Flight Controller, Micro MinimOSD, FPV power module and GPS |
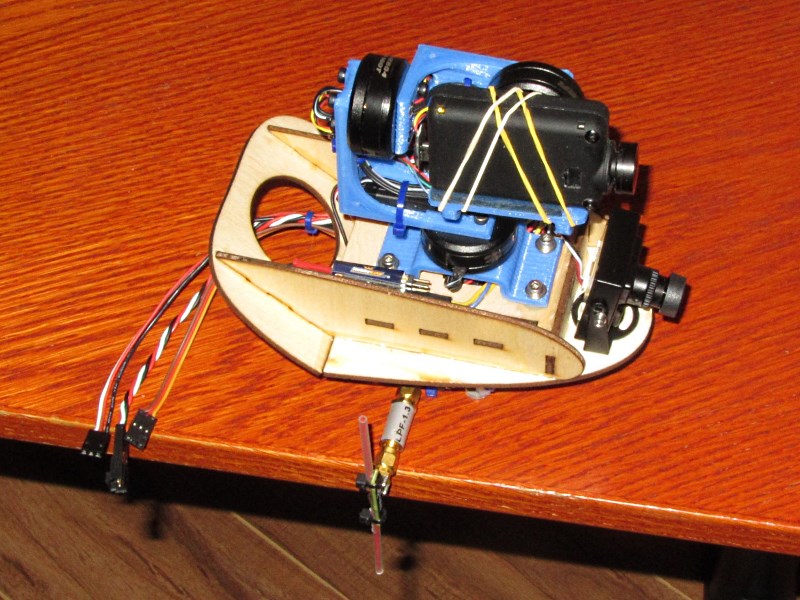
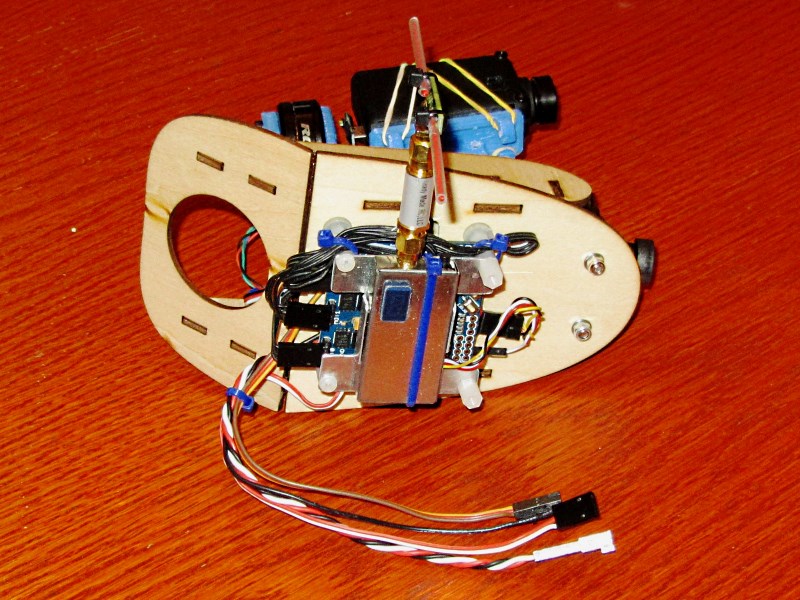
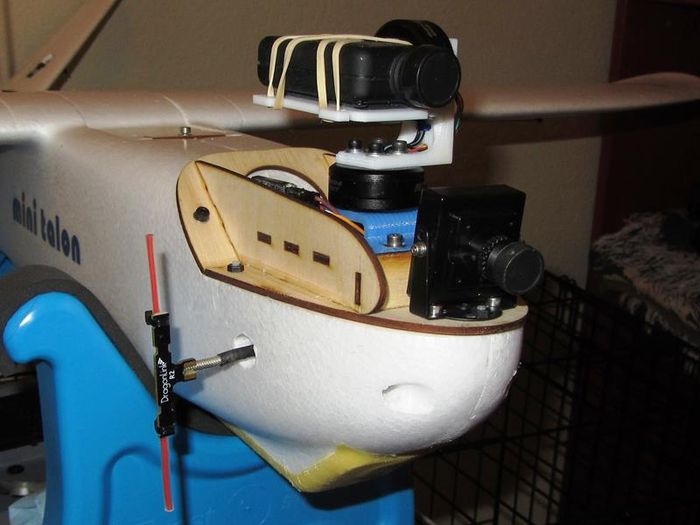
On the front I built an "FPV" module which includes the VTx, DL 1.3G Dipole antenna, a Storm32 brushless gimbal control board, an Effio camera, a two or three axis gimbal with Mobius camera and a two way camera switch.
|
| FPV module showing the DragonLink 1.3G Dipole antenna and a Low Pass filter which will not be used |
|
| FPV module - Bottom view with VTx aluminum shield and heatsink |
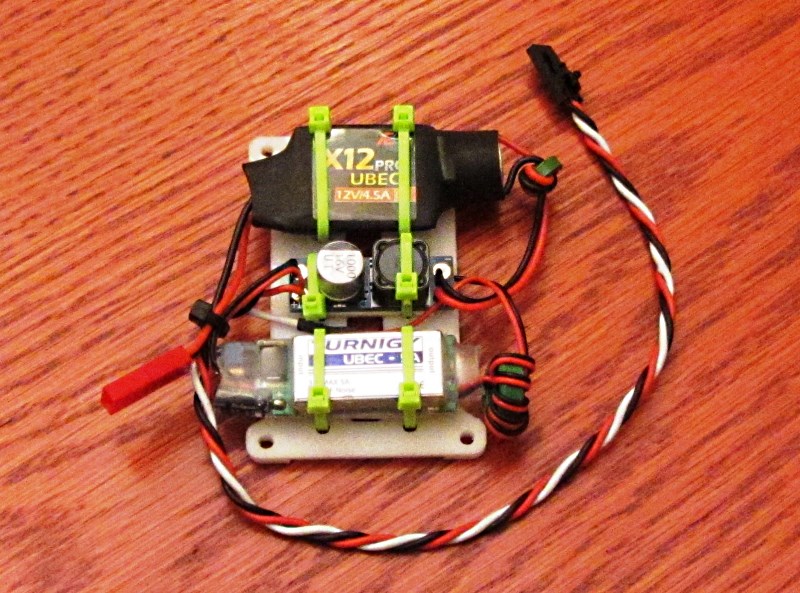
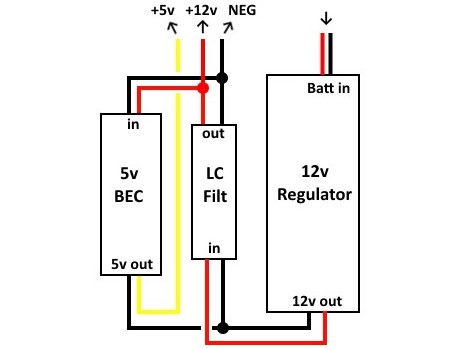
To power the FPV module I printed a mount plate for a 12v regulator, a 5v regulator and an RMRC LC power filter. All three components are mounted on foam tape with wire ties to hold them down.
|
| FPV Power Module |
|
| Power module schematic |
A Few Last Views
|
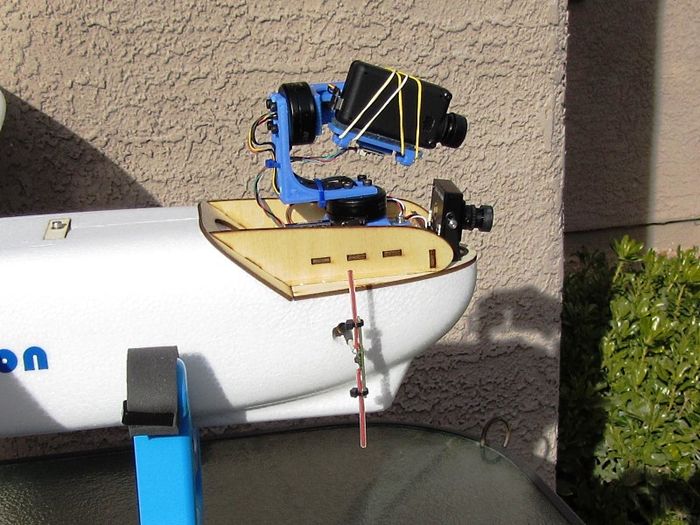
| Side view with VTx antenna |
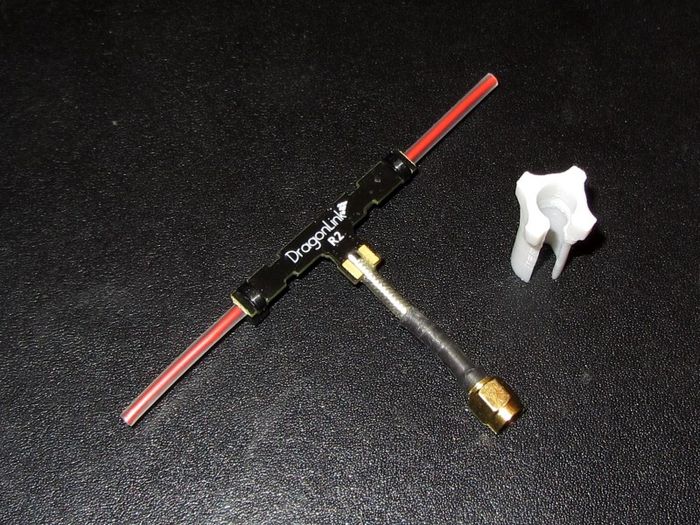
To install the VTx Dipole I had to design a simple 3D printed thumb wrench which would fit through the hole in the fuselage.
|
| DragonLink dipole and wrench |
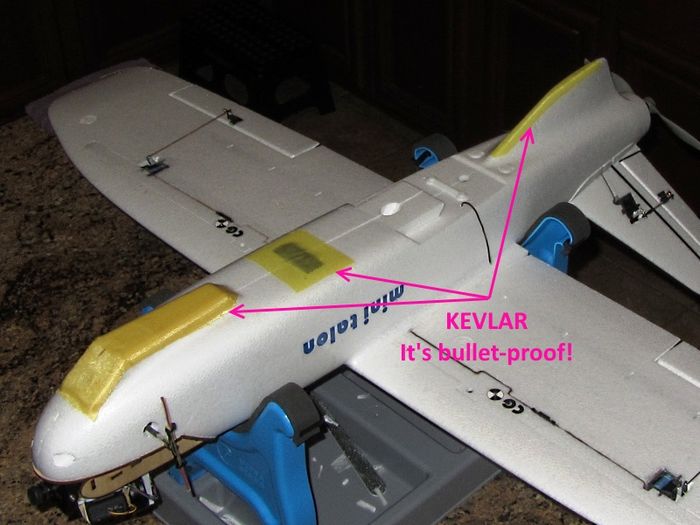
Using a process I detail in "How To - Create a Kevlar Skid Shield", I added 1.7oz Kevlar to the landing skid areas and over the battery strap.
|
| It's all about Kevlar! |
|
| Front view showing smaller 2 axis Gimbal and VTx cooling ports - Ready for Maiden! |
Maiden
The maiden went very well! After all the anticipation, the initial launch was as uneventful as its bigger brother, my full size Talon. It literally just floated out of my hand without any drama or surprises what so ever. Unfortunately I had to keep it LOS as the MinimOSD decided to not work. I'll get it all sorted out along with some initial PID tuning hopefully on a day with sunshine and no wind :).
Here's a video of the maiden flight. Because I had to wait till after sundown for the wind to get reasonable, I was running out of light pretty quickly. Enjoy...
|
Maiden Day - February 6, 2016 |
Mods 
3D Print Skids
After much destructive landing on rocky roads and general desert areas I decided to do away with the Kevlar and print up some "Bash Guards". The Kevlar did its job just fine but my conditions are extreme and my ability to land smoothly is, well, lacking...:D
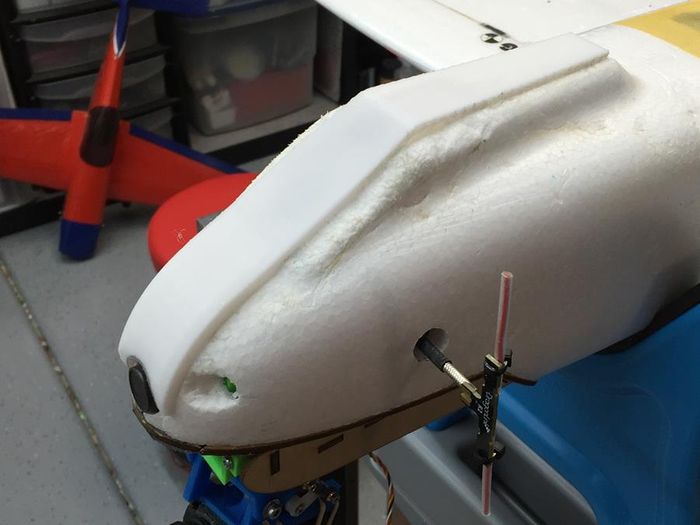
So on my present MT which has the front hump cut down, I made a flattened version of a printable skid plate:
|
| Flat bash plate |
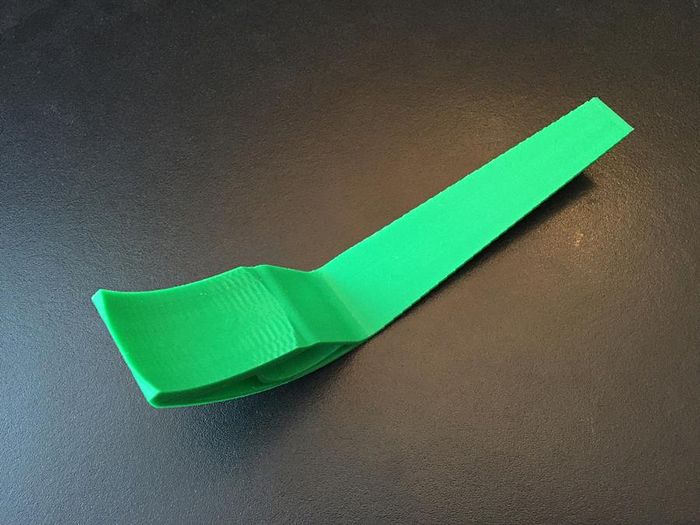
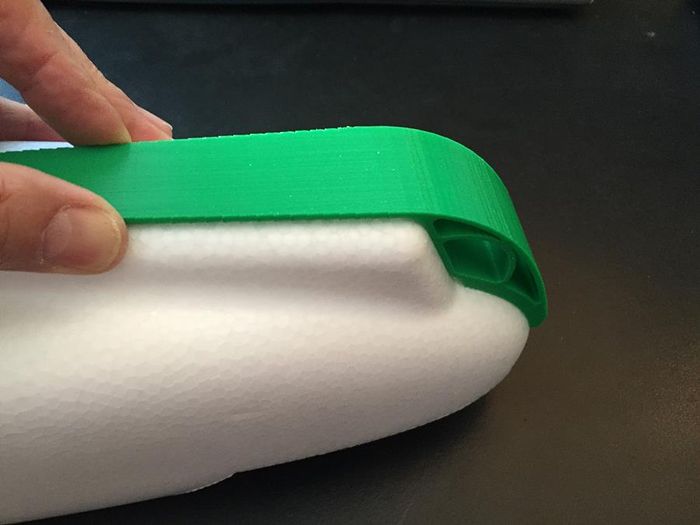
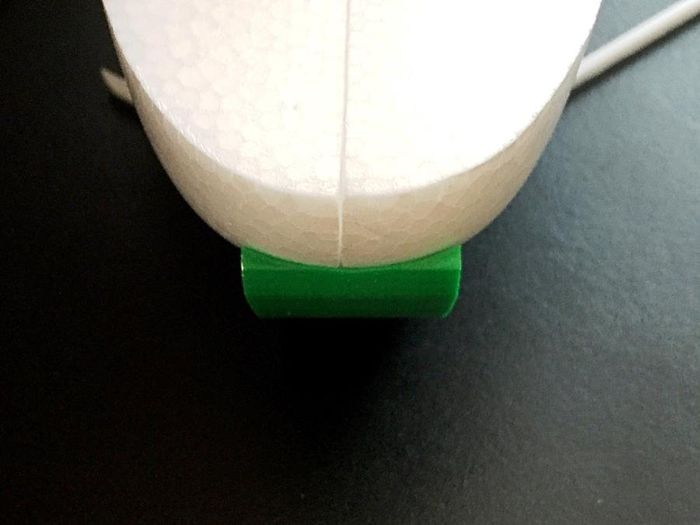
For my newly received $49 BangGood special (AKA: MT#2), I printed up what would fit without modification. The front skid weighs 23.5g (@ 40% infill for you 3D printer guys) the rear skid weighs 8.5g. Both conform almost exactly to the rounded shape of the Talon fuse so gluing will be easy enough (White tube, Zap Goo or Contact cement, etc.). Here are a pile of pics:
|
| Off the printer (after clean-up) |
|
| It fits! |
|
| ...and it conforms! |
|
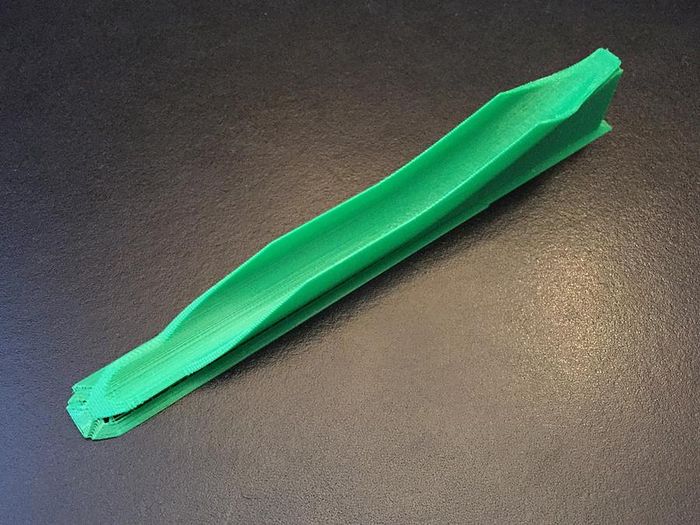
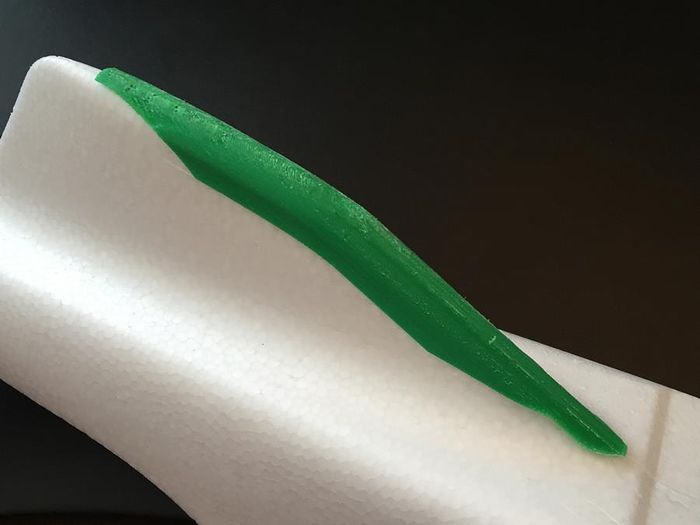
| Rear skid right off the printer |
|
| After some Dremel clean-up and pushed onto the fin |
The front skids are 2.8mm thick on the flat section and 2-2.5mm for the rest. The rear skid is 1.8mm thick along the center tapering down to 0.5mm on the edges.
See Also
Vendors to use for this project
Comments? Questions?