Strix StratoSurfer
Introduction
I decided to try something different and having never gone down the Bixler style road, the Strix StratoSurfer seemed like a good place to start. Also, after reading much about this plane, I decided to start with a larger motor/prop combo. For flight management/control I'll be starting with an Omnibus F3Pro flight controller to keep it light and simple.
Here then is a collection of my build notes and eventually a flight review of this plane.
General Specifications
Distributor - ReadyMadeRC, USA
Aircraft - Strix Stratosurfer
Build Date - January, 2018
Update - 5 February, 2018
| Airframe Type - | Top Wing FPV Specialist | All-Up Weight - | 55oz (1565g) w/ 4S/7000 Li-ion Pack | |
| Wingspan - | 59 inches (1500mm) | 56oz (1586g) w/ 4S/5200 Li-Poly Pack | ||
| Length - | 39 inches (1000mm) | COG - | 65mm - 70mm @ Wing root (Stock) | |
| Wing Area - | 2.95 ft^2 (27.4dm^2) | Wing Load w/5200mAh/4S - | 18.9 oz/ft^2 (58g/dm^2) | |
| Motor - | Sunnysky 2216-1250kv | Max Continuous Power (4S) - | 470 watts (4S) | |
| Propeller - | 8x7 Aeronaut Cam Carbon Folder | Max Prop Power - | 405 watts @ 2550ft ASL | |
| Static Thrust & Prop Speed - | 1145g & 94mph @ 2550ft ASL | Static Thrust/Weight - | 0.72 | |
| Battery Type - | 4S1P Lipo -or- 4S2P Li-ion | Battery Capacity - | 5200mAh/10C or 7000mah/3C | |
| In flight efficiency - | TBA | Flight Time - | TBA | |
Components/Flight Gear
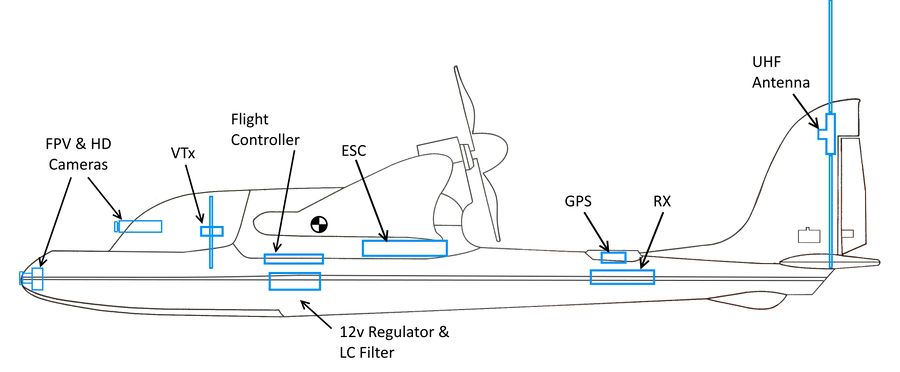
Below is the approximate layout of installed components:
|
Power Set-up
For power on this build I have chosen the Sunnysky X2216-1250kv. For an ESC, I started with a HobbyKing Blue Series 40A with a pair of Low ESR capacitors added. I am now using a Hobbywing Flyfun v5 40A unit to get active freewheeling and its awesome 8A, super quiet BEC.
- Motor - Sunnysky 2216-1250kv
- ESC - Hobbywing Flyfun V5 40A
- Prop - Aeronaut Cam Carbon Folder, 8x7
- For more informaion on setting up a pusher folding prop - How To - Set-Up a Pusher Style Folding Prop
- Battery - Multistar 4S/5200, 10C or a 4S/7000 Li-Ion
|
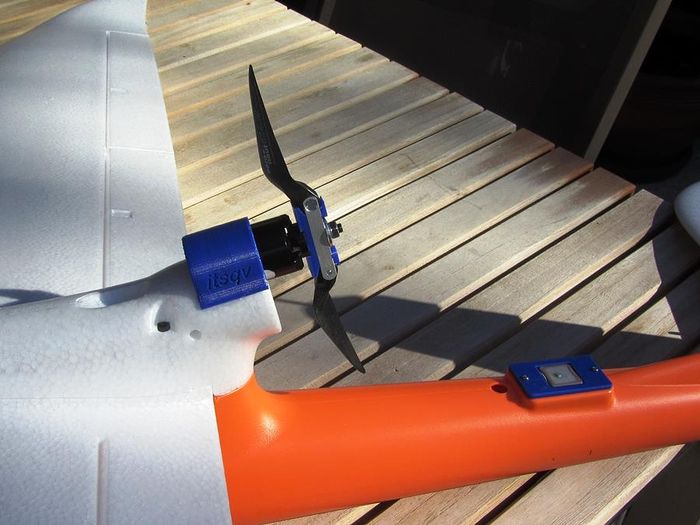
| Mounted with a 7x6 Aeronaut folder |
|
Motor Mount
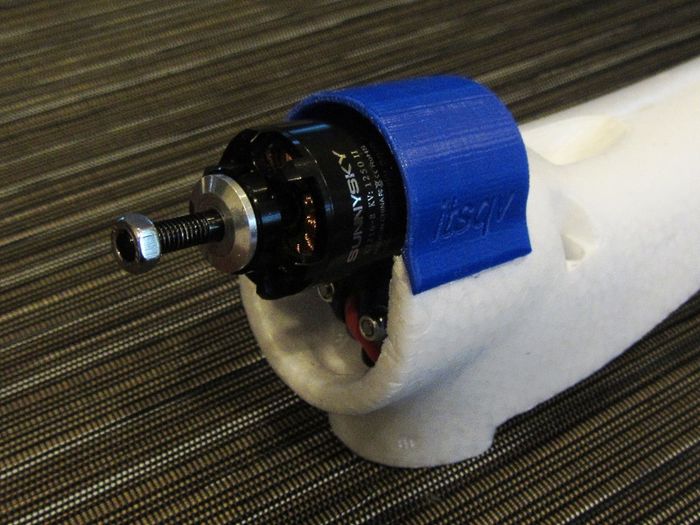
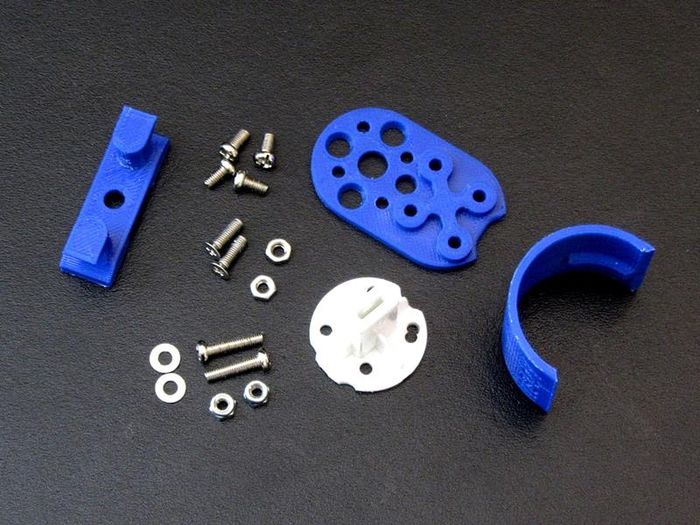
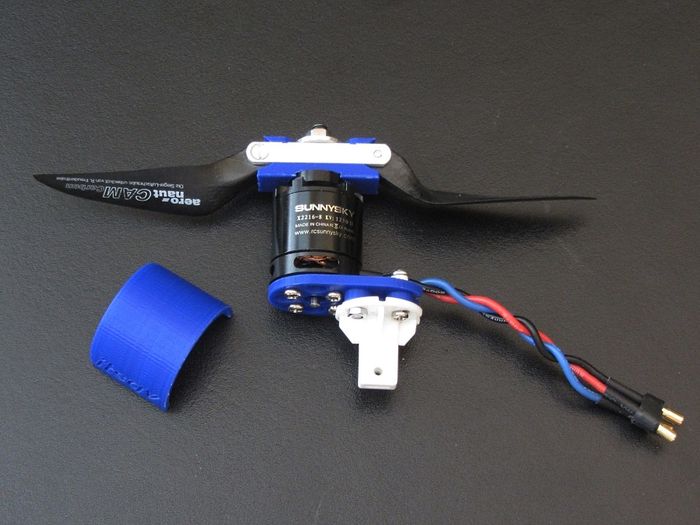
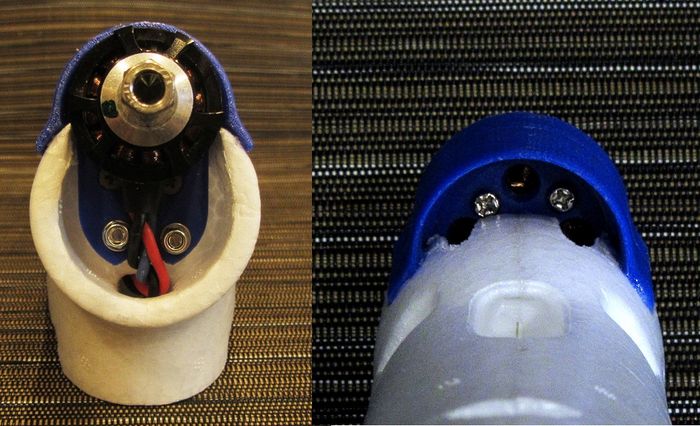
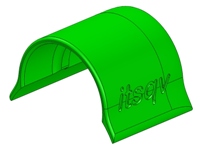
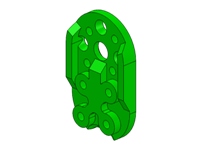
For the motor mount I designed and printed one that spaces the motor 6mm rearward and 19mm above the original mount to get the clearance needed for 7" & 8" props. Additionally, I printed a cowl to protect the motor and direct cooling air to the rear of the motor.
|
| Motor mount parts |
|
| Mounted |
|
| Front and rear views |
ESC Mount
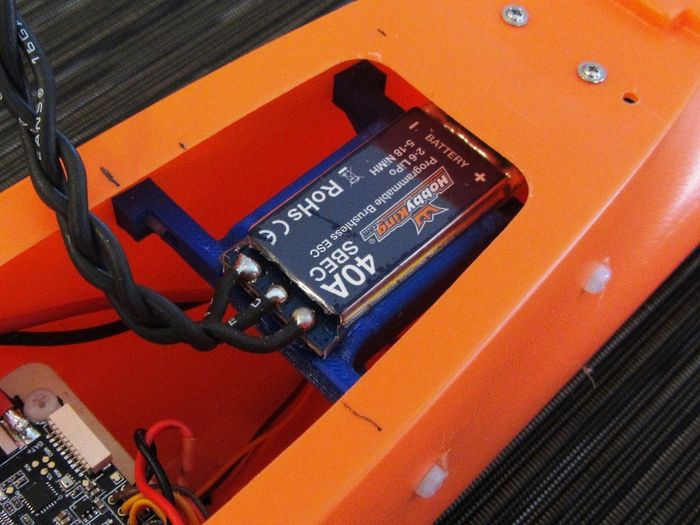
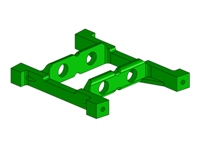
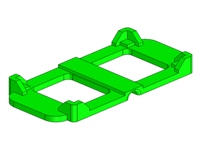
I decided to design and print a simple mount to hold the ESC. It mounts with four M3x6mm nylon screws and a wire tie to hold the ESC. This print is sized for a 25mm wide ESC.
|
| ESC craddle |
Flight Control
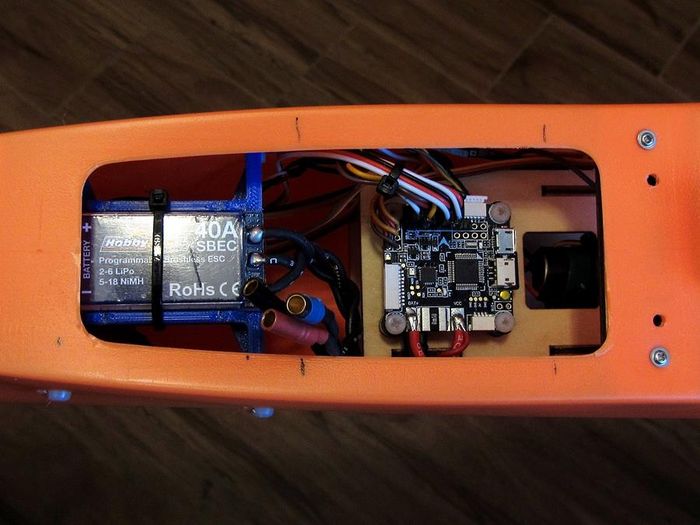
For flight control I have chosen the Omnibus F3Pro from Banggood. It is very inexpensive and in my experience completely reliable.
-
- w/iNav 1.8.1
|
| All wired up! |
FC Mount
To mount the FC I drilled out the existing mount holes to 2.3mm then tapped them to M3 and flooded the tapped holes with thin CA. This makes them more than strong enough for a set of rubber M3x6mm stand-offs.
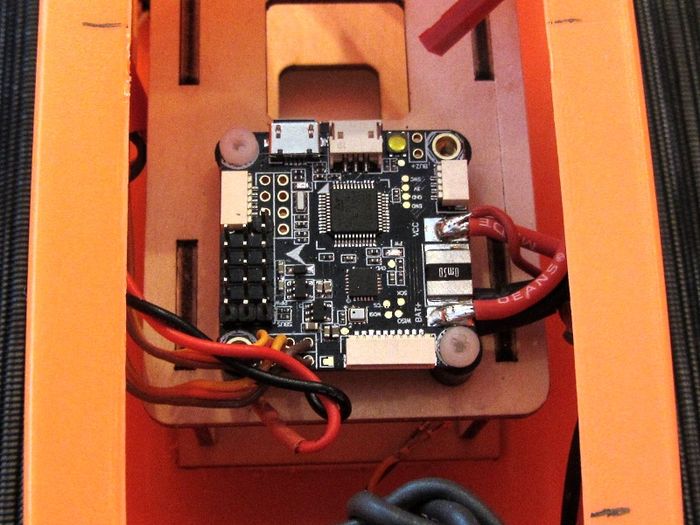
|
| FC mount |
RC Control
For radio gear I am using my standard DragonLink V2 system. I have mounted the DL dipole inside the verticle stabilizer. The RX is mounted on a printed deck below the GPS mount.The printed part is glued in with contact cement but you could also use E6000 or UHU-POR.
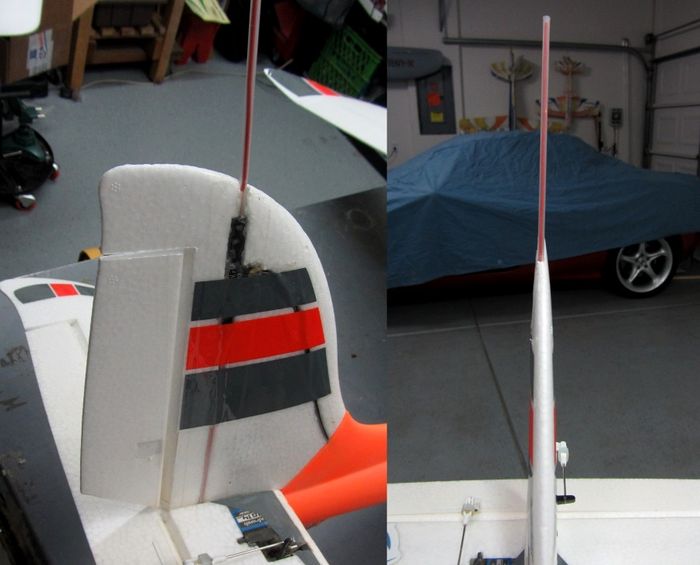
|
| DragonLink UHF antenna |
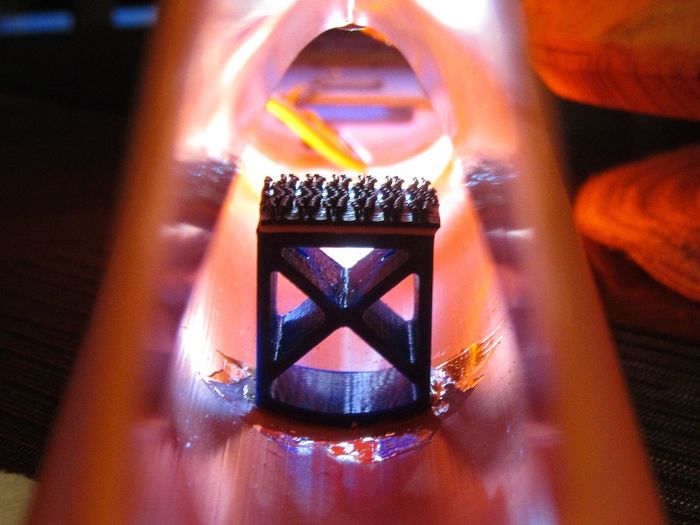
|
| RX mount |
GPS Mount
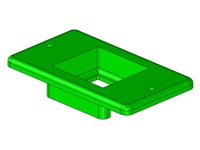
For the GPS I created a mount plate to replace the white plate on the rear of the fuse. This is sized for a Ublox Mini M7 GPS.
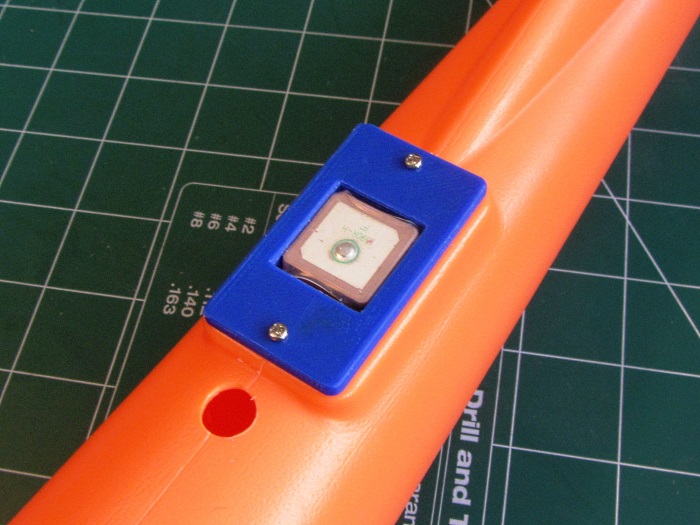
|
FPV Gear
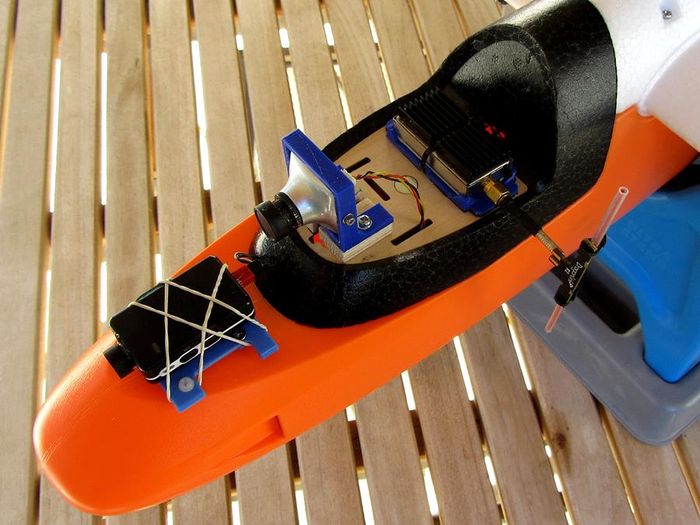
For an initial setup I am using the stock foam cowl piece with simple mounts for the FPV camera, VTx and HD camera. I will be changing to printed canopies as I did on my MiniTalon builds to get a more aerodynamic profile and cool looks! Here are the initial components and a picture of their mounts:
- VTx - RMRC 800mw, 1.3G
- FPV Camera - HS1184 with 2.8 lens
- HD Camera - Mobius Mini
|
| Initial FPV gear |
Airframe
Stabilizers
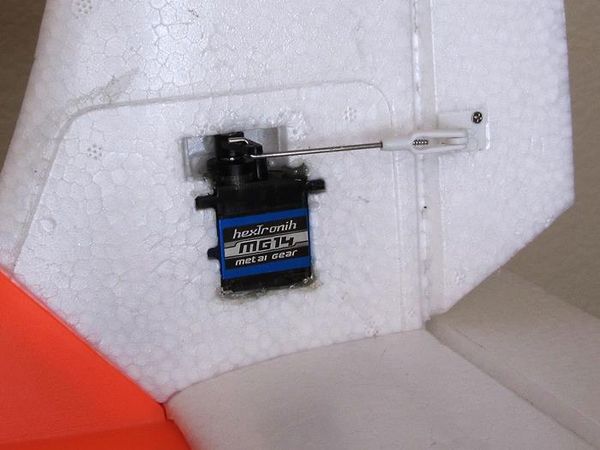
On the tail linkage I used the stock linkage bits with Hextronic MG14 metal gear digital servos. Of course the standard 1/2" Blenderm tape was added to the hinges for strength.
|
Wings
Nothing new or special here. I added 1" (25mm) of 3 mil laminate to the leading edge. Linkage is the same as the elevators and servos are Corona DS929MG's. Blenderm on the hinge line here too.
Fuselage
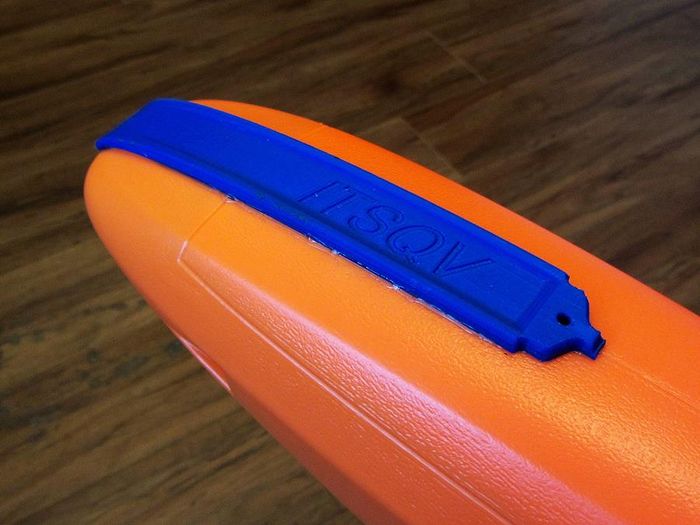
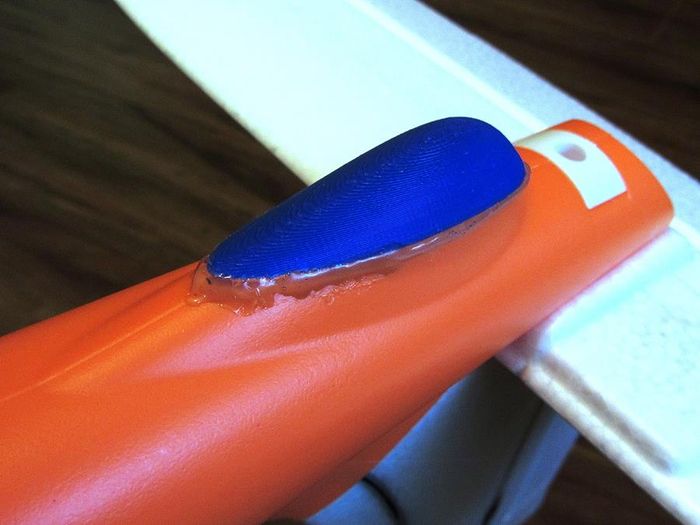
The beauty of a plastic fuselage is it is already very durable. Because of where I fly (and land) I still felt I needed a little more protection on the nose and rear skid so I designed up a couple of skids which conform to the fuselage shape. The new nose skid also has a provision for a bolt-on tow hook which I will add later. These are printed in ABS at 80% infil for durability. For glue, I used E6000 which is similar to UHU-POR and Beacons FoamTac.
|
| Front skid |
|
| Rear skid (with excessive glue) |
Kit/Build Review
I opted for the bare bones kit because I live and fly at 2500ft or more altitude and it has been my experience that most PNP setups are underpowered and supplied with servos that could be improved, etc. With that said, all in all this is a really nice kit. The linkage components in mine are well made and sized perfectly. There are good, solid stiffeners in the control surfaces and having the channels pre-cut in the wings for servo wires is a big plus.
The plastic fuselage is also a big treat. Using plastic makes for an enormous amount of room, it is very stiff and has a nice battery tray pre-installed.
Here are some of my personal points for improvement:
- Please! Stop producing kits like this that will only take a 6" prop. Anyone serious about fixed wing FPV is going to weight it down with gear and packs and a 6 inch prop is not an efficient way to go on a plane of this size. It is also very noisy. A lot more planes would be sold if there were more motor/prop options.
- So, include an optional large prop motor mount for those of us that want to spend more money on motors and props.
- The screw holding the tail together should be much closer to the bottom of the fuse so you can get it out. A socket head cap screw would help as well.
- The four screws holding the wing and motor pod in place are difficult to get in and out which makes it difficult to break this down for travel. Changing them to socket head cap screws would be a big improvement.
- Change the main wing spar to a more common CF round tube that slips into a tube in each wing panel. This would make it much easier to take the wings apart. I simply can't get mine apart without damaging them.
- Put some stabilization inside the fuse on each side of the wooden FC mount. This piece is well glued but it still moves around too much. I inserted two pieces of foam down each side to dampen the movement.
Maiden!
Maiden - 01 January, 2018
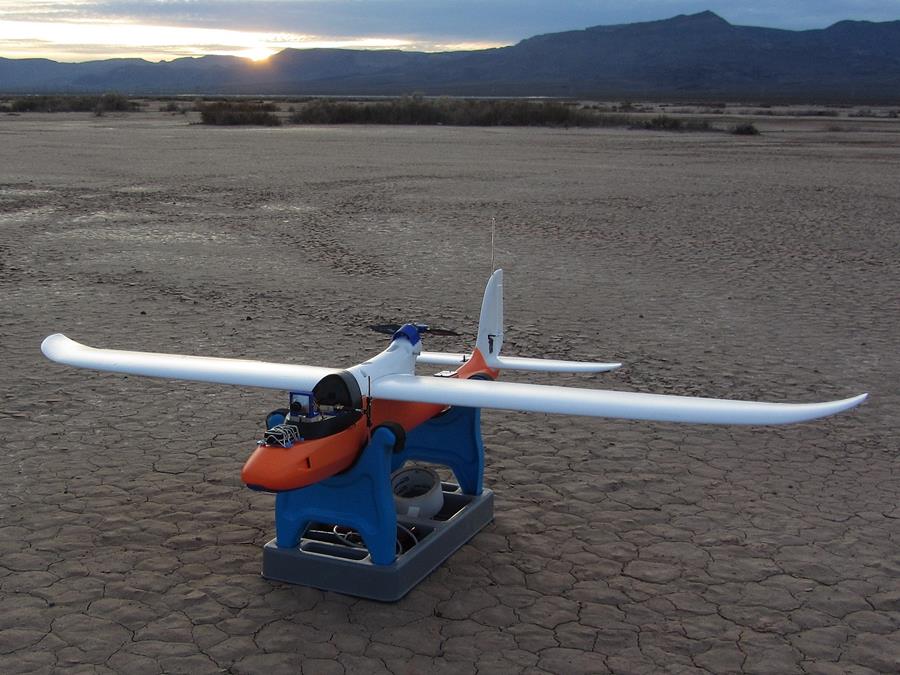
The maiden was uneventful in terms of drama (well, except on the launch!) which is always a good thing. The weather was perfect with temp at ~70F a very light breeze and clear skies. From a flying standpoint, the Stratosurfer flies very well, very controllable, nice yaw response and can be landed slow enough (for me!) without the use of flaps which I haven't installed. The prop I selected, an Aeronaut 7x6 folder was a bit weak as far as climb-out and launch and I will be changing this to an 8x6 Graupner folder for the next flights. The iNav FC needs some tuning and board alignment adjustment but it did its job and kept the plane stable when asked.
|
Maiden Day - 15 January, 2018 |
|
| Post maiden! |
Updates/Mods/Changes
Released Part Updates
Offset Motor Mount
I added stiffening ribs to the motor mount plate as requested by several people. Parts list below is updated.
RX Mount
I added two 2.55mm holes with bosses to the bottom of the mount which you can tap to M3 so you can use nylon screws to hold it down. I originally had it glued down with contact cement which came loose.
Changes & New Parts
APM Mini 3.1 Flight Controller
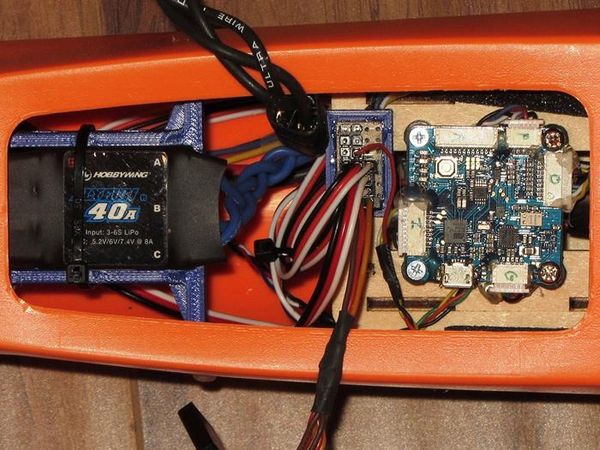
After ~18 flights I finally got tired of trying to get the Banggood Omnibus F3 Pro flight controller to perform like an APM. So, I have now replaced it with an APM Mini 3.1 I had "on the shelf" which is basicly an APM 2.8 in a small package. It flys excellent although I will need to add a compass to get all the benifits from the APM.
Hobbywing Flyfun V5 40A ESC
Got another HW Flyfun V5 in and immediately replaced the HK Blue Series 40A. Nothing wrong with the Blue Series but the Flyfun is a much better unit and with their DEO Technology, also known as Active Freewheeling, these units run amazingly cool at any throttle position and are more efficient at power management. Additionally, they come with a 5.2/6.0/7.4 volt BEC that will deliver a full 8 amps/20 amps peak (tested).
|
| New Hobbywing Flyfun v5 and APM Mini 3.1 |
52143 & 52144 - New FPV Camera Mount
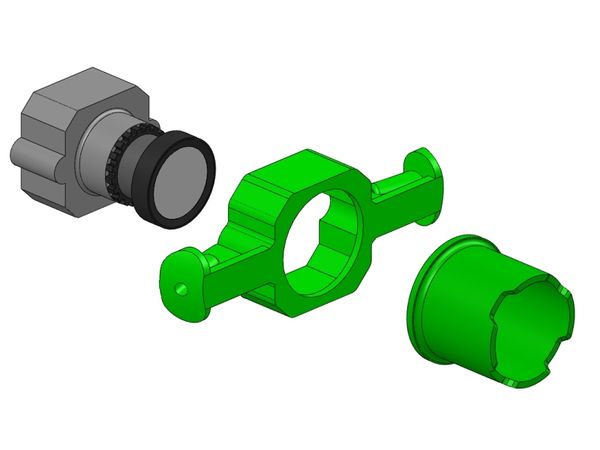
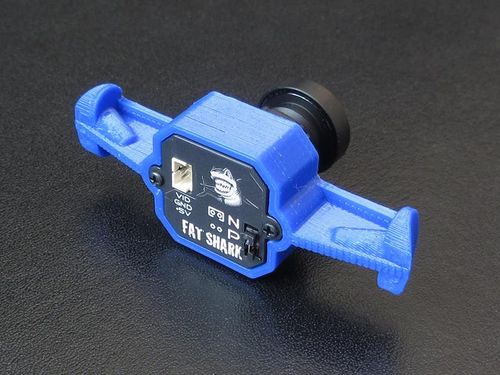
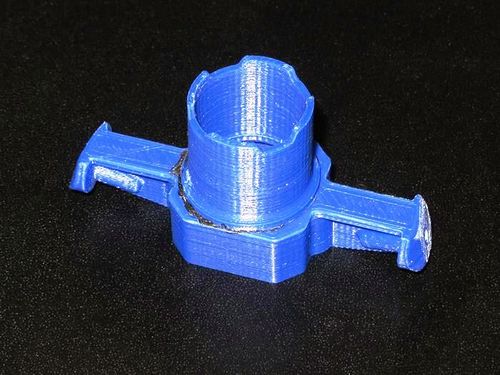
Another mod from my maiden setup is a nose mounted FPV cam. I've seen pictures of others done with a nose cam and I have been on the fence about cutting into it as plastic isn't as easy to patch up as EPO should something go wrong or not work-out. Looking through all my extra gear I found I had a spare Fatshark 700tvl v2 FPV cam which fits very well inside the nose with only the lens needing a hole in the fuse.
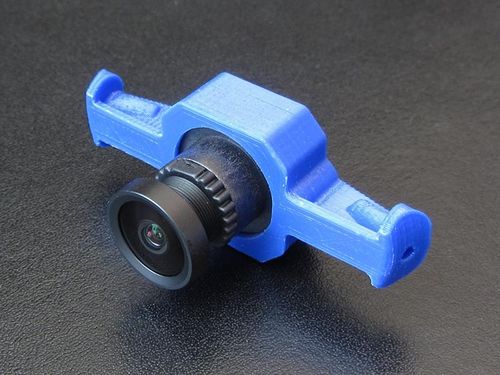
I designed then a 2 piece mount for the camera consisting of a camera mount and a lens hood. The lens hood is glued to the cam mount with ABS glue which is incredibly strong (you must print in ABS for this to work!).
|
| Fatshark camera mount assembly |
|
| Shown without lens hood |
|
|
| With lens hood glued |
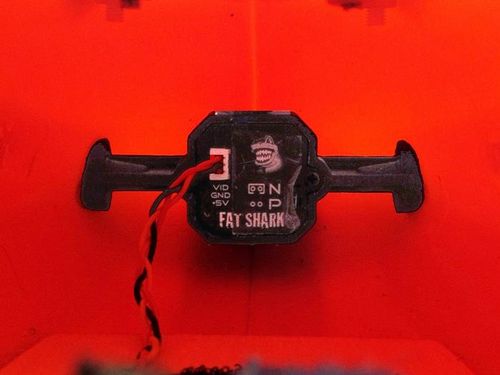
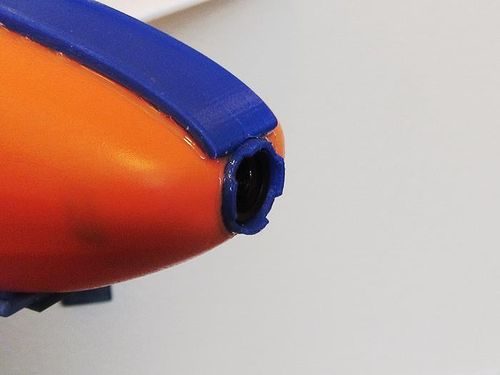
Once the two pieces are glued together, a hole is cut in the nose and the assembly is glued in (I am using E6000 glue). The mount is shaped to fit so that the camera and its lens hood are looking down about 2 degrees but some fine "Dremel" tunning is required. It is also a challenge to get it in there as there is not much room for fingers and hands.
|
| View from the inside |
|
| Bottom view shown with front skid |
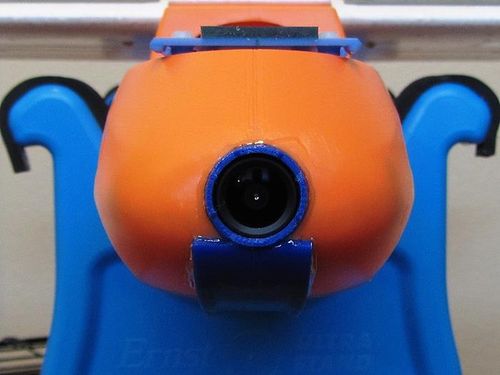
|
The last bit is optional but recommended. There are two small 2.55mm holes in the mount that can be used for a small screw on each side if you want more strength in the mount. You can either tap the holes to M3 and use nylon screws or just use self taping screws. These screws are not shown here but will be added. The camera should lightly press into the mount tightly, if not, put a layer of tape on the sides to tighten it up.
52145 - GPS Mount for 36mm Sqaure Ublox
Because I changed to an APM flight controller, I needed to add a GPS unit with a magnetic compass. This mount then is to fit the new GPS unit.
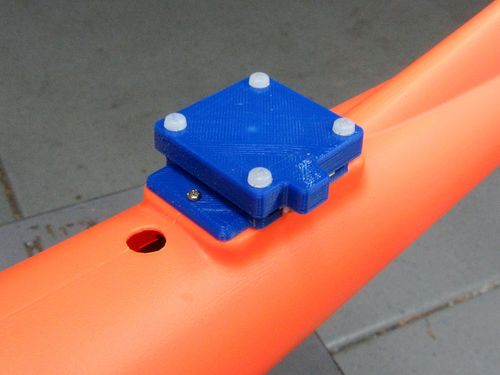
|
| Mount with cover |
52147 - Prop Strike Protection Plate
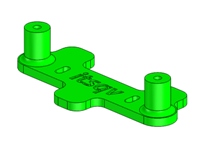
Because the plastic fuselage is quite thin and very easily cut, I decided to add a prop strike protection plate. This is also because I do not trust the integrity of the foam supporting the motor mount which could easily break away from the motor pod.
The piece shown in the picture is longer, side to side, then the final print version.
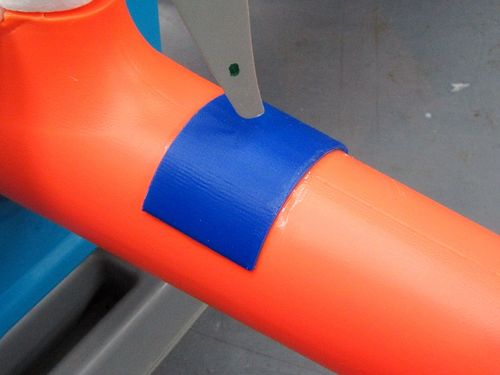
|
| Shown with an APCe 8x6 prop |
52148, 52149, 52150 - New Small Canopies
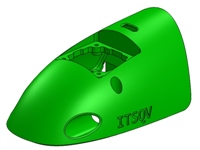
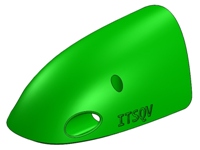
Finally finished the small canopy shape and have released (below) two canopies and a mount that screws down to the plywood deck.
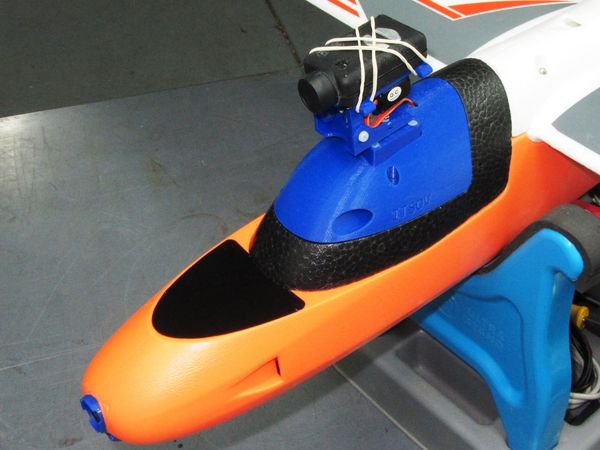
|
| Mounted on the plane, Pan and Tilt version shown |
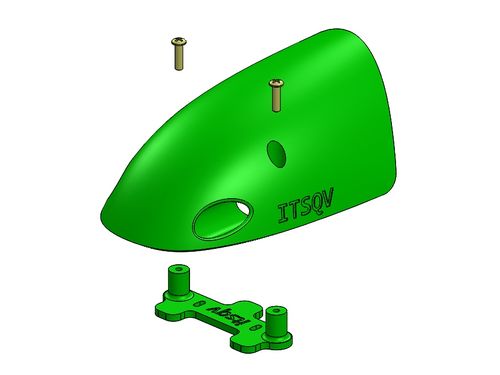
|
| Plain canopy with mount |
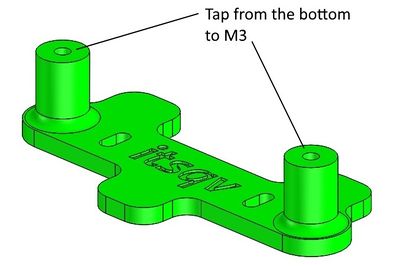
|
| Canopy mount |
Future Canopy!
Below is a canopy concept I am working on for this plane. It is a full length unit that hopefully will be printable as one piece. I haven't developed the cut-outs for the long canopy yet but here is the basic shape and how it fits on the fuselage. With a shell thickness of 1.4mm the weight would be close to 42g.
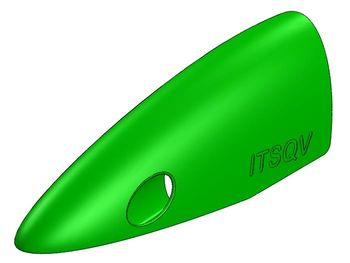 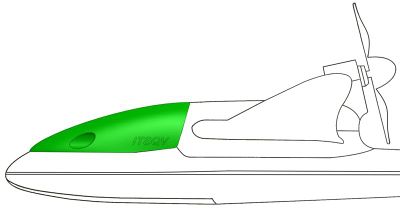
|
| Long Canopy concept |
- Stay tuned!
Stock Motor and Wing Mount
It is well known, the vast majority of fixed wing FPV hobbyists over-power their planes and add more FPV gear than needed. In addition, a very large number of us long-range types are always looking for the best flight efficiency to get the longest extended range and/or flight time and this means we will try any motor/prop/battery combo we can fit. This generally ends up being a larger motor with low Kv to run larger, deeper pitch props at a lower RPM.
How the manufacturers of planes marketed as “Long Range FPV” rigs don’t understand what the community wants in an “FPV” plane is a complete mystery to me!
- "On ALL fixed wing planes designated as FPV planes, especially those sold as "long range", we, the FPV community, want the ability to use larger motors and props than you or your designers think are appropriate"
In the case of the Stratosurfer, putting a larger prop on the plane requires an offset or extended mount. The problem with this idea is the stock wing/motor mount is not designed to accommodate a larger motor and it is certainly not designed to handle an offset mount of any kind.
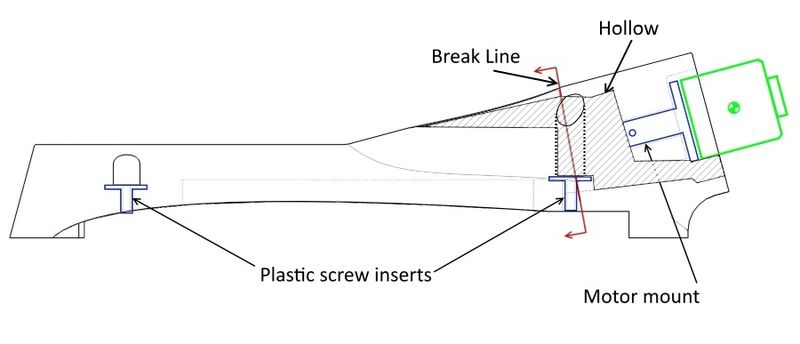
It’s a design problem. The stock mount has very little foam support and even with a stock motor set-up it is very likely this mount will eventually fail on a hard landing. In fact, directly in front of the stock mount piece, the supporting foam is mostly hollow. Here is a general sketch of the stock mount and you can see there is no hard plastic structure tying the motor mount part to the wing screw insert so the only support is the foam which, again, is mostly hollow.
|
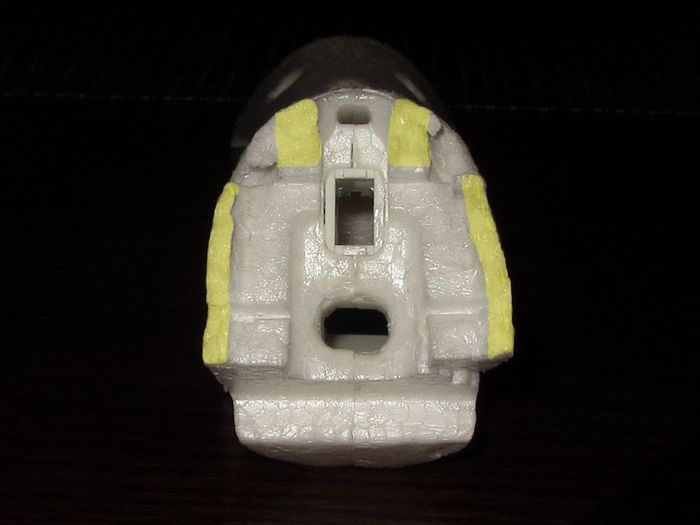
Below is a picture of a failed mount showing how small the area of foam support is. The area highlighted in yellow is all that supports the motor and the motors center of mass is above the weakest part of this support putting it in an extreme stress condition.
|
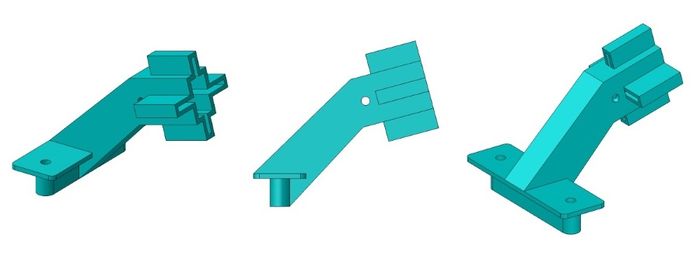
So, at the very least, the designers should have tied the mount piece to the rear wing screw insert. This would transfer most of the load into the screw mount. Below is a part illustration of this idea:
|
OK, my solution:
Low Profile Wing and Motor Mount
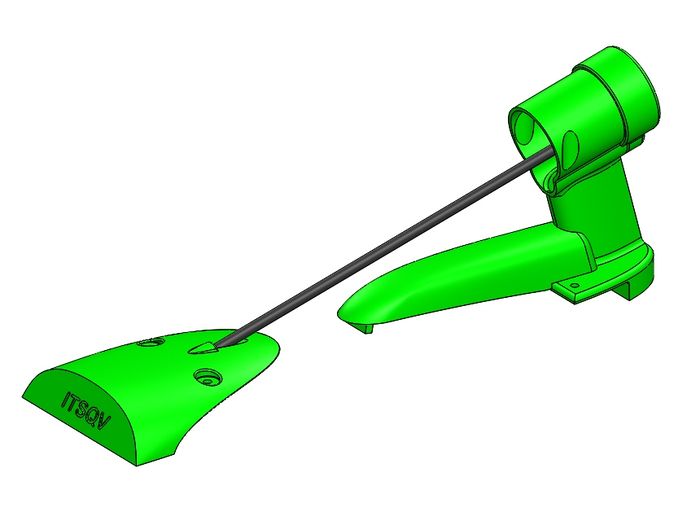
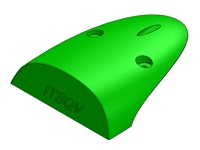
My solution is a two part (5 piece) wing & motor mount that are tied together with a 4mm CF tube. This gives the same wing clamping force as the original two screw inserts but adds an immense amount of strength to the motor mount which is now integral to the wing mounts and their screws. It is also extended to allow 8” props. The total mass of these pieces is 24g more than the foam mount with the motor mount insert.
|
There are 5 parts to this solution:
- 1. Front wing mount cover
- 2. Motor mount
- 3. ESC wire cover
- 4. Motor shroud (optional)
- 5. 4mm x 2mm Carbon Fiber tube
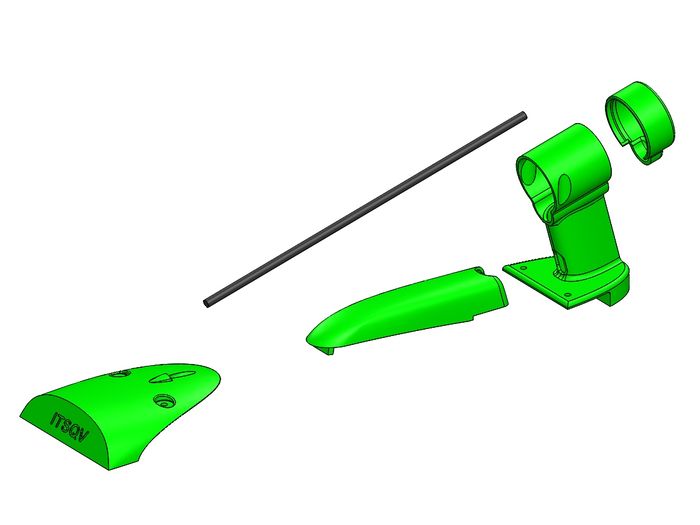
|
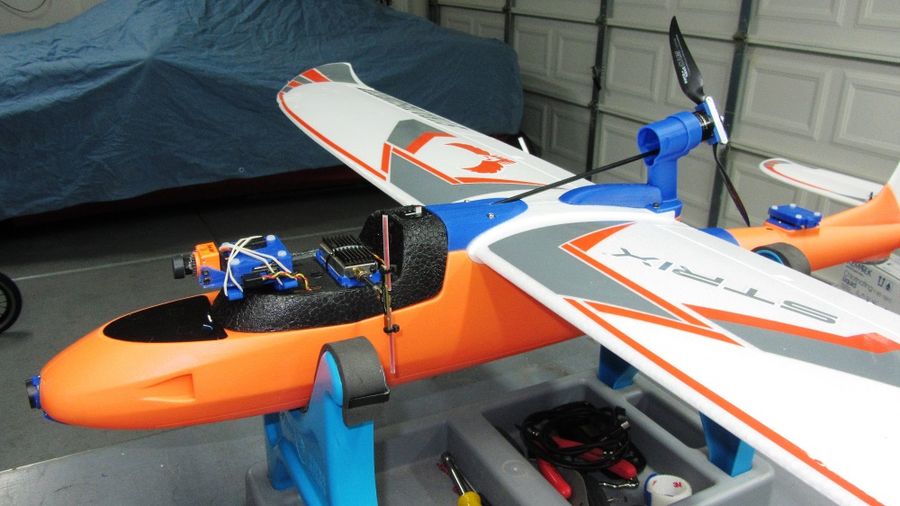
Now, because this is a low profile solution, the front foam canopy base needs to be carefully cut to match the front wing mount piece. Below is a picture of mine with the foam piece cut to match and a spring latch added to replace the magnet. Shown with a 2216 motor and an 8" Aeronaut folding prop.
|
Coming soon, I will release a longer 1 piece canopy to go with all of this. Sure makes the plane look slippery!

|
See below for these new parts!
Project 3D Print Files
Below are the 3D print files shown in this build.
- General print notes:
- 1. All parts are shown printed in PushPlastics ABS filament
- 2. Motor mount and front & rear skids are printed at 80% infil, all others are 20-40%
- 3. All weights are as printed and subject to change depending on printer/slicer set-up
- 4. Print orientation is dependent on printer/slicer set-up, please rotate if necessary
All content is ©Mark Qvale and available under Creative Commons Attribution-NonCommercial-ShareAlike 4.0 International license unless otherwise noted or agreed to in writing.
| Image | Part Number | Part Description | Weight | Print File | Compatibility Notes |
|
52136 | ESC Mount, 25mm | 6.7g | 52136.STL | Fits a 25mm wide ESC |
|
52137 | GPS Mount | 3.3g | 52137.STL | Mount for a Ublox Mini 7M GPS |
|
52138 | Motor Cowl | 4.0g | 52138.STL | Motor and mount cover |
|
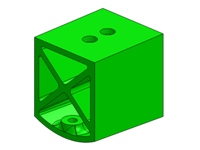
52139 | RX Mount | 4.2g | 52139.STL | Mount platform for DL RX UPDATE - Added screw holes |
|
52140 | 19mm Offset Motor Mount | 3.1g | 52140.STL | Motor mount to allow 7 & 8 inch props UPDATE - Added stiffener ribs |
|
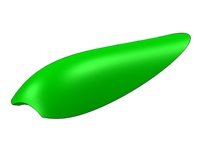
52141 | Rear Skid | 2.0g | 52141.STL | Glue on rear skid |
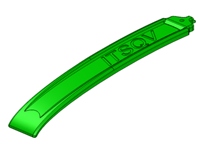
|
52142 | Front Skid | 12g | 52142.STL | Fuselage glue on front skid (print on edge) |
|
52108 | VTx Saddle Mount | 2.7g | 52108.STL | Saddle mount for a 26mm x 50mm VTx |
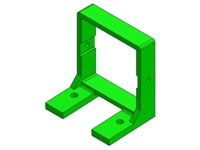
|
47010 | HS1184 Camera Mount | 4.9g | 47010.STL | Simple box camera mount for the Surveilzone HS1184 FPV camera |
New parts!
| Image | Part Number | Part Description | Weight | Print File | Compatibility Notes |
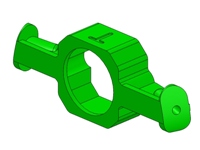
|
52143 | Stratosurfer Fatshark FPV Mount | 3.2g | 52143.STL | Fits the Fatshark 700tvl v2 FPV camera |
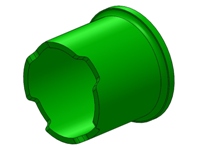
|
52144 | Stratosurfer Fathark Lens Hood | 1.3g | 52144.STL | Lens hood for two piece Fatshark mount |
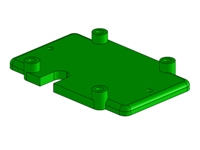
|
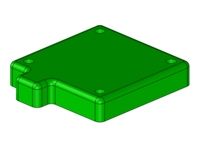
52145 | Stratosurfer 30mm GPS Mount | 4.6g | 52145.STL | Mount for 30mm x 30mm (hole centers) Ublox GPS |
|
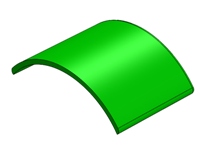
52146 | Stratosurfer 30mm GPS Cover | 4.2g | 52146.STL | Cover for 30mm x 30mm (hole centers) Ublox GPS |
|
52147 | Prop Strike Plate | 5.8g | 52147.STL | Extra protection against prop strikes |
|
52148 | Small Canopy Mount Plate | 3.7g | 52148.STL | Mount to hold the small canopy in place |
|
52149 | Small Canopy with Attachment Deck | 27g | 52149.STL | Fits the lightweight pan and tilts and roll gimbal |
|
52150 | Plain Canopy | 25g | 52150.STL | A plain deck which can be cut to fit cameras, etc. |

|
52151 | ESC Mount, 28mm | 6.7g | 52151.STL | Fits a 28mm wide ESC |
Low Profile Wing & Motor Mount Parts
| Image | Part Number | Part Description | Weight | Print File | Compatibility Notes |
|
52156 | Stratosurfer Front Wing Mount | 11.6g | 52156.STL | Low profile wing mount and cover |

|
52153 | Stratosurfer Extended Motor Mount | 18g | 52153.STL | Bolt-on motor mount that can use an 8" prop |

|
52152 | Stratosurfer ESC Wire Cover | 3.6g | 52152.STL | Cover for the ESC wires on top of the wing |
|
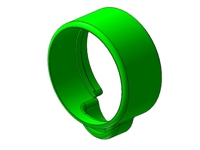
52154 | Stratosurfer Motor Mount Shroud | 2.3g | 52154.STL | Optional glue-on motor shroud |
See Also
Some of the Vendors I used for this project
Comments? Questions?
