Zeta WingWing Z84
| |
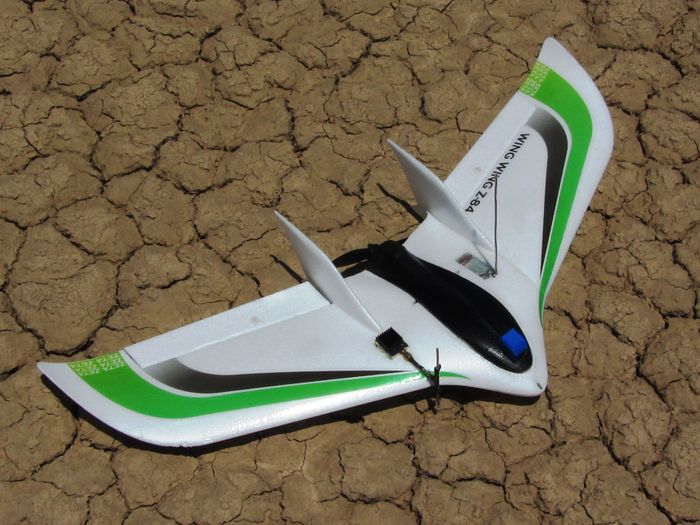
| New (tiny) wing! |
Introduction
I decided to try something much smaller in the Wing world. The Z84 is a smaller version of the C1 and FX-61 and I am hoping it flys well as I want to take it backpacking! For flight management/control I'll be starting with an Omnibus F3Pro flight controller to keep it light and simple.
Here then is a collection of my build notes and eventually a flight review of this plane.
General Specifications
Distributor - HobbyKing, USA
Aircraft - Zeta WingWing Z84
Build Date - April, 2018
| Airframe Type - | FPV Wing | All-Up Weight - | 18.1oz (512g) w/ 3S/3500 Li-ion Pack | |
| Wingspan - | 33.26in (845mm) | |||
| Length - | 15.9in (405mm) | COG - | Spar front edge (Stock) | |
| Wing Area - | 1.5 ft^2 (14.4dm^2) | Wing Load w/3500mAh/3S - | 12.1 oz/ft^2 (35g/dm^2) | |
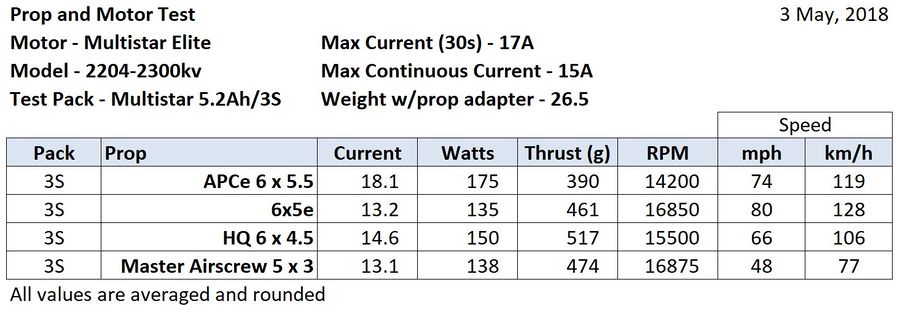
| Motor - | Multistar Elite 2204-2300kv | Max Continuous Power - | 170 watts (3S) | |
| Propeller - | 6 x 4.5 HQProp | Max Prop Power - | 150 watts @ 2550ft ASL | |
| Static Thrust & Prop Speed - | 517g & 88mph @ 2550ft ASL | Static Thrust/Weight - | 1.0:1 | |
| Battery Type - | 3S1P LG INR18650MJ1 Li-ion | Battery Capacity - | 3300mAh | |
| In flight efficiency - | TBA | Flight Time - | TBA | |
Components/Flight Gear
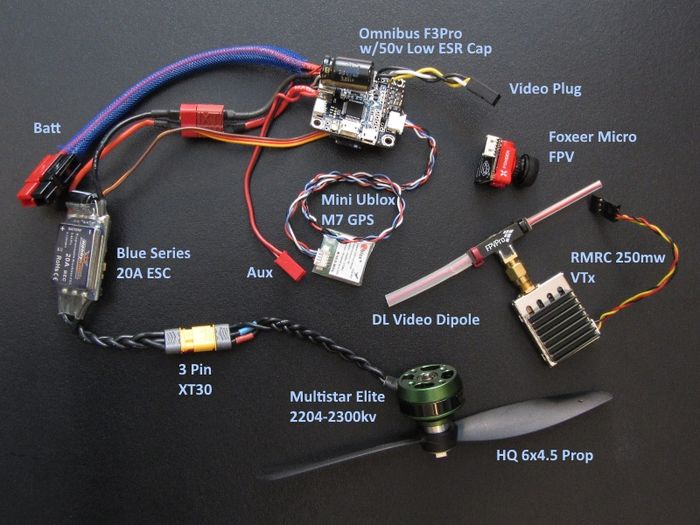
Below are my initial components. Not shown is the DragonLink Micro MR-RX:
|
| Initial selected components |
|
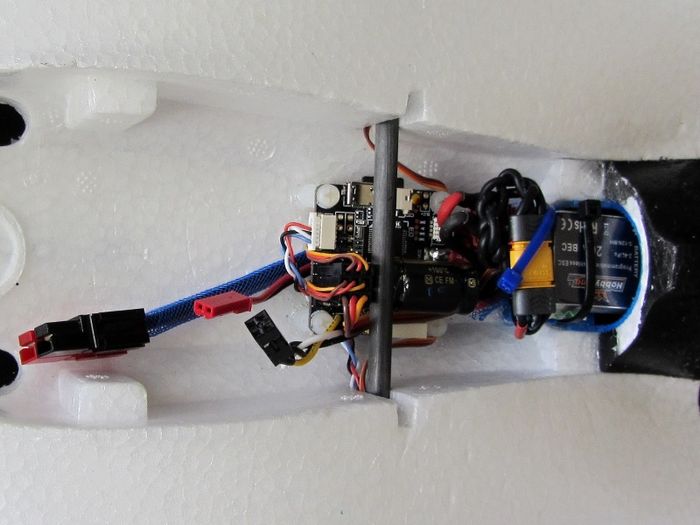
| FC,ESC & Motor Mounted |
|
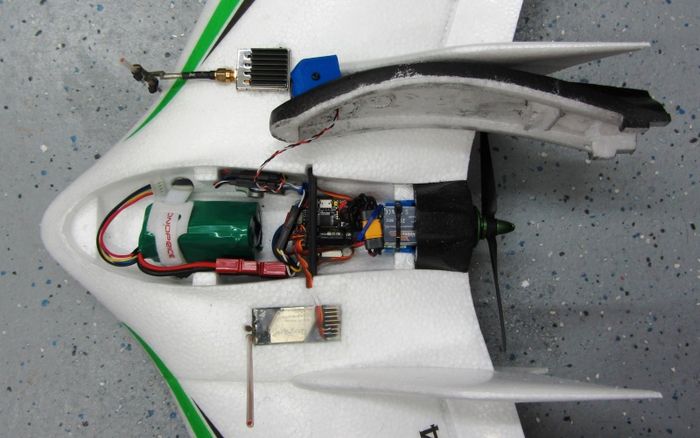
| All geared up and ready for maiden! |
Power Set-up
For power on this build I will start with a Multistar Elite 2204-2300kv motor and a HobbyKing Blue Series 20A with a single Low ESR capacitor added.
- Motor - Multistar Elite 2204-2300kv
- ESC - Blue Series 20A
- Prop - HQ6x4.5
- Battery - Li-ion 3S/3500
|
Motor Mount
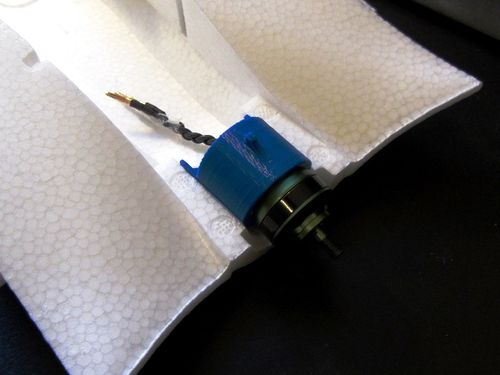
I have designed a 3D printed motor mount which places the motor 10mm rearward of the stock mount. This is to accommodate a standard 22xx motor and standard prop. To use a folding prop I will have to put the motor on an additional 10mm stand-offs.
|
| Mount and 2204 motor |
ESC Mount
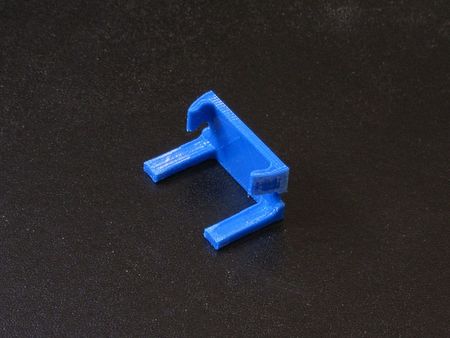
I decided to design and print a simple mount which glues into the motor mount and bottom of the fuselage. The ESC is held down with a single wire tie and there is a foam pad between the ESC and mount deck.
|
| ESC mount |
Flight Control
For initial flight control I chose the Omnibus F3Pro from Banggood. It is an inexpensive and in my experience completely reliable FC. This is the same board I have in the larger C1 Chaser
-
- w/iNav 1.8.1
FC Mount
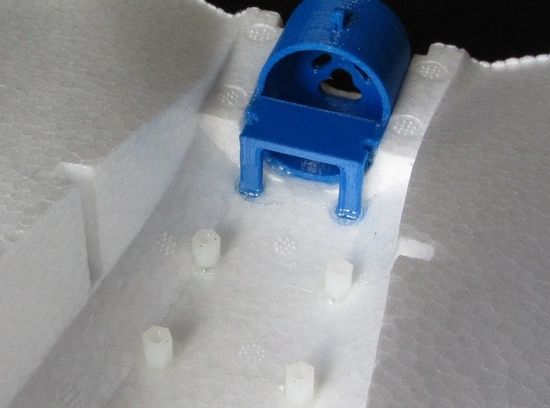
To mount the FC I Glued in some 6mm stand-offs in the bottom of the fuse.
|
| Motor, ESC and Flight Controller mounts |
RC Control
For radio gear I am using my standard DragonLink V2 system. I have mounted a multi-rotor RX with integrated DL dipole to the left of the hatch.
GPS Mount
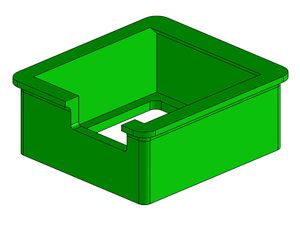
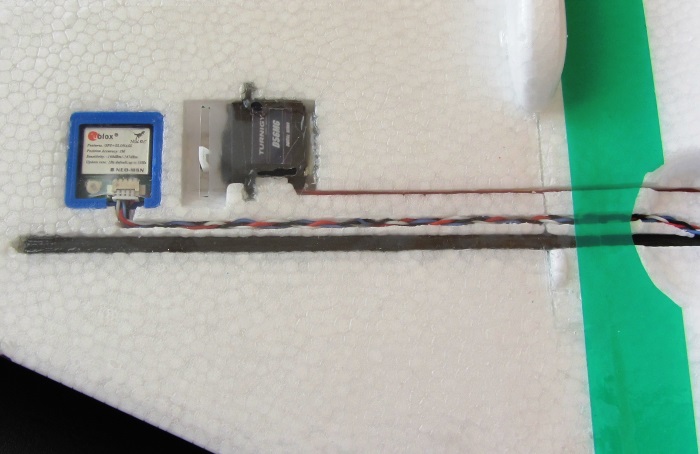
For the GPS I used an inverted version of the one on my C1. This is to mount it under the wing and it is sized for a Ublox Mini M7 GPS.
|
| GPS Mount - 1.71g |
|
| Mini Ublox GGS mounted under wing |
FPV Gear
- VTx - RMRC 200mw, 1280gHz
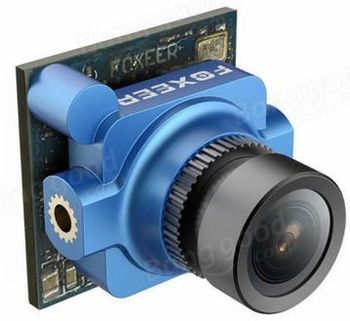
- FPV Camera - Foxeer Arrow Micro V2 with 2.1 lens
- HD Camera - TBA
|
| Foxeer FPV Camera |
Airframe Mods and Set-up
Front Nose Skid
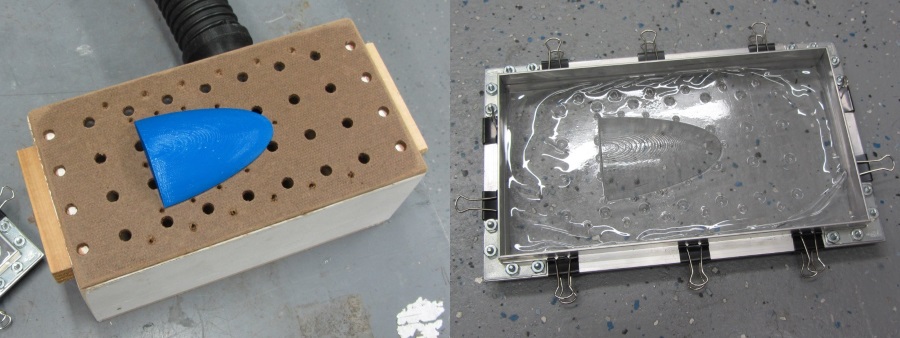
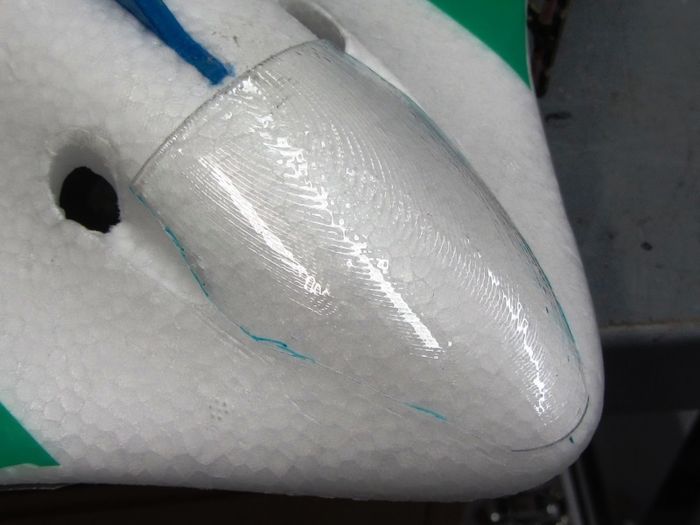
While I originally was going to go for a simple tape skid on the nose, I had some extra time so I designed and printed a plug that copies the shape of the nose and vacu-formed a skid.
|
| Vacu-form plug and part (with vacu-frame) |
Part Specs:
- Material - .020" Clear PETG Sheet
- Part Weight after trim - 2.24g
Below is how it looks with most of the trimming done.
|
| Trim and Fit-up |
For glue I used Gorillas "Clear Grip" contact adhesive which is an excellent cement for attaching plastic parts to EPO.
Wings
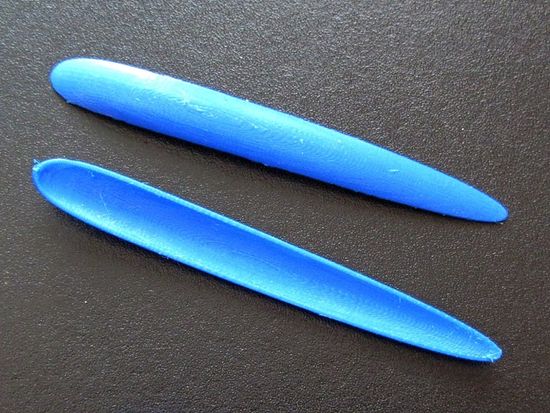
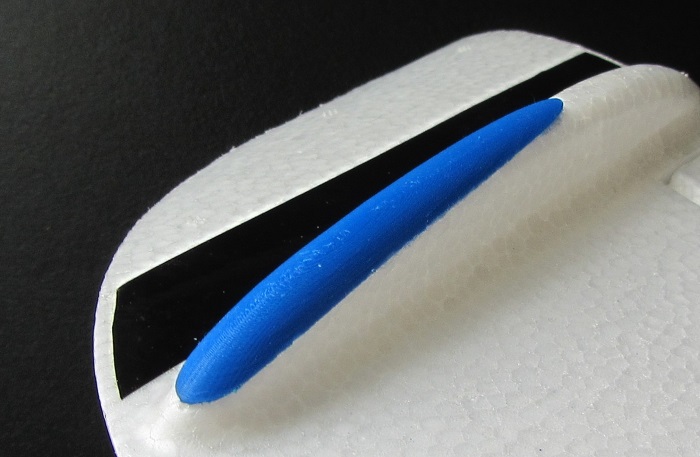
Printed a couple of form fitting skids for the wing tips. This area on both my C1 and FX61 get really banged up so this time some 1mm thick skids.
|
| Printed Wing Tip skids |
|
| Installed skid |
Airframe Changes
I made some initial changes based on experience with the C1 and FX's and listening to some of the more expert posters on RC Groups.
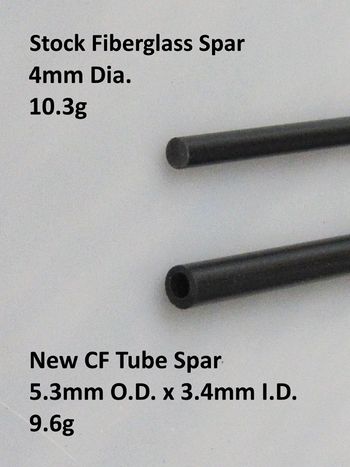
The first change was to swap the very flexible fiberglass spar for a slightly larger Carbon Fiber tube spar. The CF spar is slightly lighter but considerably stiffer. I only had to do a small amount of hot-wire work to fit it in nicely. Of course this means I will have to come up with my own hatch latch (stay tuned).
|
| Spar change |
The next "Aero" change I made was to cut down the center fin on top of the hatch and grind away the rear flare around the motor mount top and bottom (not shown). The fin on top just collects damage and blocks air to the prop. The flare around the motor mount makes the prop much less efficient and much, much noisier!
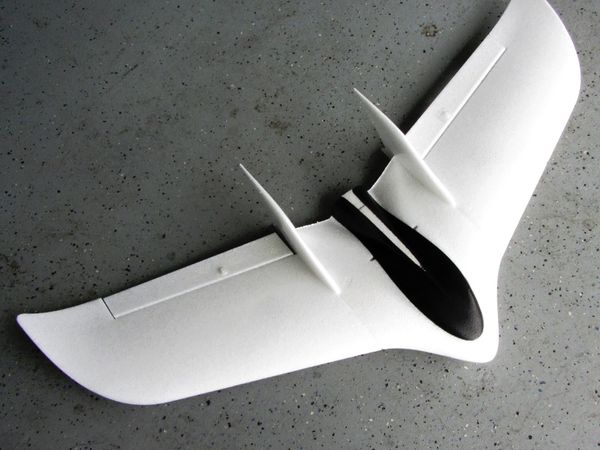
|
| Initial cut |
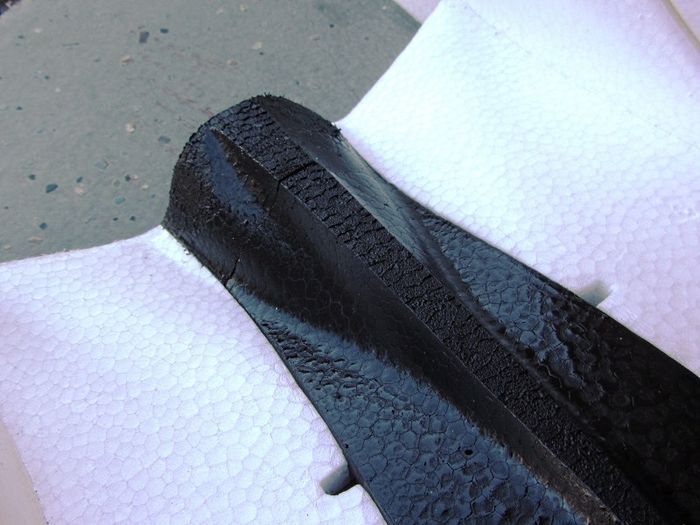
|
| close-up |
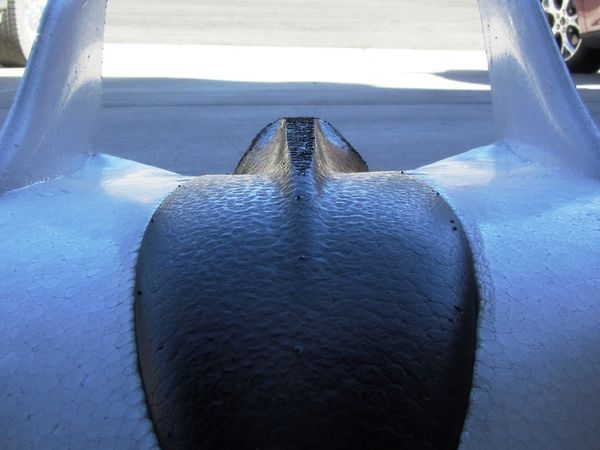
|
| Front-to-back view |
More Mods!
Here are a few mods I've done after flying for sometime.
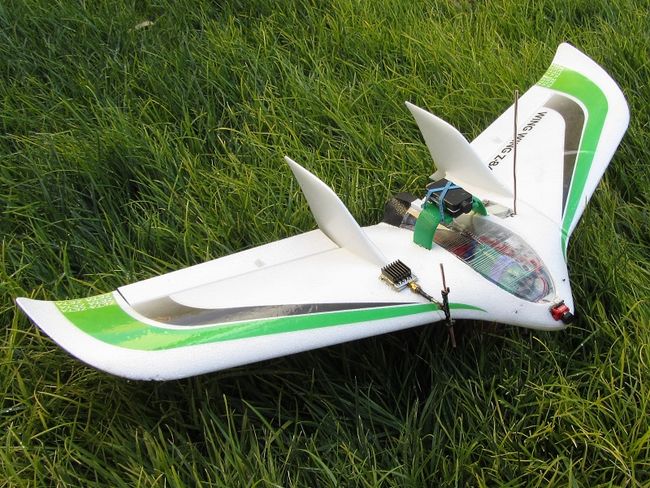
|
- Changed the motor to a Lumenier 2205-2450, Prop is an HQ 6x4.5
- Replaced the HK 20A ESC with a BLHeli 30A Opto
- Added a 5A/5.2v SBEC
- Changed the FPV Cam to a Foxeer Micro
- Made a Mobius camera mount to span the fuse and get it off the canopy
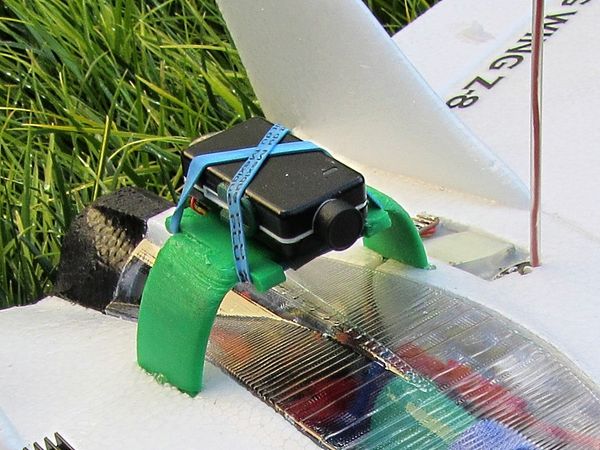
|
- Vacuformed a new canopy (9G)
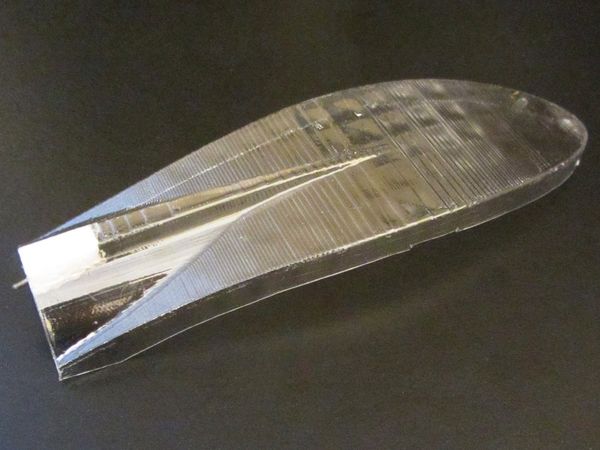
|
New total AUW with a 3500mAh/3S Li-ion is now 565g
Kit/Build Review
The Zeta WingWing Z84 is a good, complete kit. I bought the kit version (no electronics) as I don't trust any PNP kit as far as component quality. It is very much a scaled down version of the FX-61. The parts are all decent quality and all pieces went together without issue.
Here are some of my personal points for improvement:
- The motor mount is extremely weak! I designed and printed a much more robust version which cost me an additional 3g.
- It would be nice if Zeta would copy some of the features of the C1 Chaser such as the top wing linkage set-up. This planes lower linkage will be very susceptible to damage just as the FX-61 is.
- Widen the gear bay (see C1 comment above). Even an additional 10mm would help immensely!
- Provide molded plastic skids for the wing tips and the front nose. I designed and printed the wing skids which are 1.3g each. I'll probably use tape on the nose.
- Get rid of the lower vent holes and put them in the canopy instead. This will keep the dirt frome getting in the gear bay and ultimately in the motor.
Maiden!
What a great tiny flyer! Weather was perfect at 82 degrees F and very light wind. I built this wing to use as a backpack FPV rig and so I maidened it as such. I used a lightweight 1.5kg bungee for the maiden as I wasn't sure how it would fare on a hand launch with the motor & prop I have in it.
Everything worked flawlessly until the landing which caused no damage but the plane did sink very quickly with the throttle off due to my not setting the brake on the ESC so the landing came up a little short. Not having the brake set also caused the prop to break (OK, so there was a little damage).
|
Maiden Day - 20 May, 2018 |
Project 3D Print Files
Here are the 3D print files shown:
The total weight of all 5 parts is ~15.4g, depending on print set-up. The cover over the Foxeer FPV camera is not included.
See Also
Some of the Vendors I used for this project
Comments? Questions?