How To - Create Night Lights!
From my July 2012 article - "ITSQV_Lights!"
INTRODUCTION
RC plane lights have really brought the other 12 hours in a day alive. There are many different ways to light a plane from flashing beacons and landing lights which are very scale looking to adhesive strip lights that come in many different colors. One of the more popular light set-ups on the larger planes are made by Aurora RC Lights. These lights are generally high end LED emitters mounted to stalks at the wingtips and sometimes under the tail. They do an amazing job lighting up the aircraft with brilliant white light.
For this build, my goal was to create this lighting effect for my 40" DW Juka Foamy. Because this is a small foamy, I needed components that would not use too much battery and be as light as possible.
The Build
First, gather the bits. Below, the parts list has links to stores which carry these in stock.
Parts List
- .063 Carbon Fiber Rod 16"L
- 1/8 x .040 Carbon Fiber Strip
- 3/64" Plywood
- 1mm Carbon Fiber Sheet (optional)
- 3W, 8000deg, White LED Emitter 4x
- 7.2v Voltage Regulator
- 32ga Servo Wire
Specs
- Power - 12 Watts
- Current @ 7.2v - 1.67A
- Weight
- One Strut with all hook-up wire - 6.4gr
- Regulator with pigtail - 13.6gr
- Total Weight - 26.4gr
Cut, Shape, Fit
After looking at how the auroras were set-up I decided on a strut length of 8" for a plane this size. This puts each emitter about 4" above the wingtips with about an inch of ground clearance.
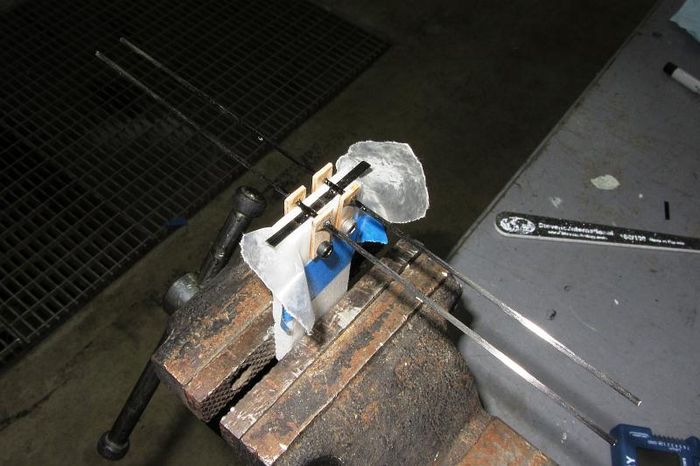
Next I cut two pieces of plywood to 5/16" x 1" and drilled an .067 hole and a #29 drill hole in each one. I then clamped a piece of 9mm Depron foam in the vice and bolted the two pieces of plywood to the foam. Next, I threaded the CF rod through the .067 holes placed the CF strips under the rod and glued it all up with epoxy.
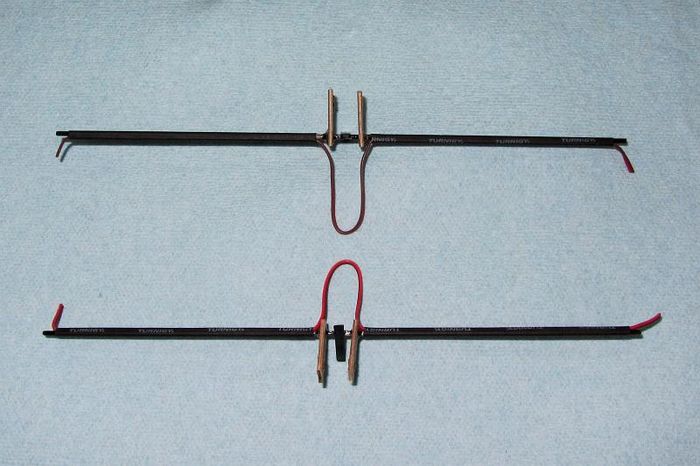
From the 32ga servo wire, I stripped the signal wire off to make it 2 conductor and put 3mm shrink tube over each strut. I left enough wire to make permanent connections.
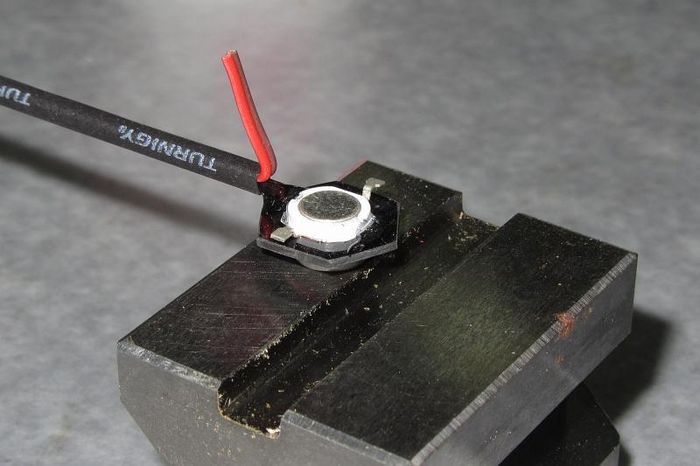
I made the four emitter mount plates out of the 1mm CF sheet. This is optional as you could use the plywood, I just had some scraps. To make these I drilled a 5/16" hole in the CF sheet covered with masking tape. Then I placed a 5/16" bolt in the hole and traced the hex profile onto the masking tape. I used a thin Dremmel carborundum cut-off wheel to cut the CF. With a little filing I could snap in the LED emitters.
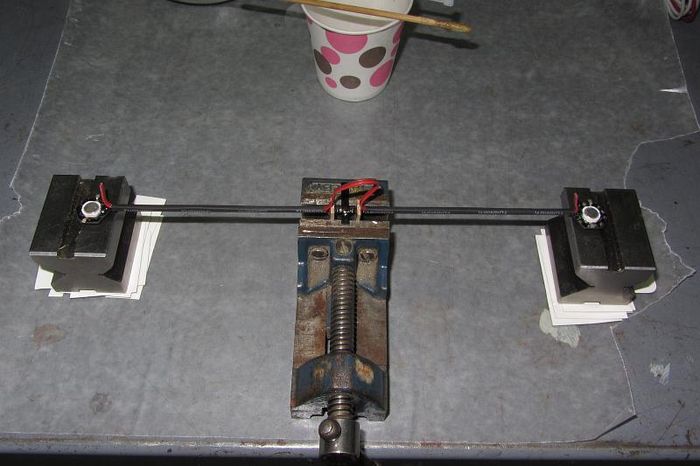
Now it is clamp and glue time. The picture shows how I set it up using a small vice and a couple steel blocks. (The emitters were sitting in APC prop adapter rings.)
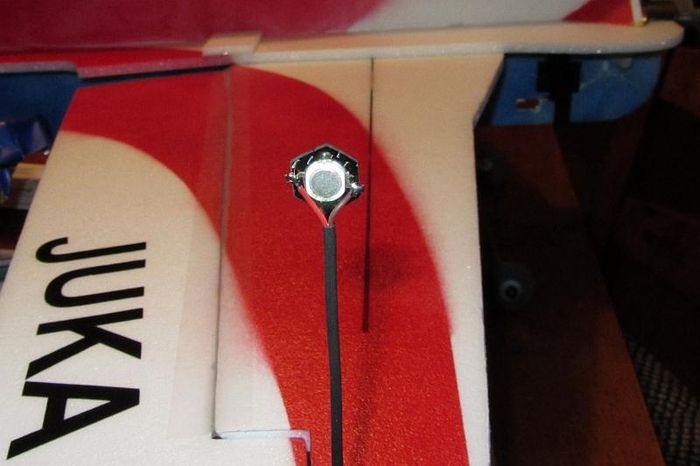
I soldered all connections after everything was glued up. I did not use connectors at the wingtips but rather added enough wire to reach the fuse. Here is a detail of the emitter connection.
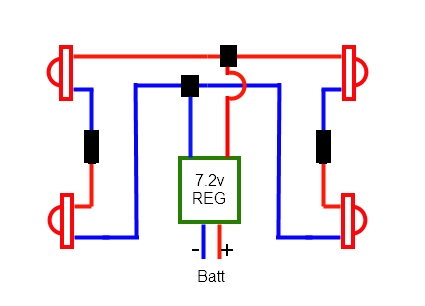
Using the 7.2v Voltage Regulator, I wired the lights up in series/ parallel. Each emitter has a voltage requirement of 3.4v to 3.7v so it is important to wire them in series on each wing and in parallel at the regulator.
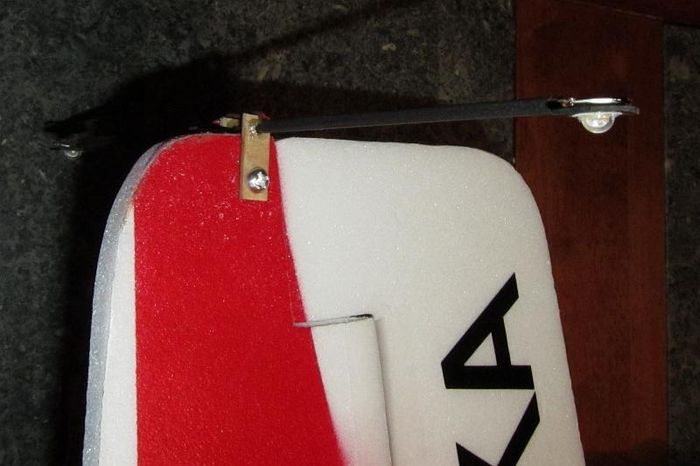
This front profile view shows the wood wing clamps. I used an aluminum 6-32 screw to keep it light.
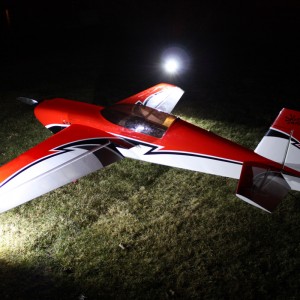
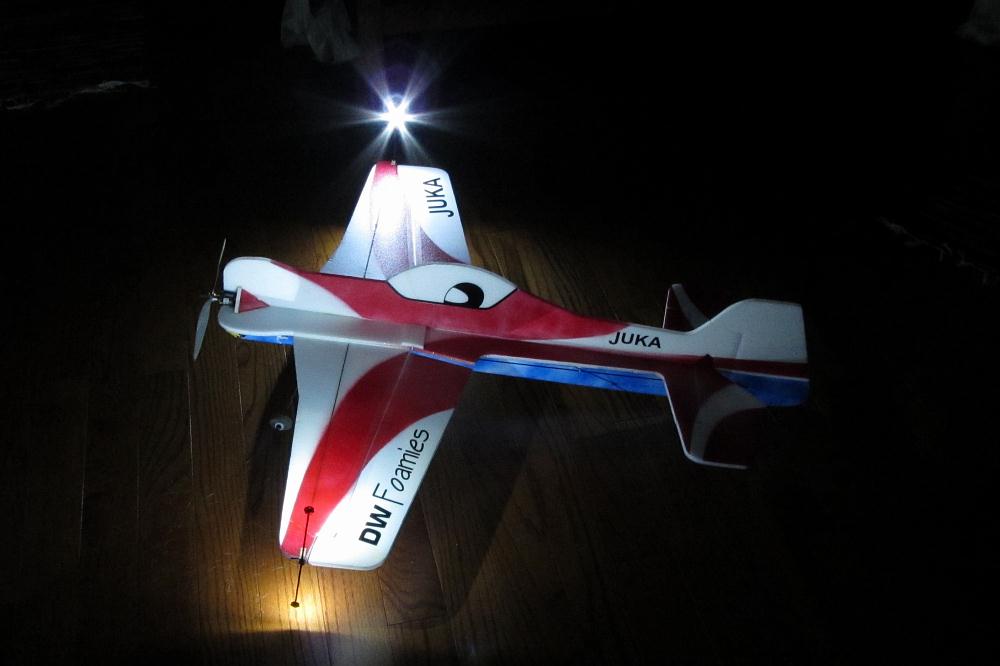
All mounted and lit up!
Flying
It looks sharp! Compared to the strip lights I think this looks considerably better because you can see the plane. With the strip lights you could only see the somewhat fuzzy color stripes.
Note
These LED emitters give off a lot of heat so be careful handling them after they have been on for a while.
Now, GO FLY!
