Hoverthings HT-FPV Quad
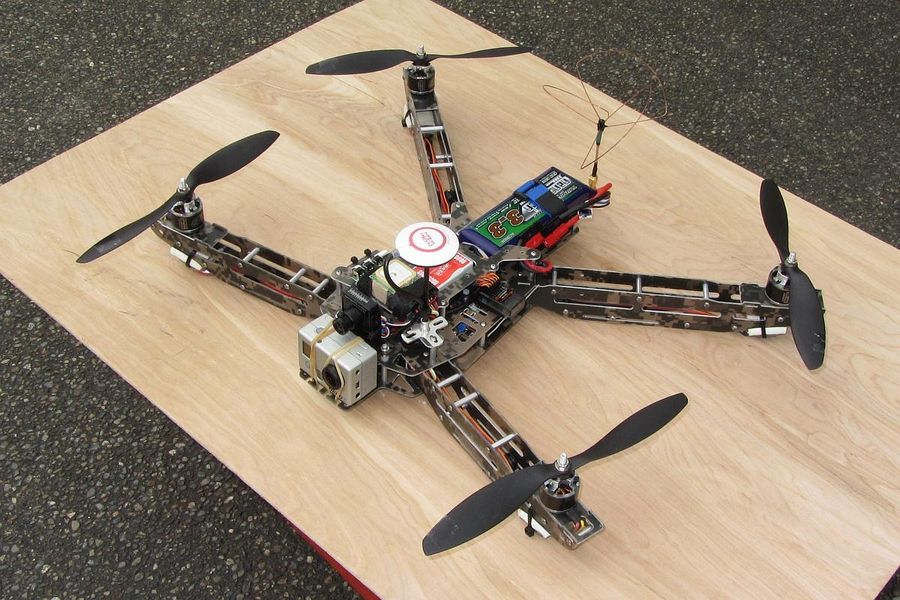
|
| Just waiting for some sunshine! |
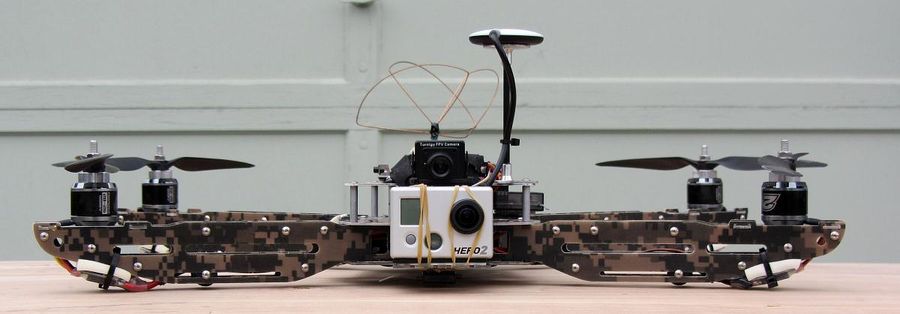
|
| Super Low! |
Contents
Hoverthings HT-FPV Build Log
OK, I got bit by the FPV bug...
General Specifications
Build Date - August 2012
| Airframe Type - | Multi-rotor Quad-X | Flying Type - | Sport Photography | |
| Motor Centers - | 510mm / 21.6" | Propellor Span - | 28.5" | |
| Rotor Area - | 254 sq. inches | Weight - | 48oz | |
| Motor - | NTM 28-26 1000Kv X4 | Rotor Load - | 27.4 oz/sq. ft. | |
| Propellor - | 9 x 4.7 Gemfan Carbon | Power - | 1000 watts MAX | |
| Thrust - | 128 ounces MAX | Thrust/Weight - | 2.66 | |
| Battery Type - | Lipoly 3s1p | Capacity - | 3300mah, 35C | |
| Speed Control - | SimonK 30A X4 | BEC - | N/A |
Component List
The component list includes all the major components needed. What is not shown are additional fasteners tie-wraps, connectors, aluminum materials, etc. Also not shown is the radio reciever. The quantities shown are for a single build and do not reflect spares such as extra props or battery packs.
| Item (as of June 22, 2012) | Price | Quant | Sub-Tot |
| Hoverthings HT-FPV Frame Kit in Camo | $125.00 | x1 | $125.00 |
| NTM Prop Drive 28-26 1000KV/315W | $15.99 | x4 | $63.96 |
| NTM Prop Drive 28 Series Accessory Pack | $1.89 | x4 | $7.56 |
| GemFan 9x4.7 Normal & Reverse Rotation | $1.75 | x4 | $7.00 |
| SimonK 25A Flashed ESC by Steve (saabguyspg) | $22.00 | x4 | $88.00 |
| Nanotech 3300mAh 3S 35C Lipo Pack | $21.25 | x1 | $21.25 |
| DJI Naza Flight Controller | $230.00 | x1 | $230.00 |
| DJI Naza GPS add-on | $169.95 | x1 | $169.95 |
| EzOSD On screen display | $179.95 | x1 | $179.95 |
| 1500mW 1300MHz Video Transmitter | $77.99 | x1 | $77.99 |
| 1.3Ghz Cloverleaf Antenna | $29.99 | x1 | $29.99 |
| Low Pass Filter for 1.3Ghz Antenna | $26.99 | x1 | $26.99 |
| Micro FPV Camera 700TVL (NTSC) | $99.95 | x1 | $99.95 |
| Spektrum AR6200 Receiver | $77.99 | x1 | $77.99 |
| Total- | $1205.58 |
You'll also need a base station and to see mine, go to this link:
FPV Base Station
What is here
These build notes are really about the second build of this quad platform. The first build was put together quickly to get all the set-ups defined and understood and to prove to some degree, the compatability and reliability of the chosen components.
The main purpose of doing this second build was to work out ways to make the entire system more reliable and bullet proof. After reading several billion forum posts it became clear that most of the issues written about were because of the hobbyists lack of knowledge with regards to failure modes and how to avoid them.
I do not describe in these notes the basic frame assembly as the frame maker has a very good, easy to understand manual which covers everything needed. These notes then describe how I put together the components I selected in this frame.
Motors, ESC's and Power Distribution
Like on my other quad I chose parts that were consistently used by others with reliable results. With the new SimonK ESC's it works well and it is very smooth.
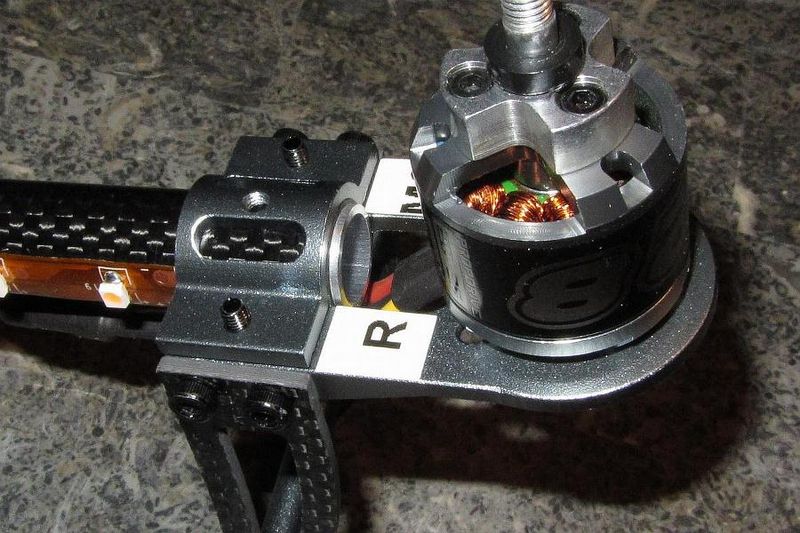
|
| The Turnigy NTM 28-26 1000Kv motor |
On the prop selection, I started with GemFan 9 x 4.7 and these worked well. I then changed to DJI 8 x 5 in black and these also worked well however battery life suffered a little.
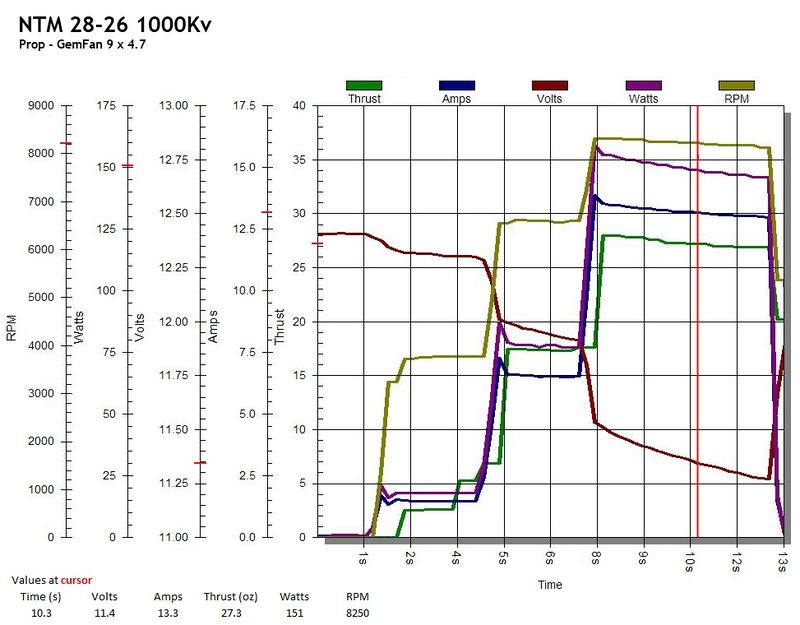
|
| Motor Test Chart(single unit) |
For the final build I wanted to move the ESC's as far away from the flight control and video electronics as possible. I also wanted to eliminate as many connectors as possible to keep it as reliable as possible.
I cut the shrink tube off of each ESC and soldered the motor wires directly eliminating 24 soldered bullet connections on the motor side. On the battery side I did the same eliminating another 16 soldered connections. I also increased the power wire size from 18ga to 16ga.
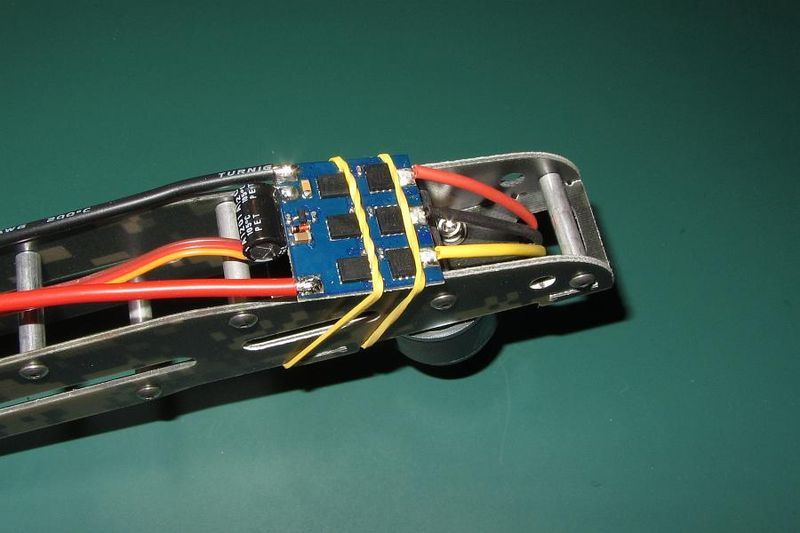
|
| Re-soldering the ESC's |
After the soldering I put new clear shrink tube on and mounted them under the motors with wire ties and Dubro 1/4" (6mm) foam.
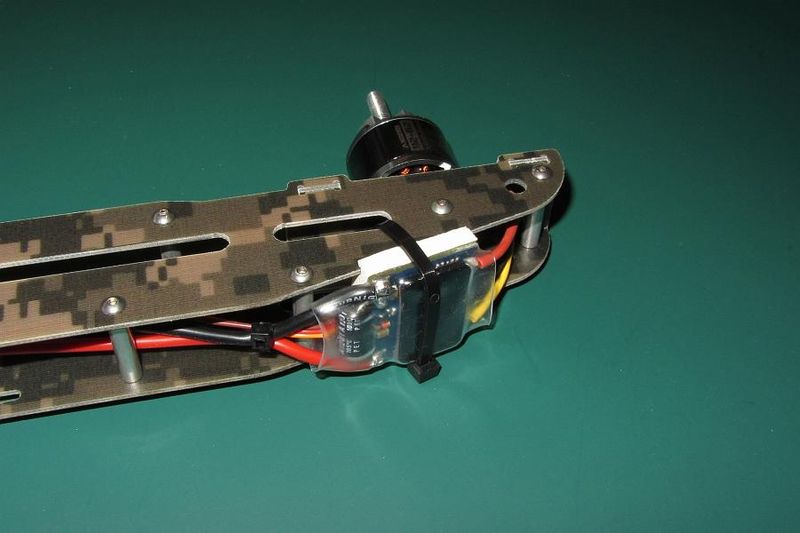
|
| ESC Mounting |
For power distribution I again elected to be a little different. Instead of a power distribution board which is typically a lot of soldering, I instead went with crimped ring connectors using both proffesional grade connectors and crimp tool.
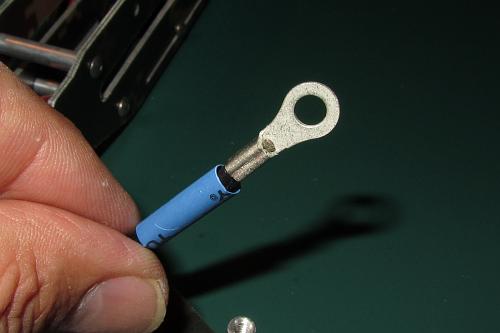
|
| Ring connector |
To hook them all up I used two stainless steel 8-32 (~4mm) screws with lock nuts which made for neet and easy to layout wiring.
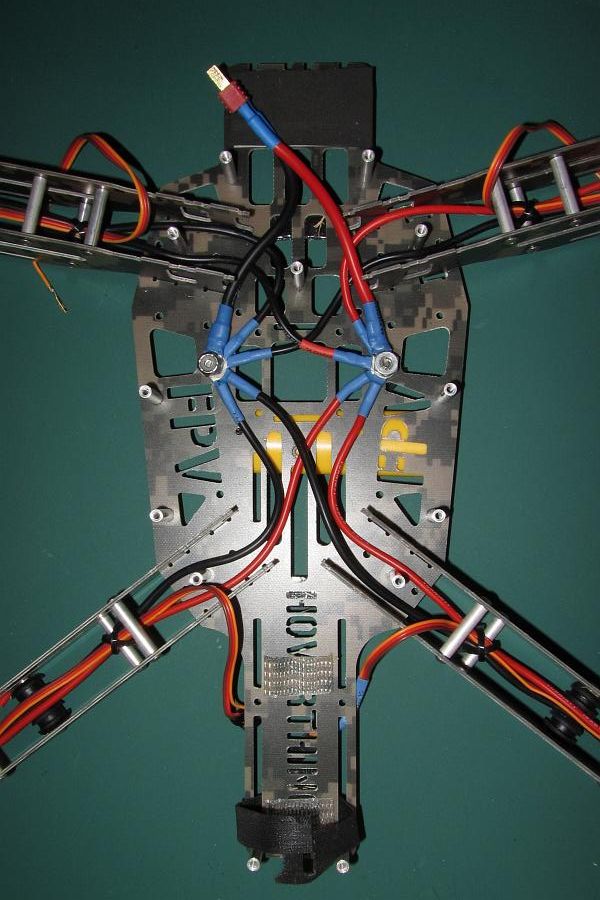
|
| Power distribution |
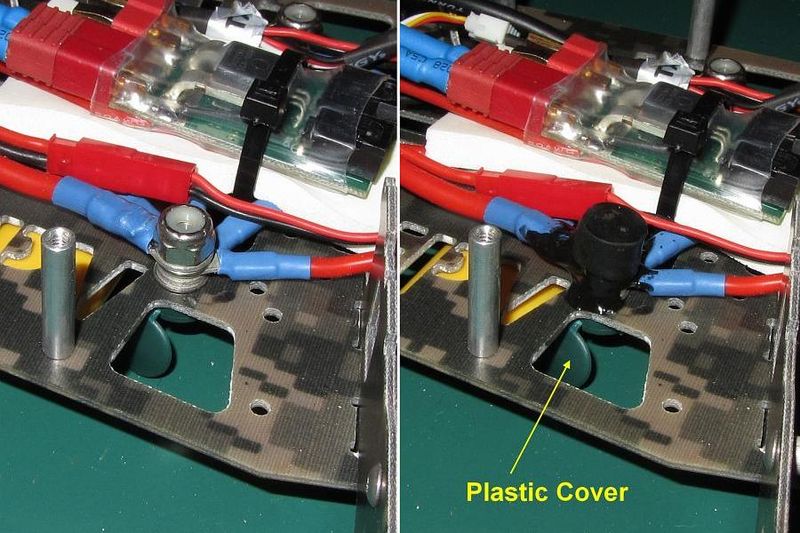
Lastly, I coated the positive terminal with liquid electrical tape and capped it with a rubber cap. You can also see in the picture below the plastic cover for the bolt head on the bottom of the frame.
|
| Positive terminal with liquid electrical tape |
FPV Camera
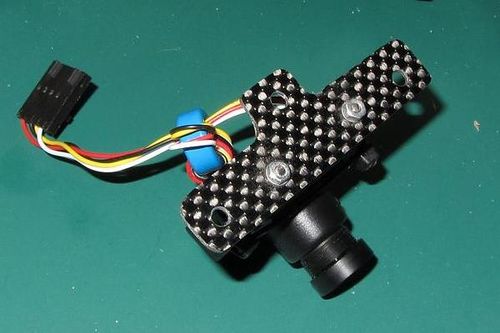
For the FPV video camera I cut a mount out of 1mm Carbon Fiber and mounted it on the mid plate above the GoPro mount.
|
| FPV Camera mount plate |
Wire it Up!
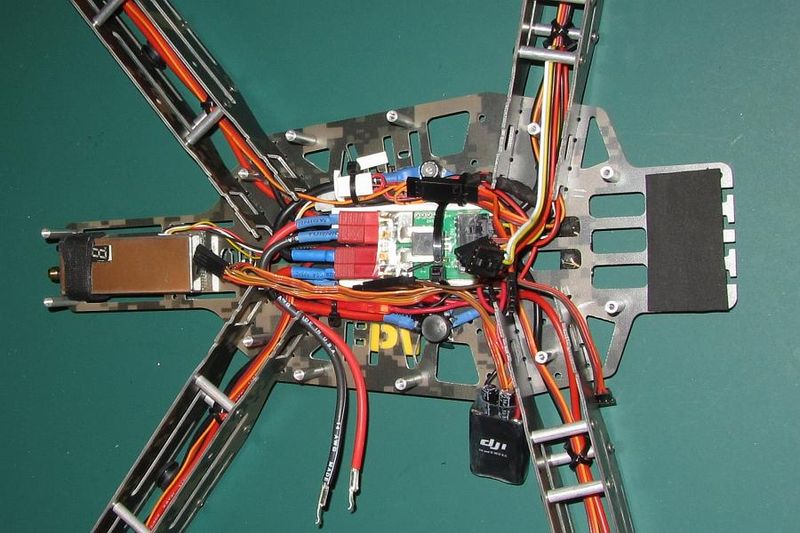
Next I mounted the VTX using 3M Dual Lock and a velcro strap and added in the VTX cabling. I then plugged together the EzOsd current sensor and tie-wrapped it over Dubro foam. Last bit was to combine the ESC signal wires into two cables and lay in the wiring for the DJI VU led/power unit. A few wire ties and we are ready for the center plate.
|
| Ready for the middle plate |
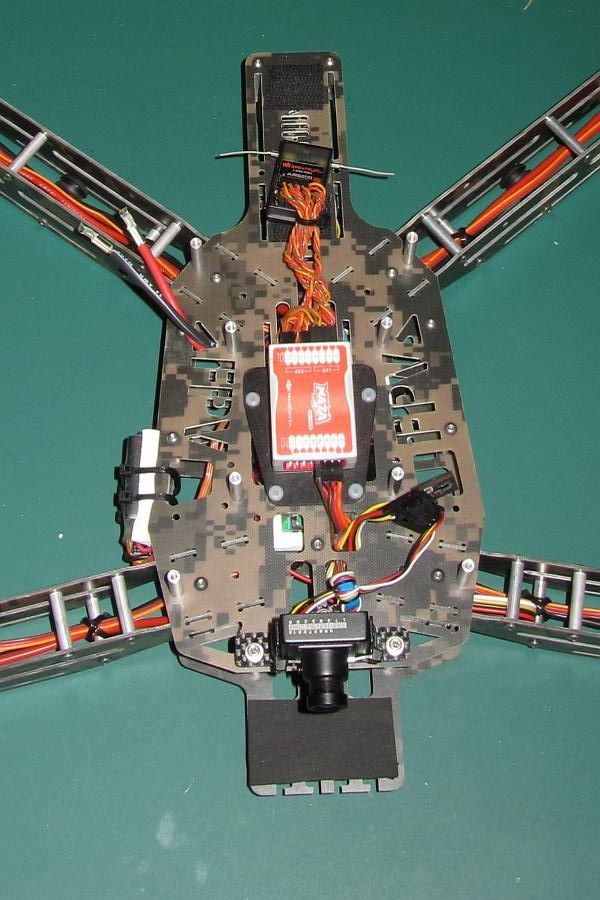
On the center plate I made a mount for the DJI controller out of plywood and spaced it about 5mm above the center plate deck. Added the camera mount and screwed it all down.
|
| Naza and Camera mounted up |
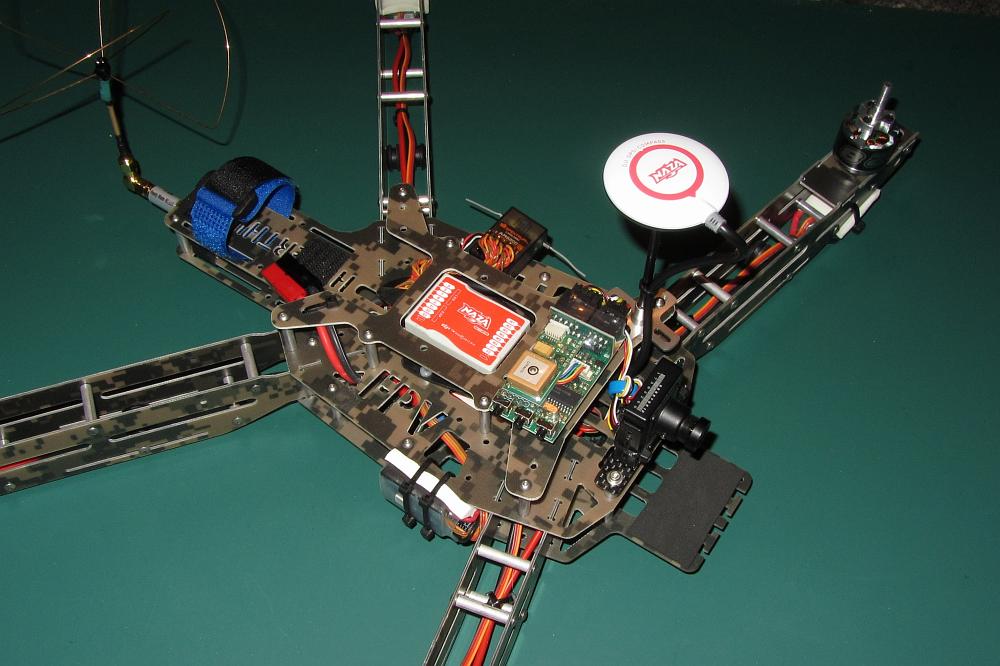
After I made sure everything was secure I plugged in the motor and DJI VU wires and screwed on the top plate. Next I added the EzOsd GPS unit, the DJI GPS antenna, the Spektrum receiver and the VTX cloverleaf antenna with the low-pass filter. I also added the Spektrum satelite RX on the bottom and wire-tied the DJI VU unit to the side.
|
| Almost ready! |
The only thing left to do at this point is to add the 9" props, battery and go fly!
MODS!
GoPRo Mount
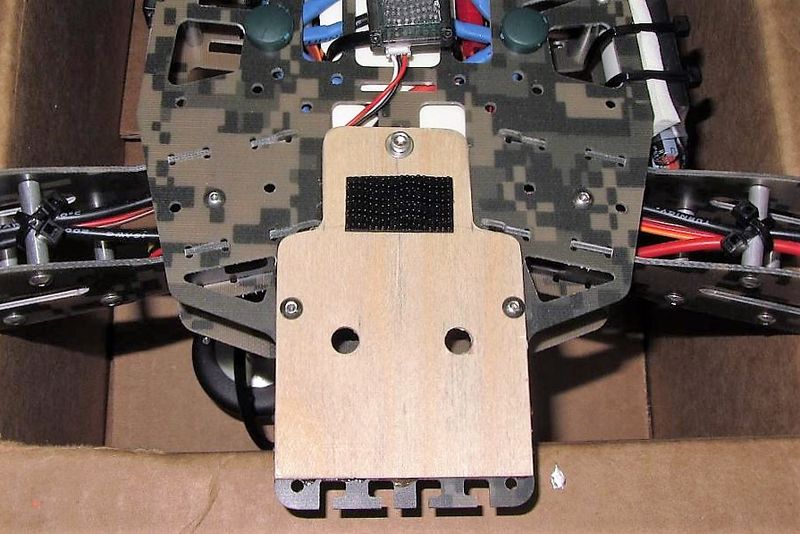
After flying this FPV and recording a couple of GoPro videos it became pretty clear the GoPro mount was not great. The problem is, even with meticulous prop balancing, this little deck turns into a vibration amplifier because of it's location relative to the CG and the thin fiberglass material used. To help mitigate the vibration problems I first cut out a piece of 1/16" (1.5mm) plywood and glued it to the bottom of the frame.
|
| Plywood stiffener |
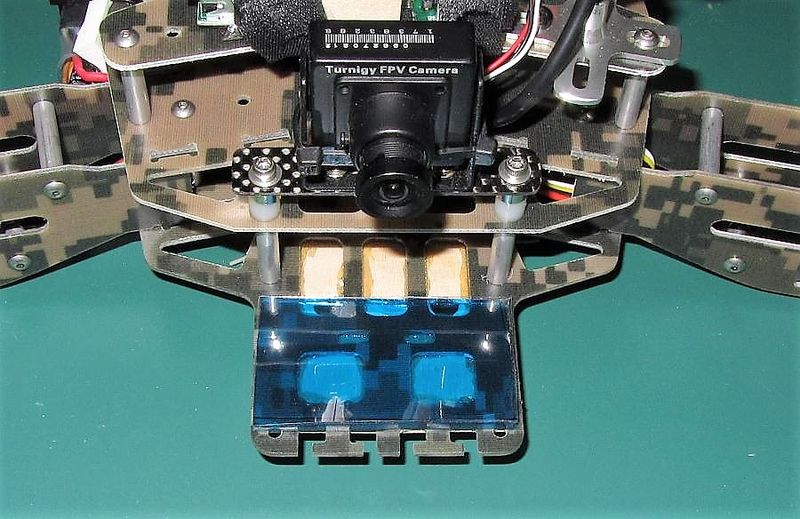
Then on the top, I used an Align anti vibration pad I found at RCDude.com for $9.95.
|
| Align GEL Mount added |
This made a huge difference in the amount of camera shake (jello) but there is still some more work to do.
Motor Plates
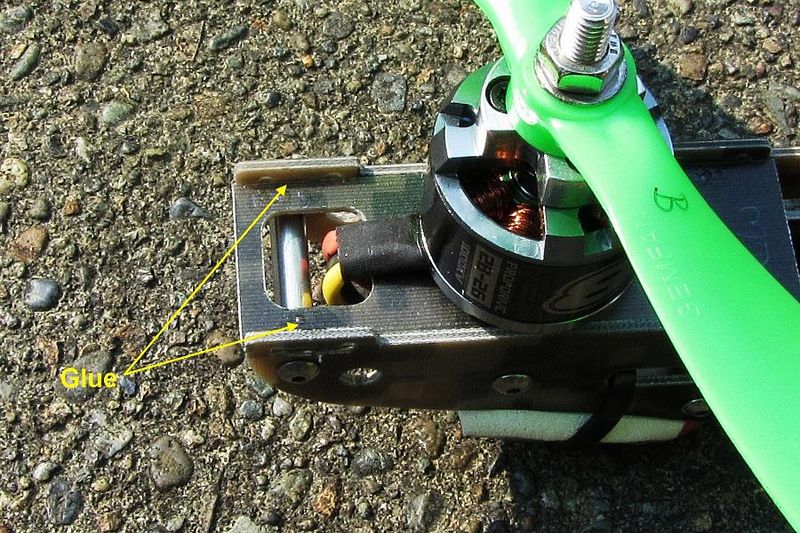
Another "bad point" are the motor plates and how they mount. After several flights I noticed (with the help of a very knowledgeable friend, Victor) there was white powder growing around the motor plate lock tabs. This is because any motor vibration turns this slot/tab arrangement into a mechanical file and the hole immediately starts to enlarge which then makes it all worse. The solution for me was to glue this joint. I used gap filling CA only because I was out flying when Victor showed this too me but a better glue might be clear silicone or Gorilla glue which would stay somewhat flexible.
|
| Glued motor plate |
Stay tuned!...markqv
Parting Shots
TBA
See Also
| RC Groups | Flying Einstein |
| MultiWii | |
| RC Dude! | |
| HobbyKing |
Comments? Questions?