DIY - Benchtop CNC
© Mark Qvale - March, 2020

| |
| Affordable Tooling! |
| |
This page or section is under construction and will change going forward.
Questions or Comments? Please contact the Wiki administrator |
Introduction
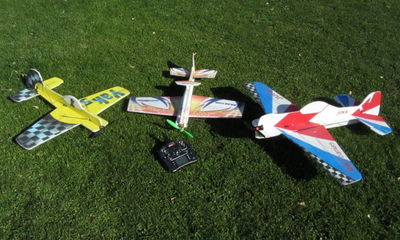
While "impressing" the neighborhood kids with some of my old 3D foamies (small, aerobatic foam RC planes) I decided to work on drawing some plans to help the kids build their own small flyers. Of course this led me down several paths. I first bought some foam board and hand cut a couple of fuselages modeled on an old DW Foamies Juka 40 3D plane. This proved to be a real pain so the next thing I looked into was how to build my own foam cutter that would be relatively inexpensive and easy to build.
|
So, while doing some googling on this I found an article from the great guys at Flightest RC about using an RC motor to drive a needle (like a sewing machine) for cutting foam and this article also led me to V1 Engineering who has some great ideas for a "Mostly Printed CNC" machine.
After all this (and much, much more) I decided how to proceed with my own version of a bench-top CNC for foam cutting and other jobs. This article then, is my version using many of the ideas found in the two articles above and other resources.
All designs found in this article are licensed under Creative Commons Attribution-NonCommercial-ShareAlike 4.0 International
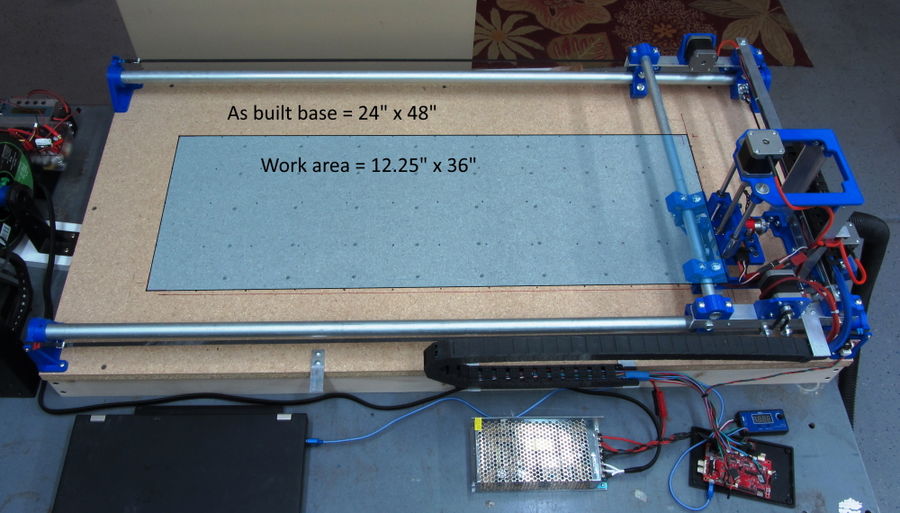
Machine Specifications
|
As built:
- Base Size - 24" x 48" x 13.5" (61cm x 122cm x 35cm)
- Base Width w/respect to Y axis = Y tube Length + 1/4" (6mm)
- Base Depth w/respect to X axis = X tube Length + 2" (51mm)
- Work Area - 12" x 36" x 3" (31cm x 63cm x 8cm)
- Max plot path w/respect to Y axis = Y tube length - 11" (280mm)
- Max plot path w/respect to X axis = X tube length - 9-1/2" (241mm)
- Control Board - Printrboard Rev D (from a very old 3D printer)
- Will be replaced with CNC board
- Number of Stepper motors - 1 for X, 2 for Y, 1 for Z
- Stepper Motor Size - Nema 17, 45mmL w/4 wires
- Drive type - X and Y axis are GT2 belt drive, Z axis is by 8mm lead screw
- Number of 3D Prints - 23
- Total print time <60 hours
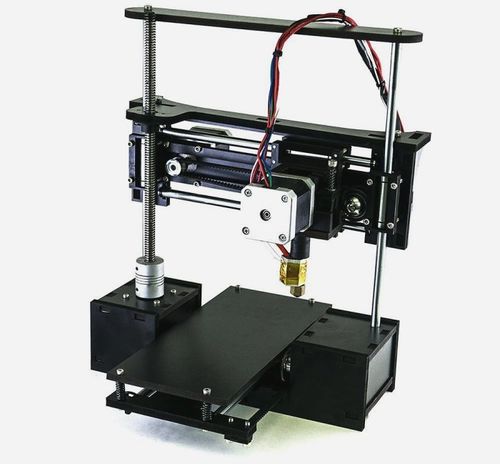
An Old 3D Printer
|
Because I had a very old OneUp 3D printer taking up space (in a box) I decided to use its components for a first shot at building my CNC. From this printer I took the below items. Prices shown are from random online searches (March 2020):
- 4 - Nema 17, 45mm, 4 wire stepper motors ($28)
- 3 - MakerBot style stop limit switches ($6)
- 1 - ATX 12v power supply ($16)
- 2 - 8mm x 15mm x 45mm slide bearings ($9)
- 2 - 8mm x 200mm guide rods, tapped to 4mm both ends (incl)
- 1 - PrintrBoard Rev D control board (CNC version $30)
- Total purchase cost ~$89
Added to this are the rest of the printer pieces found online:
- 6 - GT2 Pulleys with 5mm I.D. ball bearings ($8)
- 3 - GT2 20 tooth drive gears (incl)
- 1 - 5m GT2 belt ($6)
- 3 - GT2 belt spring clips (incl)
- 1 - 8mm x 5mm lead screw coupler ($8)
- 1 - 8mm x 2mm pitch x 200mm long lead screw ($11)
- 1 - 8mm x 2mm pitch lead screw nut (incl)
- Total purchase cost ~$33
- Total 3D printer parts used - $122
Printed Parts
|
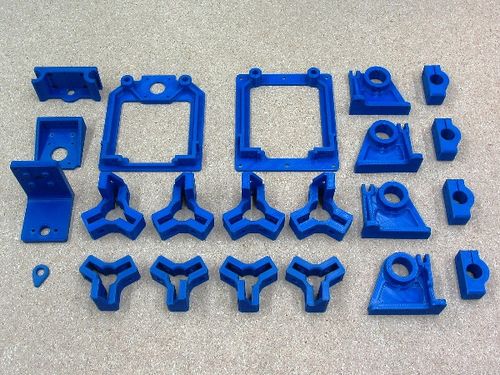
This section has information on the projects 3D print parts. In the list below, the column "Print File" has an STL download link (left click) to get the print file of each part.
| Image | Part Number | QTY | Part Description | Print File | Part Notes |
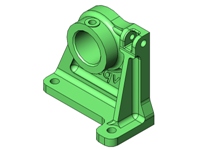
|
80001 | 1 | Corner Mount, Type A | 80001.STL | Print in ABS or PLA at 0.2mm resolution and 50% infill |
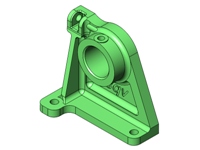
|
80002 | 2 | Corner Mount, Type B | 80002.STL | Print in ABS or PLA at 0.2mm resolution and 50% infill |
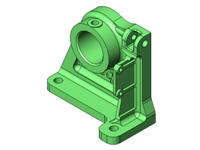
|
80003 | 1 | Corner Mount, Type C | 80003.STL | Print in ABS or PLA at 0.2mm resolution and 50% infill |
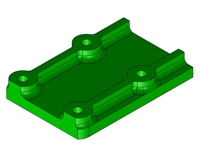
|
80004 | 1 | X-Axis Limit Switch Mount | 80004.STL | Print in ABS or PLA at 0.2mm resolution and 50% infill |
|
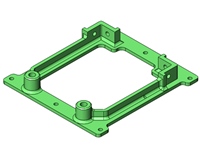
80005 | 1 | Tool Carriage Base Plate | 80005.STL | Print in ABS or PLA at 0.2mm resolution and 50% infill |
|
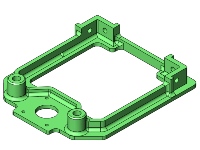
80006 | 1 | Tool Carriage Top Plate | 80006.STL | Print in ABS or PLA at 0.2mm resolution and 50% infill |
|
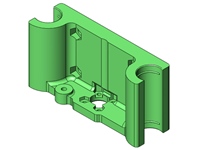
80007 | 1 | Z-Axis Slide Mount | 80007.STL | Print in ABS or PLA at 0.2mm resolution and 50% infill |
|
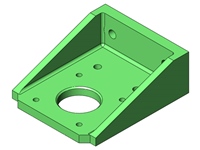
80008 | 1 | Tool Carriage Drive Mount | 80008.STL | Print in ABS or PLA at 0.2mm resolution and 50% infill |
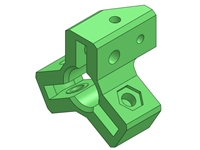
|
80009 | 2 | X-Axis Carriage Slide, A | 80009.STL | Print in ABS or PLA at 0.2mm resolution and 50% infill |
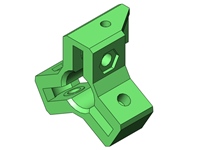
|
80010 | 2 | X-Axis Carriage Slide, B | 80010.STL | Print in ABS or PLA at 0.2mm resolution and 50% infill |
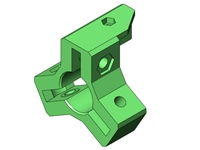
|
80011 | 2 | Y-Axis Gantry Slide, A | 80011.STL | Print in ABS or PLA at 0.2mm resolution and 50% infill |
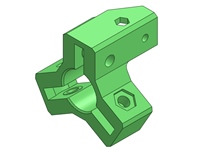
|
80012 | 2 | Y-Axis Gantry Slide, B | 80012.STL | Print in ABS or PLA at 0.2mm resolution and 50% infill |
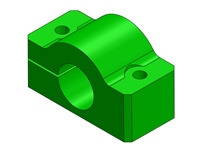
|
80013 | 4 | X-Axis Tube Clamp | 80013.STL | Print in ABS or PLA at 0.2mm resolution and 50% infill |
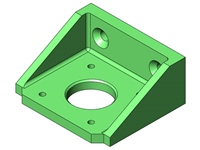
|
80014 | 2 | Gantry Drive Mount | 80014.STL | Print in ABS or PLA at 0.2mm resolution and 50% infill |
The following are print parts for the Needle Cutter Tool and the Plotter/Pen Holder Tool:
| Image | Part Number | QTY | Part Description | Print File | Part Notes |
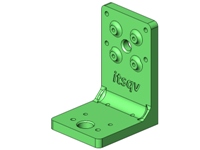
|
80015 | 1 | Needle Cutter Mount | 80015.STL | Print in ABS or PLA at 0.2mm resolution and 50% infill |
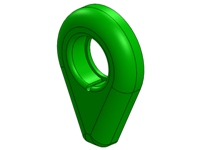
|
80016 | 1 | Needle Cutter, Needle Holder | 80016.STL | Print in ABS or PLA at 0.1mm resolution and 80% infill |
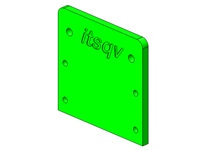
|
80017 | 1 | Pen Holder Mount | 80017.STL | Print in ABS or PLA at 0.2mm resolution and 50% infill |
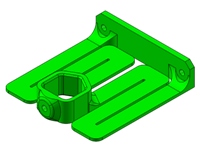
|
80018 | 2 | Pen Holder Spring Bracket | 80018.STL | Print in ABS or PLA at 0.2mm resolution and 50% infill |
Specific Part Notes
- 80016, Needle Cutter Needle Holder is printed at 0.1mm resolution and 80% infill.
Print Details
The chart below outlines print details with estimated print time and filament usage for the parts in this project.
Print filament used in first build:
- Hatchbox PLA, 1.75mm - ($22)
- Extruder Temp - 210C
- Bed Temp - 60C

|
- Total print time, all parts - 58hrs, 27min
- Total number of parts - 28
- Total filament used - ~0.76kg
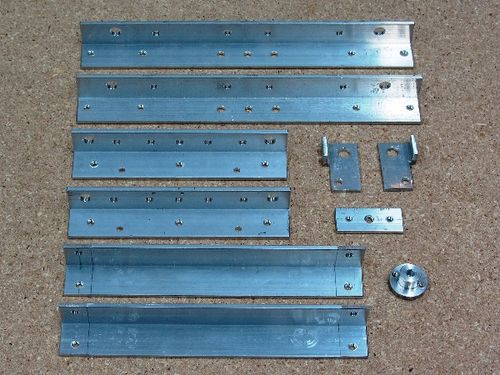
Brackets & Turned Parts
|
This section has information on aluminum parts made from standard hardware store materials. The column "Drawing File" has a PDF download link (left click) to get the drawing details of each part. There are a total of 6 drawings describing these 12 parts which are listed by part number in numerical order.
| Image | Part Number | QTY | Part Description | Drawing File | As-built Mtl | Part Notes |
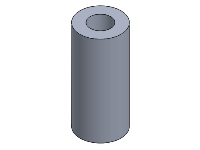
|
40001 | 2 | Spacer, 5mm x 10mm x 22mm | CNC004 | Aluminum tube - 3/8" x 0.049" wall | Aluminum spacer for the X-Axis cable track guide |
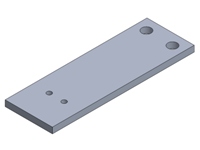
|
70001 | 1 | Y-Axis Cable Track Bracket, Base | CNC002 | Aluminum flatbar - 1" x 1/8" | Bracket to attach Y-Axis cable track to the wood base |
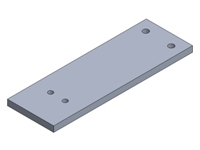
|
70002 | 1 | Y-Axis Cable Track Bracket, Gantry | CNC003 | Aluminum flatbar - 1" x 1/8" | Bracket to attach Y-Axis cable track to the Gantry |
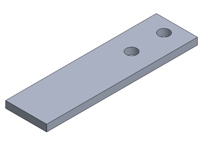
|
70003 | 2 | Cable Track Base Support Bracket | CNC002 | Aluminum flatbar - 3/4" x 1/8" | Bracket to support Y-Axis cable track |
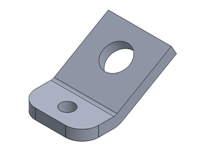
|
70004 | 2 | X-Axis Drive Belt Mount Bracket | CNC002 | Aluminum flatbar - 3/4" x 1/8" | Bracket to mount belt post |
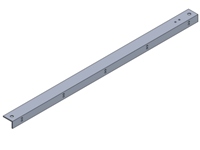
|
70005 | 1 | X-Axis Cable Track Support Bracket | CNC003 | Aluminum angle - 3/4" x 1/2" x 1/16" | Bracket to support X-Axis cable track |
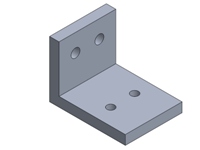
|
70006 | 1 | Tool Carriage Cable Track Mount Bracket | CNC002 | Aluminum angle - 1" x 1/8" | Bracket to mount X-Axis cable track to the tool carriage |
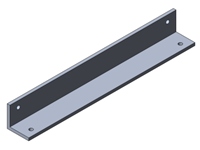
|
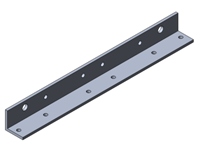
70007 | 2 | Tool Carriage Corner Bracket | 70007 | Aluminum angle - 1" x 1/8" | Corner post support bracket |
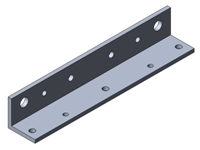
|
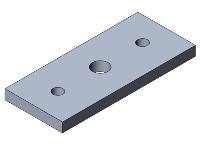
70008 | 2 | X-Axis Carriage Bracket | 70008 | Aluminum angle - 1" x 1/8" | X-Axis slide assembly bracket |
|
70009 | 2 | Y-Axis Gantry Bracket | 70009 | Aluminum angle - 1" x 1/8" | Y-Axis gantry slide assembly bracket |
|
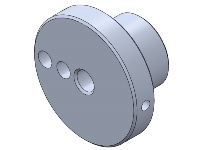
70010 | 1 | Needle Cutter Tip Mount Bracket | CNC002 | Aluminum flatbar - 3/4" x 1/8" | Bracket to mount the MIG weld tip |
|
90001 | 1 | Needle Cutter Flywheel | CNC004 | Aluminum roundbar - 1" Dia. | Flywheel/crankshaft to drive the needle cutter |
Summary of As-Built aluminum material used-
- Flat-bar - 3/4" x 1/8" x 12"L
- Flat-bar - 1" x 1/8" x 12"L
- Angle - 1" x 1" x 1/8" x 60"L
- Angle - 3/4" x 1/2" x 1/16" x 36"L
- Tube - 3/8" x 0.049 wall x 3"L
- Round-bar - 1" O.D. x 2"L
Specific Part Notes
Part and material substitutions are definitely OK. Here are two ideas-
- 40001 - Spacer, this part can be made from the material shown above or any close alternate like standard nylon tube.
- 90001 - Flywheel, This part can be made in many different ways including 3D printing. Here is a link to a 3D version - "Needle Foam Cutter for MPCNC"
Fasteners
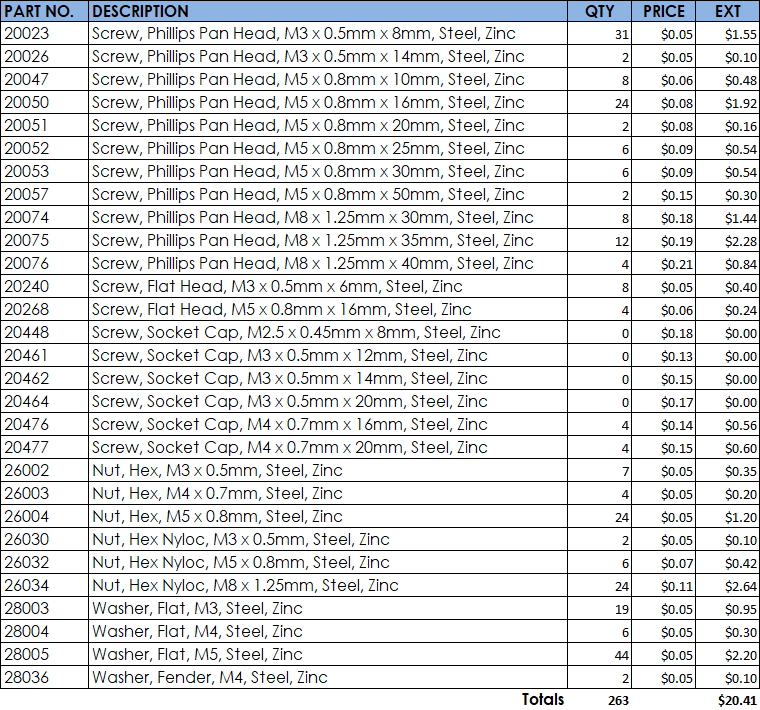
The chart below lists all the fasteners used on my first build. Part numbers are from my own part database and prices shown are from BoltDepot.com as of April 2, 2020.
|
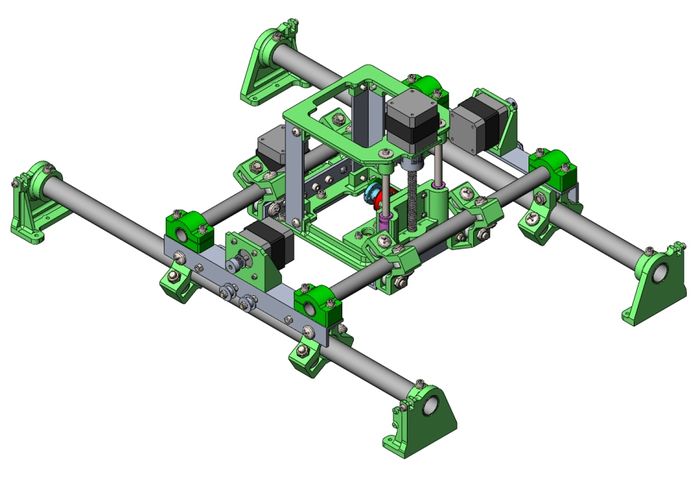
Design and Sub-Assemby
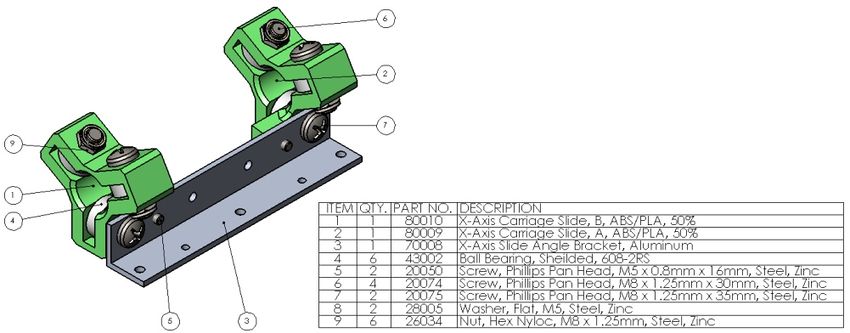
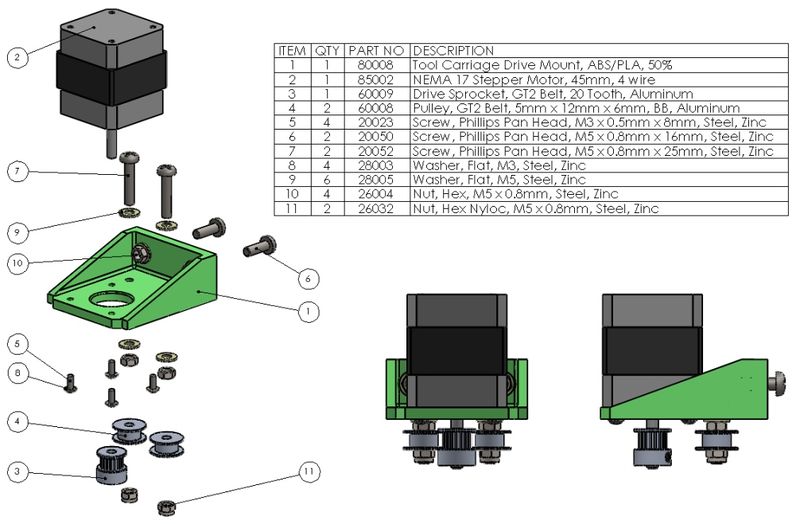
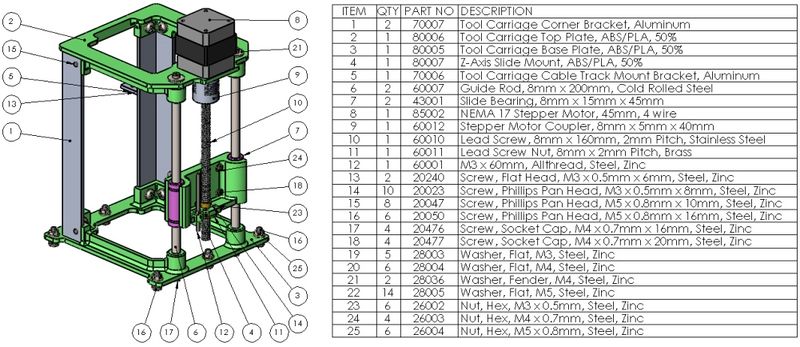
This section takes a look at some of the major sub assemblies and how they are intended to be built. All designed parts were done in SolidWorks and are licensed as "Share Alike, Non-Commercial".
|
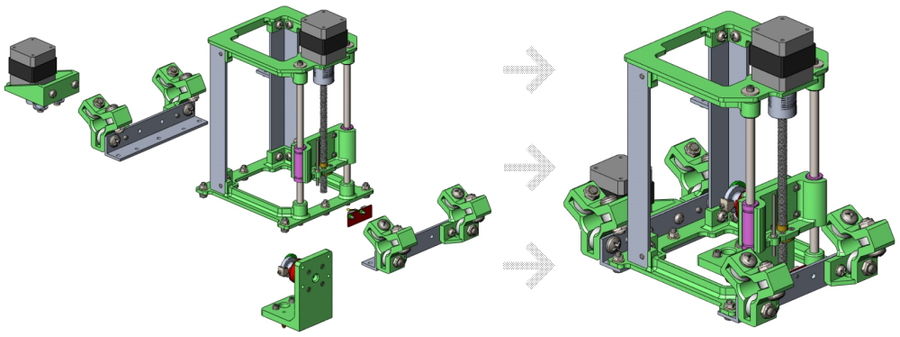
X-Axis Tool Carriage Slider
|
X-Axis Carriage Drive
|
X-Axis Tool Carriage
|
|
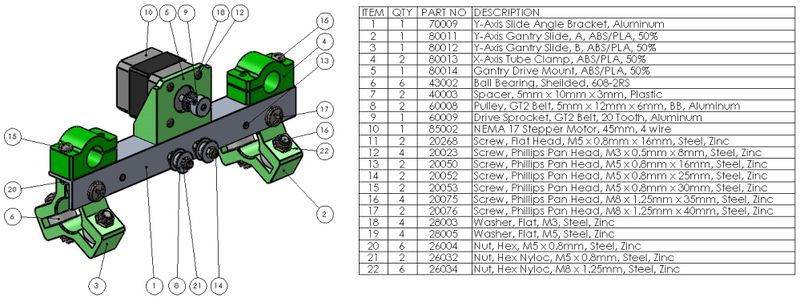
Y-Axis Gantry Slider
|
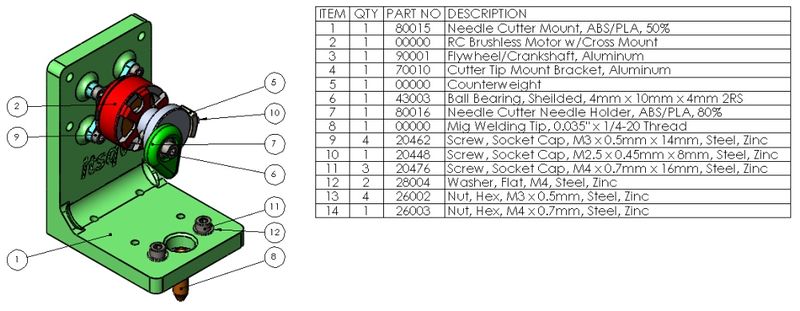
Needle Cutter Tool
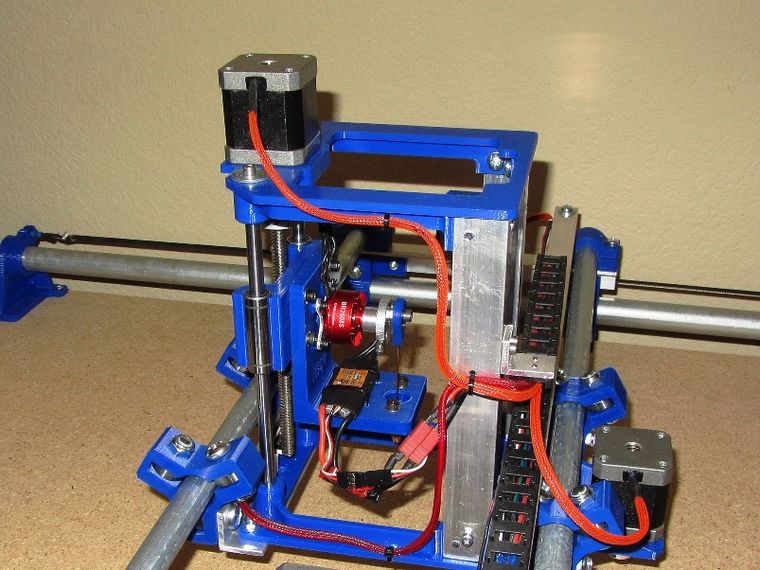
The Needle Cutter tool works really well for cutting foam panels. I got the idea from the great guys at Flightest RC and this in turn pointed me to a Thingiverse version of this tool. Here is the forum posts which have more info and many other ideas on how to do this - cutting-foam-sheets-with-a-needle.
|
While the design is simple enough, it is dependent on using a motor with exactly the same dimensions or the alignment over the needle guide hole will need to be adjusted. For a motor I chose one I already had, a Racerstar BR2508-1275kv. The motor configuration, with a threaded shaft, short stator and low 1275Kv was perfect for an application like this. This motor is powerful enough to handle just about any foam cutting you might need and it is still very small and light. The important dimension from the mount face to the end face is 23mm and the motor diameter is 32mm. To control the motor I am using a very inexpensive brushless speed control that is rated for 20A but a 10A would do just fine.
As far as the flywheel part, the forum link above will give you many options to use 3D printed pieces as opposed to the turned aluminum piece I made for mine.
The "MIG Tip" that guides the wire needle is a MIG welding tip you can find at big box or welding supply stores. I have used sizes from 0.035" to 0.047" with both weld wire needles and music wire needles. Both work well!
Pen Plotter Tool
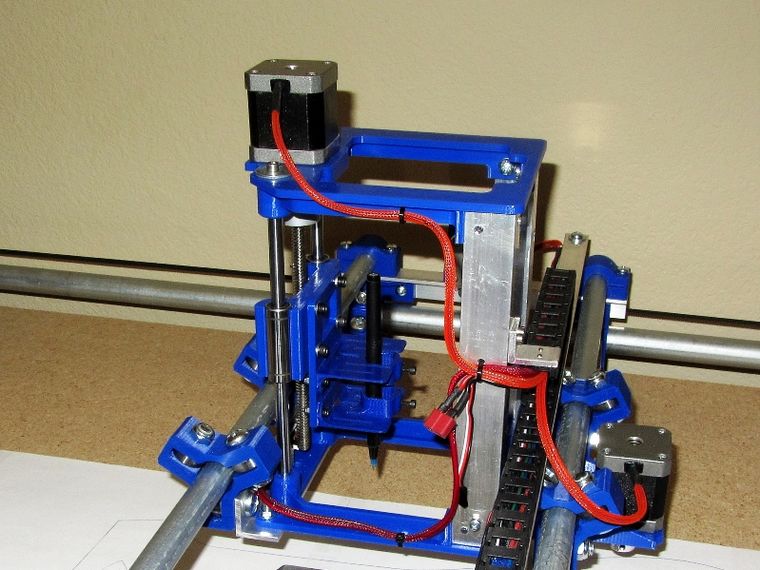
The Pen Plotter tool is really just a pair of simple, light, spring brackets with screws to secure the pen. The pen tip will be close to the 0,0 point of the needle cutter but it is not exactly the same because its exact location depends on the pen diameter. Sharpies and roller ball pens work best.

|
To set it up, first zero the Z axis then raise the tool 0.5mm to 1mm. Next place the pen in the holder with the pen tip resting on the deck. Carefully tighten the clamp screws without moving the springs up or down. If your machine is stable and has a very flat deck, this should be enough "springiness" to draw a very clean image. If it skips in spots, reset the pen with a little more Z height.
Base and Vacuum Table
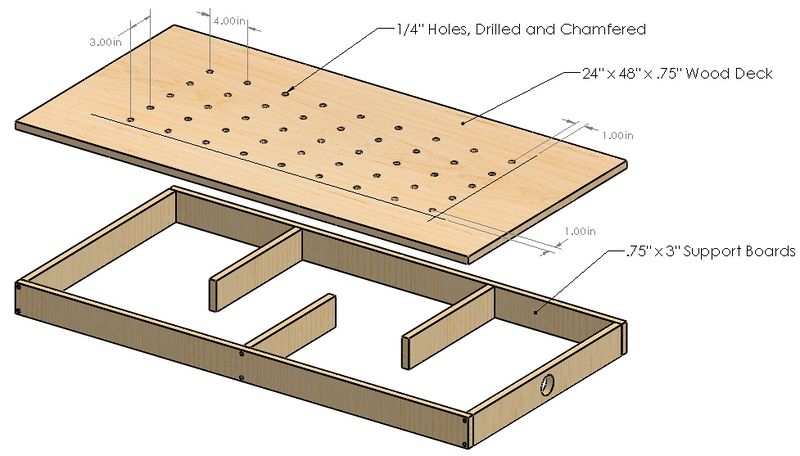
This is my "As-Built" base which includes structure for adding a shop vacuum to help secure the work piece. For the top I used a piece of HD Particle board and for the structure I used typical 1 x 3 White-wood found at the local big box store (Lowes). All structure pieces were ripped on a table saw to ~2.4" and the hole for my shop-vac was cut to 1-3/4" with a hole saw.
|
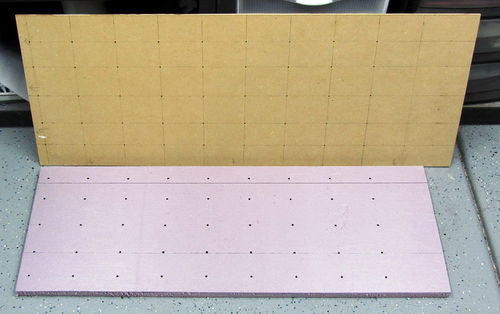
When I drilled the deck holes, I laid out the hole pattern on a piece of 1/4" hard-board, secured it in place on the deck piece against the X and Y axis and drilled them both. This gave me a template to use for making (purple) foam work support pieces which are needed when using the Needle Cutter. I simply place the template on top of a new piece of foam, lining up the two X and Y edges, and quickly hot-wire through each hole.
|
| Template and 3/4" purple foam piece |
Controls
Section TBA
Gallery
A few project pictures:
|
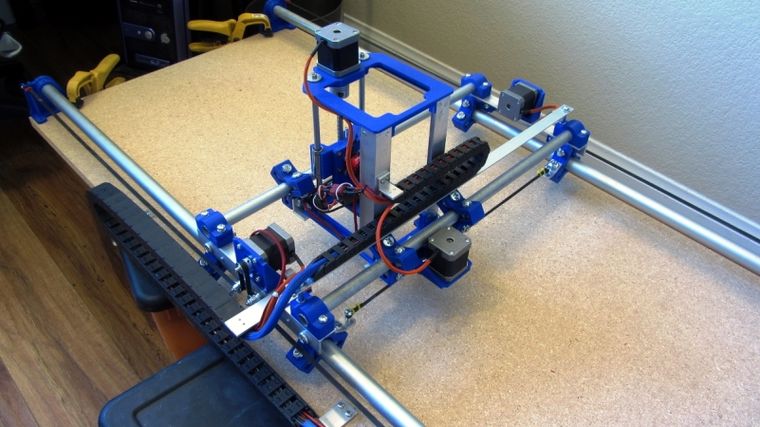
| Almost there! |
|
| Needle Cutter Tool |
|
| Pen Plotter/Holder Tool |
First Jobs Images and Video
Here are a few images of the first tasks completed on my CNC. I did the pen plot first to do a final check of the dimensional accuracy in X and Y of the parts to be cut. Once the X and Y dimensions were dialed in, it is on to cutting!
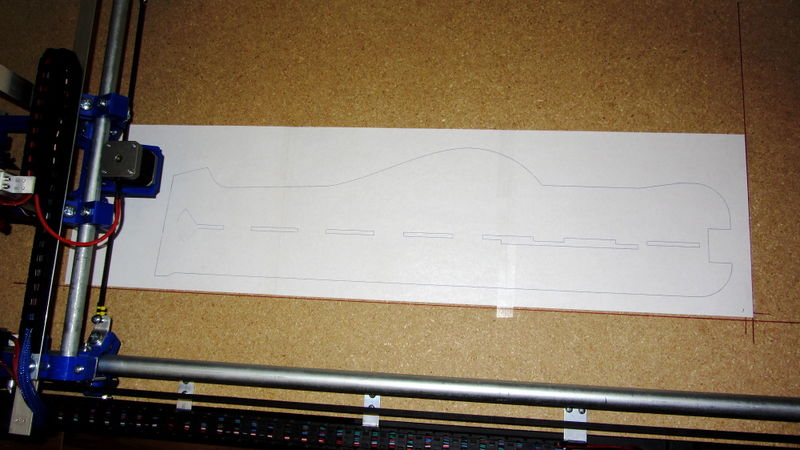
|
| Pen plot |
Next is the result of the first part set I cut out of 5mm Foam-Board. The fuselage parts are low density and the wing is high density. Cuts needed a very small amount of sanding to clean off paper remnants and smooth out some very minor bumps.
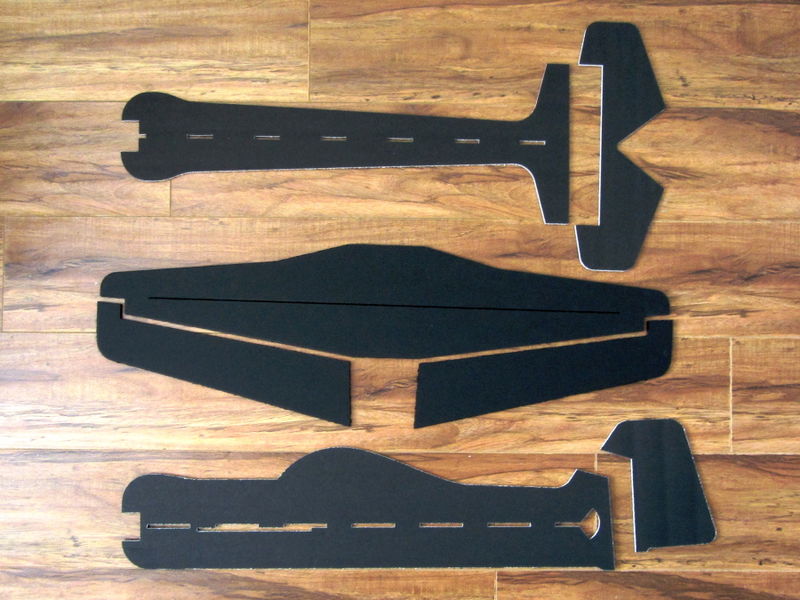
|
| First part set |
Here are the parts all glued together and ready to go fly!
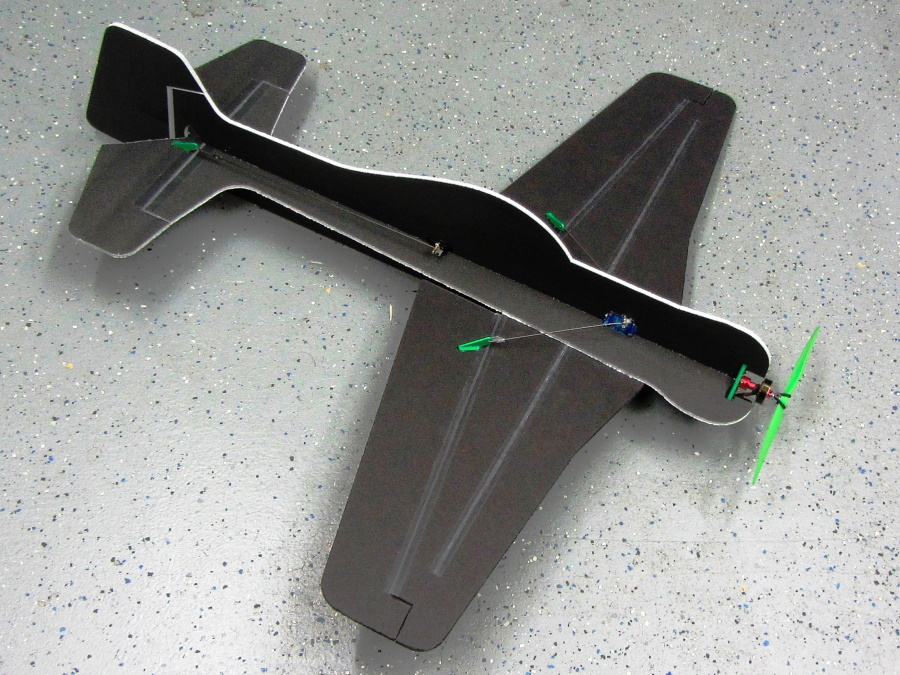
|
| First completed plane! |
Video!
|
First Cut! March 14, 2020 |
See Also
Other DIY Projects:
Comments? Questions?