How To - Build Carbon Fiber Pushrods

| |
| Carbon Fiber Pushrods |
Introduction
This article is based on methods I have used for many years to create control pushrods using carbon fiber rod you can buy at the local hobby supply. Why do this? Simple, carbon fiber rod is lighter and much stiffer than comparable steel pushrods. It is amazing on ultralite foamies because of the inherent stiffness and superlight weight. In this case the methods below are not needed as most ultralite foamies use E-Z Connectors which just pinch the pushrod at each end. On larger planes this methods will work, however, with similar benefits. Additionally, if you are running long pushrods through nylon tubes, these too are improved dramatically by changing to CF as it won't bend and/or kink thus causing large drag on the linkage.
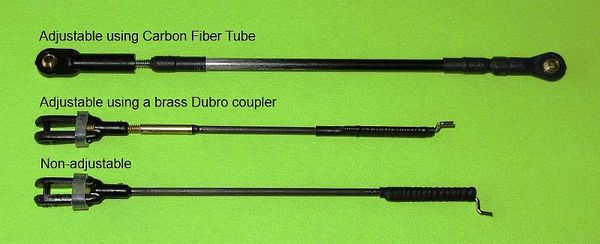
Non-adjustable Pushrod End
This section outlines the basics I use for putting these CF pushrods together and the materials needed. For the purpose of this How-To, I will show these methods based on a replacement for a 2-56 steel rod with a nylon clevis.
Materials:
- 15 minute epoxy
- Carbon Fiber Rod - Dia 0.078" (2mm)
- Dubro #228 - Mini-Nylon Kwik-Links
Examples

|
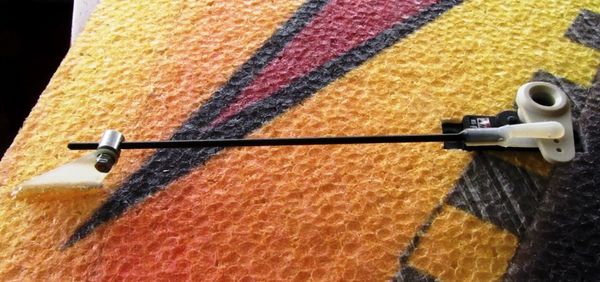
| Finished CF pushrod on my Popwing 1300 |

|
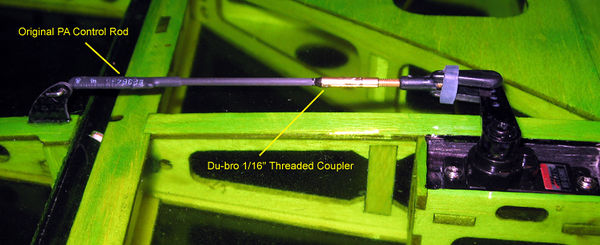
| Finished CF pushrod on my 48" PA Extra 260 |
Procedure:
- 1. Using fine sand paper, sand the end of the CF rod down enough to be able to twist it into the nylon clevis
- 2. Mix up a small quantity of the Epoxy
- 3. Using a tooth pick, coat the inside of the clevis and the outside of the CF rod
- 4. Twist the CF rod into the clevis and wipe the excess Epoxy from the joint
- 5. Let stand for at least an hour
Adjustable Pushrod End
Materials:
- 15 minute epoxy
- Carbon Fiber Rod - Dia 0.078" (2mm)
- Dubro #212 - Large Threaded Couplers
- Any 2-56 thread clevis or ball link

|
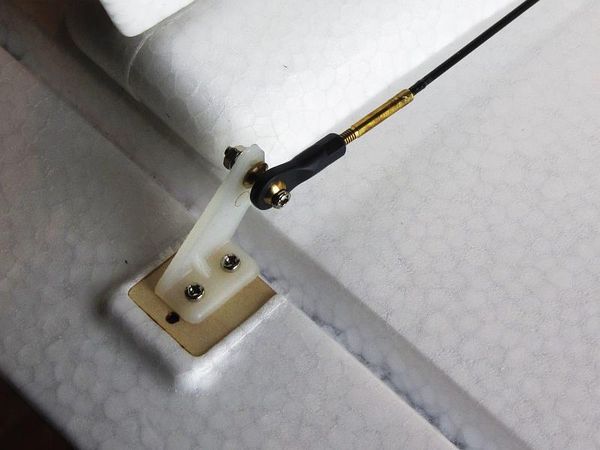
| Adjustable CF Pushrod on my Penguin using 1/16" x 2-56 coupler
on thinner 0.065" CF rod which passes through a long nylon tube |
Procedure:
- 1. Using fine sand paper, sand the end of the CF rod down enough to be able to twist it into the brass coupler
- 2. Using an airbrush cleaning brush or twisted paper clean the inside of the coupler with alchohol
- 3. Using a piece of wire, scratch the inside surface of the couple (a 2mm tap works perfectly)
- 4. Mix up a small quantity of the Epoxy
- 5. Using a tooth pick, coat the inside of the coupler and the outside of the CF rod (long tube type)
- 6. Twist the CF rod into the coupler and wipe the excess Epoxy from the joint
- 7. Let stand for at least an hour
See Also
Vendors used for this project
- Local Hobby Shop