Difference between revisions of "Simple Centered Pan & Tilt"
(→Introduction) |
(→Introduction) |
||
| Line 32: | Line 32: | ||
| align="center" | Base servo plate | | align="center" | Base servo plate | ||
|}<br><br> | |}<br><br> | ||
| + | |||
| + | {| border="0" cellspacing="0" cellpadding="0" | ||
| + | |- | ||
| + | | align="center" | [[File:xxx.jpg]] | ||
| + | |- | ||
| + | | align="center" | Lower 'U' bracket | ||
| + | |}<br><br> | ||
| + | |||
| + | == File Package for this project == | ||
| + | |||
| + | TBA | ||
| + | |||
| + | == See Also == | ||
Revision as of 18:49, 13 March 2016
| |
This page or section is under construction and will change going forward.
Questions or Comments? Please contact the Wiki administrator |
February 2016

| |
| Simple 9g Servo Pan & Tilt |
Introduction
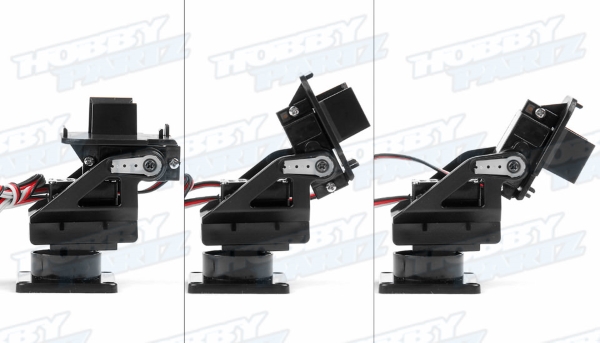
The first Pan & Tilt I tried was a very inexpensive unit from HobbyPartz.com which came with two 9g 180 degree servos for ~$13.

|
| HobbyPartz Pan & Tilt |
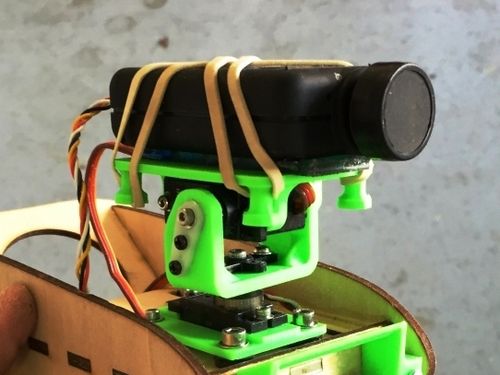
This gimbal was really made to hold a small board camera and case so the platform was never quite right to put a Mobius on. So, my first change was to print my own top plate which had rubber band posts and clearance to get the right angles. This lasted exactly one flight when the gears on the tilt servo stripped for no other reason than they were just cheap plastic gears.
I took this idea and designed my own base to mount on the deck of my Mini Talon. This puts the servo below the gimbal and takes its weight off the rotating mass. The lower bracket then is just a simple 'U' shaped piece with a servo arm attached to the bottom. The new camera plate has a slightly expanded servo cradle so I could use a better servo. The tilt functions nicely from 0 - 100 degrees. The pan is dependent on the servo used.
| File:Xxx.jpg |
| Base servo plate |
| File:Xxx.jpg |
| Lower 'U' bracket |
File Package for this project
TBA