Difference between revisions of "My Test Bench"
(Redirected page to DIY - Motor and Prop Test Bench) |
|||
| (One intermediate revision by the same user not shown) | |||
| Line 1: | Line 1: | ||
| − | <i>June 2008</i><br> | + | #REDIRECT [[DIY_-_Motor_and_Prop_Test_Bench]] |
| + | |||
| + | |||
| + | <i><small>© Mark Qvale - June, 2008</small></i><br> | ||
[[File:BTI.png|link=Power Systems & Testing|Testing!]]<br><br> | [[File:BTI.png|link=Power Systems & Testing|Testing!]]<br><br> | ||
| Line 89: | Line 92: | ||
<br><br><br> | <br><br><br> | ||
| − | [[Category: | + | [[Category:Redirects]] |
| − | + | ||
Latest revision as of 15:37, 24 June 2018
Redirect to:

|
| It's all about testing and evaluation...or...guessing... |
Why a Test Bench?
I have never been satisfied with the information given by manufacturerers, forums or vendors on motor, prop and battery data. There is also a huge amount of mis-information dedicated to proving one motors performance over another which only serves to make this more confusing. The problem has always been there is a huge inconsistency by all parties on the effect of any given combination of prop, motor and battery.
Because of this I decided to build my own simple test bench (stand) so I could at least understand what all the numbers really mean and to get real consistencey on these numbers for the motors, props and batteries I have selected. It has been great fun with a few surprizes and even a smoke show or two!
This article then has some information and shows picures of the first two set-ups and a little more detail on my current "GEN 3" set-up.
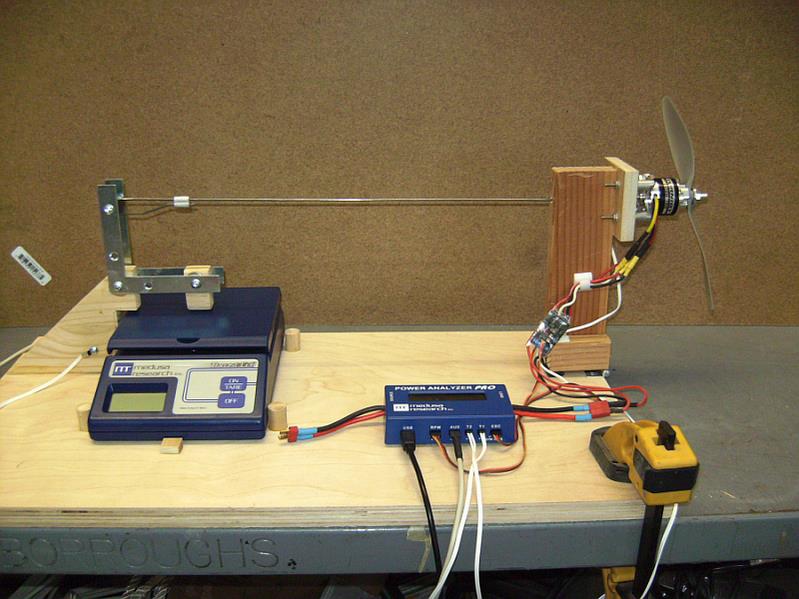
GEN 1
June 2008
I knew going into this I would need a way to measure thrust so I started looking for USB scales or anything I could build an interface for on a PC. I then stumbled into the Medusa Research data system and it was priced low enough that I decided to give it a go. It works very well; unfortunately it is no longer made so at some point I will need to replace it.
GEN 1 was simple to say the least. Built entirely of components I had laying around the shop, it took a couple hours to get together and running. I was careful to make sure the thrust produced by the motor had a 1:1 relationship with the load cell (scale) and that there was enough strength to deal with normal vibration as well as the possibility of "Uh Oh" vibration.
GEN 1 was a Puller (tractor) type. That is, the prop was set up to pull and the prop wash blew over and around the test components. It worked really well above about 20oz of thrust, but under this it was a little inconsistent. This was due to the sloppy fit of the peices I had selected.
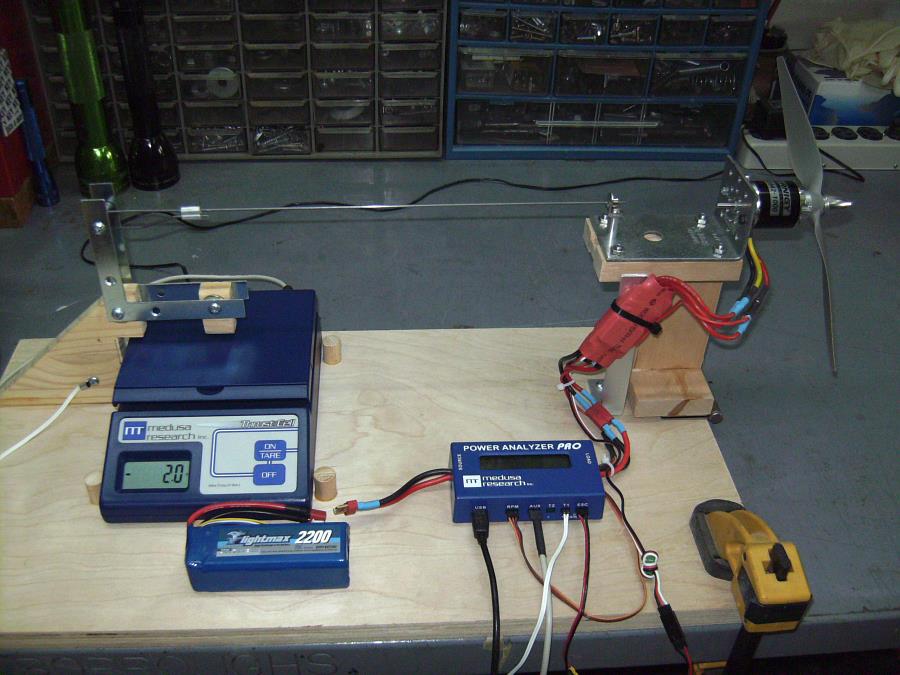
GEN 2
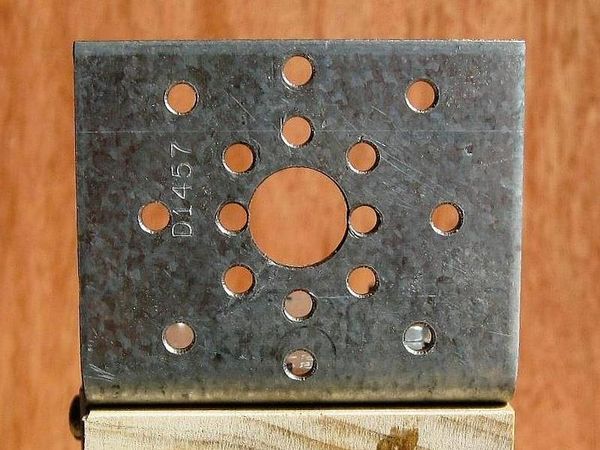
GEN 2 was a big improvement over GEN 1. I found a Home Depot construction bracket that was perfectly sized to build a custom motor mount which made it much easier to change motors and in most cases removed the need to use any mount bracket or cross mount plate.
Other improvements were in the pivot structure and hinge which provided much less slop and an aluminum post for holding the ESC solidly. GEN 2 was still a "Puller" type set-up and the height of the test stand limited the prop size to some degree.
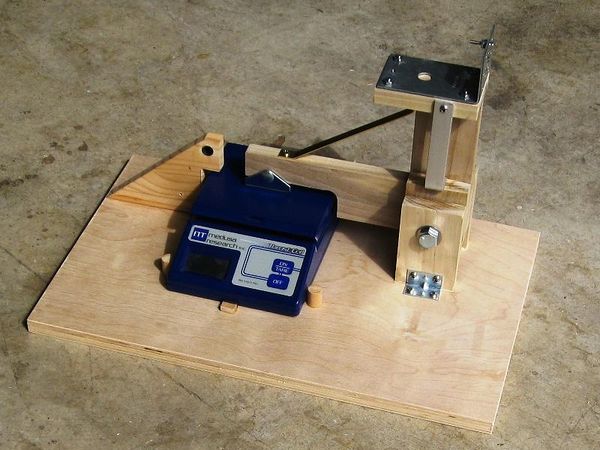
GEN 3
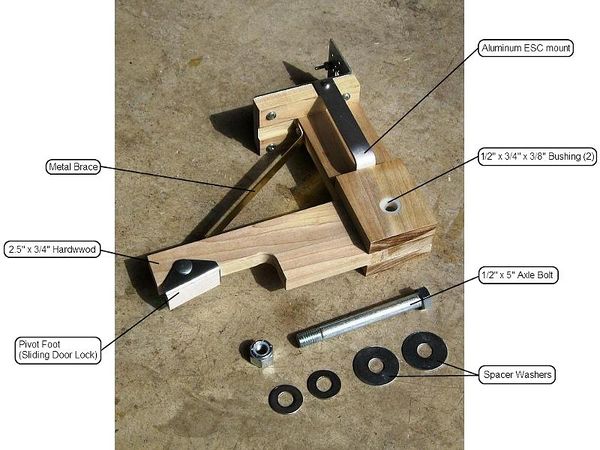
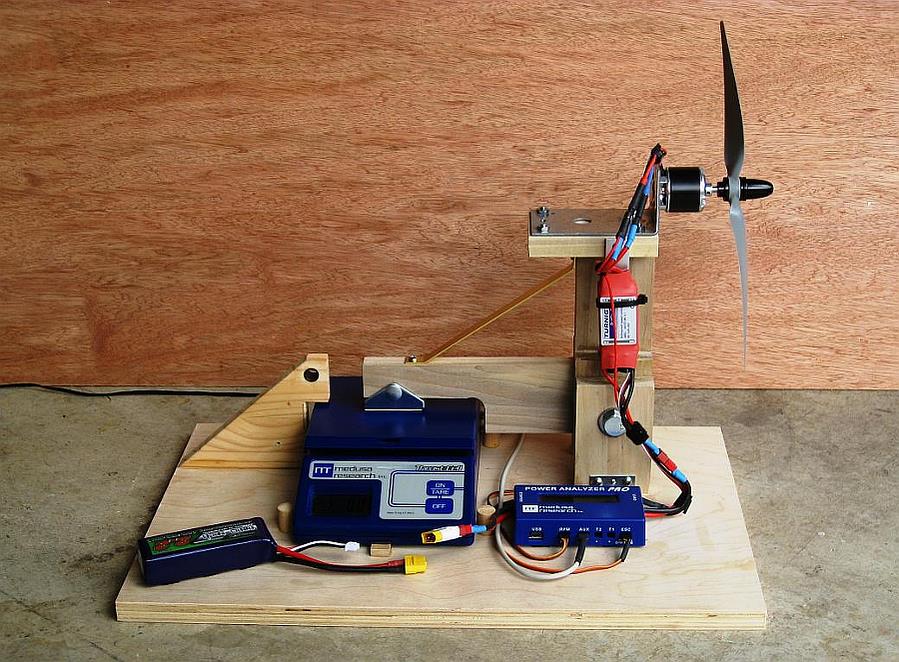
GEN 3 is the best yet. This latest version (June, 2011) has a more robust pivot with very little "slop" and very low friction so the consistency is much improved. Other improvements include a pivoting foot where it contacts the load cell and a taller structure to accomodate larger props. Also, after getting some advice from Dr. Kiwi and RonVansommen of RCGroups.com, I have switched everything around and made this version a "Pusher" instead of a "Puller". This improves the over all performance by elliminating the airflow resistance and makes the entire system safer as well.
Here are some detail images:
| Bare bones |
| Some component details |
| Mount plate hole patern |
| Loaded up and ready for the first test (yes, the prop is backwards!) |
See Also
Comments? Questions?
